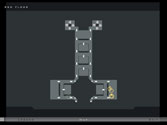
As the mission begins, you are standing in a large white
room, with a dead man and the red Hitman logo plastered on
the floor.  Walk to the dead man and search his corpse by pressing the
action key, and you will be able to retrieve the Car Key.
Walk through the only door.
Walk to the dead man and search his corpse by pressing the
action key, and you will be able to retrieve the Car Key.
Walk through the only door.
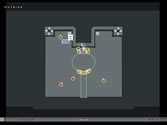
You are in a small room with three dead clones.
They each have weapons and some ammo. There is nothing of
interest in this room, so go through the next door.
You will be in a hallway that gently curves to the right.
There are several clones littered throughout this hallway,
each with weapons and ammo. Make your way around the circumference
of the hall, and you will spot a door. Go through it.
If you finished the original Hitman: Codename 47,
you'll recognize this room; it's the laser machine that scanned
the barcode on the back of the clone's heads. There are three
doors in this room. The door to your right is locked and cannot
be opened. The open door to your left leads to a gate that's
locked, and a small metal door. Go through the metal door.
You'll be in a room with a metal catwalk.
There is a patient wandering around, but you don't have
to worry about him, or any of the other patients. Walk forward
into the room, onto the catwalk, and follow it to the right,
to another door. Walk through it.
This room is pretty pointless.
There are a few clone corpses and some patients. The clones
have weapons, but you won't need them. Run down the
short hall to the door at the far end and go through.
Immediately after entering this room, look to your left to
spot another door.
Inside this door, you will be in a small hallway with three
paths. Which door should we choose?
The door on the right has a disturbed patient hacking another
patient with a knife. Don't bother going in there, unless
you want to see the slashing. The door on the left leads to
a small operating room that has several Syringes laying
on a table. Grab them if you want, then go through the door
that was in the middle of the hall.
In the next room, you'll be facing a gate with a door
to your left.
The gate is pointless, so go through the door on the left
to wind up in a long hall with a full-length mirror.
The hall zigs to the left then zags to the right, and you'll
come to a single door in the middle, at the very end of the
hall. Go through it.
You're now in a fairly big room.
Don't go to the door at the bottom of the stairs; it's
locked and there's no way to open it. Instead, go through
the only other door, which is almost directly across and to
the right from where you entered.
You will be in a long hall.
Ignore the door on your right. Run down the hall. The door
at the direct end of the hall is locked, but you can pick
the lock. Don't bother, though, because there is nothing
there but several small rooms with nothing to pick up, not
even ammo. You want the door to the right of that one.
If you're not sure which door it is, look through the
window, and you'll spot another clone's corpse.
About this time, you should see a cutscene of SWAT members
about to storm the sanitarium.
In this room, there are three lockers; two to the right,
one to the left. The right ones hold nothing, but the left
one holds some ammo. You can also grab a weapon and some ammo
off the table. Head to the gate, and go through it.
You'll now want to take the only exit available to you,
the elevator.
Inside the elevator, head to the second floor.
When you get off, you'll see a collection of corpses, as
well as a dead SWAT member.
Approach the SWAT member and change into his clothes. You
can grab the Spas-12 Shotgun if you want; disguised
as a SWAT, you won't arouse suspicion. Do a 180° turn,
walk forward a little, and face the door with the green picture
of a staircase.
This is the route to your exit.
You are now in an operating theater, of sorts.
Depending on how fast you've been moving since seeing
the SWAT cutscene, a group of them may burst in through the
left door, and start shooting at some patients on the upper
level. Ignore the gunplay, and run directly across from where
you entered to the next door. There is a camera here to help
you distinguish which door to go through.
You will be in a large foray with stairs heading up and down.
Don't go up. Have you ever seen a horror movie? You
never go up! Take either the left or right staircase. At the
bottom, you will see some SWAT guarding the corridor.
If you walk slow enough, you will be able to get by them.
Do so, and go through the wooden door to the right.
In this room, which is the reception area, you will be behind
a metal barrier.
Go through the next wooden door. There is a SWAT here who
will patrol back and forth. Walk by him slowly, through the
door, and you'll finally be outside.
Walk down the stairs, and head to your right. Behind the
SWAT who are near the staircase, you will see a black car
being guarded by yet another SWAT.
Wait for the SWAT member to walk to the passenger side of
the car, then walk up to the driver's door and choose the
"Escape" action. You will get in the car.
The Hitman accelerates, and crashes through the gate of the
sanitarium.
Congratulations, you've just beat the first mission. With
your Silent Assassin rating, you have unlocked the CZ2000
Dual.
Basement |

1st Floor |
2nd Floor |
3rd Floor |
| |
|
|
|
Outside |
|
|
|
|