| WALKTHROUGH
- Mission 10 - Showdown Below
"Make your way to the orbital elevator through
the Akrid infested area and the underground preparation
facility beyond it. Fight any NEVEC remnants you may
encounter."
 |
|
Notice how quiet it is? Don't look off the left side
yet or all hell will break lose. Grab the HAND GRENADES
and the ROCKET LAUNCHER in the back then get in the
GTB-11 Vital Suit. Walk over to the side of the cliff
on the left to see some Scorpions and an Armored Dongo
below. You can wait up on the current area and defeat
the Akrid as they come to you. The Scorpions will hop
up to your area and the Armored Dongo will roll up the
hill. Several turrets will also shoot at you so back
off from the side of the cliff.  The turrets are on the top rim of the doorway on each
side below. If you can find the beacon for each set
of turrets then you can destroy the beacon to deactivate
the turret. There are two VS SHOTGUNS (one on the far
left cliff), a GATLING GUN, a SHOTGUN (also on the cliff
to the left), and some HAND GRENADES below. Be sure
to pick up the PLASMA GUN near the doorway with fallen
rocks. Activate the DATA POST (1/8) at the bottom.
The turrets are on the top rim of the doorway on each
side below. If you can find the beacon for each set
of turrets then you can destroy the beacon to deactivate
the turret. There are two VS SHOTGUNS (one on the far
left cliff), a GATLING GUN, a SHOTGUN (also on the cliff
to the left), and some HAND GRENADES below. Be sure
to pick up the PLASMA GUN near the doorway with fallen
rocks. Activate the DATA POST (1/8) at the bottom.
Shoot down the doors on the doorway near the hand grenade
pickup then walk down the ramp. A few Scorpions may
attack at the bottom of the ramp. They will enter from
a hole in the roof. There is a SHOTGUN to the side along
with a GATLING GUN.
Jump into the PTX-140 suit and use it to jump through
the hole in the roof. You'll find a VS SHOTGUN and some
DISC GRENADES on top of the roof. Jump up the rock platforms
on the right side. You'll find a MACHINE GUN and a ROCKET
LAUNCHER along the platforms and will be attacked by
plenty of Scorpions and some Wasp Akrid at the top.
If they fall into the hole in the floor, shoot the boulders
to the side so they roll down into the hole and damage
them. A GATLING GUN will be lying to the side of the
hole and a VS ROCKET LAUNCHER will be down the corridor
inside. A few Wasp Akrid will be inside as well. Move
down the corridor and drop in the hole at the end of
the middle corridor.
| |
 |
Take a few minutes to grab the DISC GRENADES, ROCKET
LAUNCHER, SHOTGUN, and VS SHOTGUN if needed. You'll
hear an Akrid below you, which turns out to be an Armored
Chryatis. Fall down into the area below and defeat the
Armored Chryatis by aggressively attacking him with
heavy blasts from a grenade launcher, shotgun, or rocket
launcher. A few Wasp Akrid will join the fight from
the back of the area. Hunt down the Wasp Akrid after
defeating the Armored Chryatis. There are several weapon
pickups in the area ranging from a VS SHOTGUN, PLASMA
GUN, ROCKET LAUNCHER, HAND GRENADES, LASER GUN, etc.
There is also a Spider VS behind a truck on the north
side and a PTX-140 suit on the roof of the tunnel that
leads to this bottom floor along with a DATA POST (2/8)
near the PTX-140 suit. A few Explosive Akrid will be
in the back of this area and you will need to find one
of the two holes on the side of the buildings that will
lead further underground. There is more than one entrance
but they will both lead to more Explosive Akrid and
some Trilids.
You will eventually run across another PTX-140 suit
and a DATA POST (3/8) a little ways from it. Beware
the Electric Akrid up on the ceiling. These Akrid will
let loose electricity around them that will stun you
in place and they will release a burst of electricity
once defeated. Joe will contact you and tell you that
he is waiting up ahead once you get near the Data Post.
Make sure that you have a Vital Suit with you then leap
to the top of the platform up ahead and fall to the
room below.
 |
|
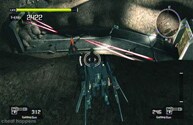
This is a very unique boss compared to the others that
you have fought. His weak point is not exposed from
the beginning of the battle so you will have to force
him to expose it. Two of his feelers will burrow out
of the concrete on both the right and the left in front
of him. The feelers will swipe at you vertically and
horizontally while the boss attacks and he will let
loose Electric Akrid. Move to the right or left to avoid
the vertical swipes and jump to avoid the horizontal
swipes. The Electric Akrid can stun you with their electricity
both in and out of the VS suit so stay away from them
and blast them with the gatling gun. He will also unleash
Trilid that will fly right toward you in a row. The
body of the boss will periodically shoot a row of several
fireballs to add to the mayhem.
Aim for the top of each feeler (where the pinchers
are) and blast it with the gatling gun or shoot it with
a heavier weapon. The feelers will stand still in midair
at times so it is possible to shoot them with a rocket
or laser blast rather easily. The feelers will retreat
back into the hole in the floor each time you destroy
the top portion, but they will regenerate in about 15
seconds.
Hint: Notice how there are weapons inside of the hole
that the feelers retreat into once the top section has
been destroyed.
In order to make the boss show his weak point, you
must get out of your current VS and run into the hole
that the feeler retreats into on foot. There will be
a few weapons that you can grab along the way. At the
end of hole shoot the feeler on the body of the boss.
Shoot it with a single rocket then quickly retreat from
the hole since the feeler will push you back out and
damage you in the process. Once the feeler hole has
closed up on the body of the boss then that feeler is
destroyed. You must destroy both feelers this way. This
process will take about 25% of the boss' health gauge.
Once both of the feelers have been destroyed, the boss
will start to attack differently by opening his mouth
and spewing lava from the extension that protrudes from
his mouth. Shoot the boss in the red extension whenever
it reveals itself for an attack. Sometimes it will only
show itself for a brief time period (when launching
small fireballs), but while shooting out the big explosive
fireball, the Akrid's mouth will be open and his extension
will be in full view waiting to be hit. This part of
the battle is much easier than before since he will
not launch out any more Electric Akrid and there are
no feelers to worry about. Move to the sides to avoid
his attacks and you'll be fine. Be sure to shoot the
occasional Trilid flock that he will release. You could
actually defeat him on foot at this point rather easily
if you use rockets.
The boss will fall and turn into a pile of rubble like
all the rest, but the mission is not over yet though!
Step through the boss' remains and move through the
corridor ahead. A cutscene will play when you enter
the area past the doorway.
This fight can get hard if you don't make it to him
with enough T-ENG. Try to make it to him with at least
around 2000 - 3000 T-ENG. Make sure to bring a Vital
Suit with you (PTX-140) since there is not one in the
boss room. Bring a rocket launcher just in case you
run out of T-ENG and are forced to fight him on foot.
A thermal energy drought can happen very easily once
his feelers are gone since there is very little T-ENG
produced from attacks against the boss at that time.
When you run down into the hole to blast the feelers,
hit them with a machine gun to save rocket launcher
ammo. When hitting the boss in the red inner portion,
remember that you must hit him once when he fires his
big explosive fireball in order to make him open his
mouth to expose the red area in full view. Only hit
him with one rocket each time, since he will be immune
to multiple rockets. You'll be wanting to unleash hell
upon him at the end of the battle with your rapidly
declining T-ENG gauge, but it is best to keep your distance
and shoot him calmly at the earliest opportunity. Make
sure to keep your distance from him if you have to fight
him on foot at the end of the battle since his explosive
fireball will rain down faster from close range and
will not allow you to move away from the explosion as
easy.
| |
 |
When the cutscene is over, run down the new corridor.
Pick up the DISC GRENADES, the EM LASER, and the MACHINE
GUN if needed then activate the DATA POST (4/8) near
the crates. You can take either corridor up ahead since
they both lead the same way - the right corridor is
a bit easier since it doesn't take you directly into
the big enemies ahead. You'll enter a huge room where
Nevec soldiers and Akrid are engaged in battle.
The Nevec soldiers will also be piloting Vital Suits.
Fight off the Trilids and shoot their hives then kill
the Armored Chryatis and Armored Dongo. Use your EM
laser along with a rocket launcher to destroy all the
enemies. If you get on the top platform via the metal
ledges on the right side, blow open the metal container
to find a PTX-140 VS suit. A metal container in the
back left portion of the room contains a Spider VS suit.
There are several other VS suits spread around the area
and several weapons as well.
 |
|
Activate the DATA POSTS (5/8) (6/8) (7/8) on the back
left (near a metal container), upper left (on some crates),
and top platform (center). Go through either the door
on the upper left on the bottom floor or the door on
the upper right side on the top floor. They both lead
the same way. Destroy the enemy Vital Suit on the outside
bridge of the room you come to then activate the DATA
POST (8/8) on the right side. Fall down below and quite
a selection of GTB-11, GTB-22, and Spider Vital Suits
will be lying in wait for the taking. There are also
some PTX-140 suits along the back sides of this room.
One enemy Spider VS and another Vital Suit will attack
the bottom but you should have more than enough artillery
available to you to destroy them.
Fall into the hole in the back of the room and a shutter
will open from behind to reveal a single Vital Suit
standing in the background. Walk through the shutter
to trigger a cutscene.
| |
 |
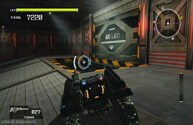
This boss has tons of attack and likes to throw everything
that he has at you at once. He will usually try to ram
your VS from long distances so watch for his guns to
glow a purple color and be ready to jump or move behind
a column when he tries to ram. The columns in this area
will be moving around quite a bit so the structure of
the room will be constantly changing. He likes to stand
back and fire off his laser gun along with missiles.
His probes are also back from the last battle where
you fought him in the Spider VS, so you will need to
blast them down once again or they will constantly fire
plasma shots at you. Sometimes the enemy VS will open
his chest and let loose a purple electric field that
will stun your VS and render you helpless for a few
seconds if it hits. The stunning electricity isn't much
of a problem but it is annoying. He will rush toward
your VS and perform this move without much warning.
Equip your Vital Suit with some heavy firepower such
as the EM laser to the left side of the room as you
enter or some VS shotguns and VS rocket launchers then
unleash hell upon this boss. He will fall very fast
if you dual wield two heavy firearms and spam him with
shots from each. He has a force field around him that
will absorb some of the damage but this is hardly a
bother when you get right up in his face and shoot him
with two times the firepower. On the flip side, while
you can damage him extremely fast, he can do the same
to you. Your Vital Suit might not last long if you get
caught up in his attacks so be ready to eject and remember
where the other suits are. There are two PTX-140 suits
in this room and plenty of weapons so you should have
more than enough to take him down. Hide behind the columns
from his attacks but try to stay near him when you start
attacking. He's not completely overwhelming on foot
like other bosses, but his moves are hard to avoid at
times. Use the rocket launcher while outside of your
VS for some good damage.
Once again, make sure to bring a PTX-140 Vital Suit
with you to this fight. Blast him with rockets and find
the VS shotgun in the room. Like before, you need to
make it to him with enough T-ENG to spare. Keep a sharp
eye out for his stunning electric attack from his body
or he will destroy your VS very quickly. Make use of
the tanks found around the sides for extra thermal energy.
|