| TARGET
MARKS
|
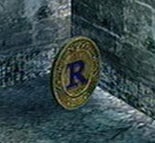
Target marks are circular
coins hidden in each level with a letter placed
on them. These letters will spell out words as
each mark is collected and will help you to gain
achievements for finding them all in a level.
Shoot each target mark in order to collect it.
Each difficulty will have the same set of Target
Marks but they will be hidden in different areas
depending on the difficulty chosen. The Target
Marks can be collected on any difficulty to satisfy
the achievements for collecting an entire level's
supply, but you must collect ALL of them on ALL
difficulties (Easy - Extreme) if you want to gain
the TM Master achievement.
Keep in mind that some of these marks are extremely
well hidden, especially on Hard and Extreme, so
they are not going to pop right out in your field
of vision all the time. Sometimes you will need
to shoot them from a very long distance in order
to get them. Also, some of the marks are out of
order on purpose since I have listed them in an
order that you will find them in while moving
through each mission.
|
 |
"E" mark - After moving through the tunnel
and destroying the first Chryatis, this mark will be
on the ground beside the left side of the building.
"A" mark - In the garage, check the far right
wall. This is the same area with the first Data Post.
"R" mark - In the warehouse, check the left
wall upon going through the doorway inside of the small
room with the hand grenades and rocket launcher.
"T" mark - When you first enter the cave,
walk over to the right a little further after you find
the gatling gun and before you get to the third Data
Post. Be sure to turn on your light to see it.
"H" mark - Before entering the nest to fight
the boss, this will be on the right ledge before moving
across the webbing leading to the nest.
"E" mark - Look in the snow behind the second
set of tanks right before entering the tunnel with the
Spider Akrid hives.
"A" mark - Look behind the row of six white
tanks to the left as you exit from the garage with the
first Data Post. The tanks cannot be destroyed.
"R" mark - After the Chryatis battle in the
warehouse, walk up the stairs near the exit doors and
this mark will be on top of the catwalk.
"T" mark - When you reach the cave, fall
down into the open area below the narrow ledge and this
mark will be right by the waterfall on the side closest
to the cave entrance above. This is the left waterfall
while jumping down the ledges.
"H" mark - When you move across the narrow
ledge in the cave, fall from the ledge on the right
side like normal, but turn around to find this target
mark underneath the side of the narrow ledge that you
just fell from.
"T" mark - Grapple to the top of the awning
above the entrance to the garage to find this mark on
the back right.
"A" mark - After exiting the garage, grapple
up to the white tanks on the left side past the fence
and look for this mark on the back left tank. It is
hidden behind the small circular portion on the top.
"R" mark - When entering the warehouse, this
mark will be on the left catwalk that is standing by
itself in the center of the warehouse. Grapple up to
it.
"H" mark - Drop down to the bottom of the
cave and head into the very back portion, under the
hive that you must enter to fight the boss, and this
will be near the right wall when you start to see the
bottom of the hive.
"E" mark - After dropping from the narrow
ledge that stretches across the cave, walk over to the
ledge with the two hives that Spider Akrid are entering
the area from. Turn to the left where the rock wall
ends and you should see a ledge across from you. Look
down from there and there is anther ledge below you.
Fall down while hugging the wall and Wayne will grapple
to the ledge that you're on. Lower yourself down to
the ledge below to find this mark. You may be able to
shoot it while still on the grapple without having to
fall below since you can't get back to where you were
without moving up the ledges along the down the narrow
path if you fall.
"E" mark - When starting, turn directly around
and move around the side of the building to find this
mark in the space between the building and the mountainside.
"R" mark - While outside the garage and facing
the entrance, look to the right and this mark will be
against the snow wall behind a small piece of concrete
debris. It is the closest concrete piece to the entrance.
Get up on the side of the wall and stand to the right
of the concrete piece to shoot the mark.
"T" mark - After exiting the garage, go past
the fence that leads to the white tanks off on the left
side and move to the large building in the back of the
tanks to the north. This mark is behind the concrete
wall surrounding the building. Rotate the came around
the side of the wall to see it. You'll need to jump
and shoot it while jumping against the big snow mound
near the concrete wall.
"H" mark - When exiting the warehouse, turn
all the way back around and face north (you'll face
the exit). Grapple to the top of the right side of the
warehouse to see this mark on the roof half buried in
snow. Shoot the mark while falling.
"A" mark - Right after falling off the narrow
ledge that takes you across the middle of the cave,
walk past the first few eggs and the machine gun pickup
below. Right when you move past the ledge enough, to
where there is no more rock wall on the south end, face
the south and look toward the ledge in the background.
Notice the orange Akrid seal on the right side of the
ledge that is inside of a circular gourd-like structure.
This mark is in the dark area inside of the gourd-like
structure to the left of that orange seal. This gourd
is on the same level as the orange sealed gourd. You
can just barely see it, so shoot in that area until
you see that you have collected it.
"S" mark - After moving under the overhead
bridge near the beginning, look for a red awning on
top of a building off to the left. Grapple up to the
awning.
"T" mark - Right when you reach the turn
to the right where you first meet up with the Snow Pirates,
look off to the left and the mark will be next to a
column up under the building to the side.
"O" mark - Before entering the dilapidated
building must be climbed, this mark will be on top of
a piece of concrete debris on a mound of snow.
"R" mark - When you reach the rail tunnel,
this mark will be on top of a dumpster on the left side
about midways down. The dumpster has steel pipes leaning
against it.
"M" mark - Get on top of the building where
the enemy missile turrets are located in the enemy camp.
Right before you go down the stairs that lead into the
building next to the turret this mark will be in the
small alcove straight ahead above the stairs.
"S" mark - When moving under the overhead
bridge, take the first left and this mark will be in
a window on the side of the building against the far
wall.
"O" mark - At the very top of the dilapidated
building must be climbed right before you get on the
bridge there is a small ledge on the south side of the
top of the building with this mark in the window. Grapple
to it. Facing away from the section of the building
leading to the bridge this mark is on the back right
side.
"T" mark - At the bottom of the first gap
that you must jump across with the GTF-13M VS suit,
look toward the south wall to find this behind the bars.
This is the wall below the railing tracks forming a
ramp.
"M" mark - Look on the left side of the very
top of the debris at the end of the rail tunnel before
turning down the right corridor.
"R" mark - When you enter the Snow Pirate
camp, enter the big building on the left side of that
area and this mark will be beside the crates before
going up the stairs.
"S" mark - When you first enter the open
area, before any of the Dongos attack, walk over to
the far left and look in the corner in between the first
two buildings to find this mark. This is the area in
front of the overhead bridge.
"R" mark - Before turning right to fight
the first set of Snow Pirates and the Chryatis, this
mark will be around the left side of the first building
on the left. Grapple up to the small roof portion and
look in the dark corner.
"O" mark - Right before you activate the
Data Post on the bridge, this will be on the middle
of the top railing of the bridge overhead. Get on the
top crate of the stack of crates across from the Data
Post and look up to see this on the middle steel beam
in the center portion of the above railing. Face away
from the way the Data Post points and look up and to
the left. You may also want to try standing on the steel
beam that goes across the gap and looking up to find
it.
"M" mark - When you first enter the rail
tunnel, grapple up to the center walkway, turn around,
and look to the left to see this on the small concrete
ledge above the left entrance.
"T" mark - Right after activating the final
Data Post on the bridge that leads to the enemy base
and the boss fight. Hop up to the railing and fall off
either side of the bridge, preferably in the middle,
and Wayne will grapple to the bridge. Lower yourself
down and look toward the steel beam under the bridge
on the side where you came from to see this mark. Shoot
it while hanging then pull yourself back up.
"S" mark - Get up on the first awning of
the building to the right side and look in between the
buildings on the southwest side of that awning to see
this mark. You'll most likely have to jump and shoot
it.
"M" mark - In the big open area where the
Dongos and Chryatis first attack stay along the south
set of buildings until you reach two buildings that
stick out a bit from the rest right across from the
single leaning tank and before moving past the arch-shaped
entrance. Stand on the snow mound against the first
building that sticks out then grapple up to the corner
of the second building that is sticking out. Look to
the right while jumping up to see this mark on top of
the second building then shoot it while falling.
"T" mark - After meeting up with the Snow
Pirates for the first time, do not destroy the third
tower with the Snow Pirate with the rocket launcher
on top. This is right next to the dilapidated building
that you must climb. Get on top of the tower and face
the southwest. This mark in between the dilapidated
building and a fallen building to the south.
"R" mark - Once you make it to the bridge,
move down it until you come to the two carts leaning
against each other up in the air a bit. Get the rifle
down the street in front of the second gap then come
back and get on the first cart of those leaning carts
that you came to previously. Look off to the west then
look down while standing on the north edge of the first
leaning cart to see a small building with two tanks
on top. This mark is behind those tanks. Zoom in on
it with a rifle then shoot it.
"O" mark - This is on the far right side
of the reddish walls of the fortress that you must enter
to battle the Crimson Pirate Commander. The best way
to see this is to stand on the raised section of the
building with the stairs in front of the section described
above then face north. Look up on the right side of
the red wall to see an extremely small shimmering object
(the mark) to the right of the third black post. This
is the third black post from the left going right. Hit
it with a rocket launcher if you don't have a rifle
handy.
"M" mark - At the starting, look to the left
and this will be on top of the metal crate with the
first Trilid hive.
"I" mark - Leave the boundaries of the camp
on the right side and this mark will be lying on the
edge of the left metal plate in the row on the right.
"R" mark - This will be on the bottom set
of stairs before going up to the Data Post on the first
building you come to when you exit from the boundaries
of the camp.
"A" mark - When you reach the Data Post close
to some blue tanks on your way to the boss fight, this
will be right in front of the section of fence up ahead,
past the tanks.
"G" mark - After obtaining the "A"
mark, don't go to the warehouse to the right where the
boss awaits, instead, run all the way to the building
in the very back, to the left of the warehouse. You
will find this mark along a narrow concrete ledge on
the side of the building while looking up at it. Get
on top of the portion where the building is buried in
snow and move down the snow while looking to your right
to see it.
"E" mark - Turn away from the building described
in the "G" mark location and run next to the
cliff on the right side. You will see this mark floating
above the snow eventually.
"I" mark - Get on top of the small dome-shaped
building with the Trilid hive on top and look on top
of the back extension to find this mark on top.
"R" mark - Leave the camp from the far left
side then turn around and look back at the metal plates
to find this in front of the group of plates on the
left side.
"A" mark - Stay along the far left cliff
while moving out of the camp and you'll eventually find
this mark floating above the snow right beside the cliff.
"E" mark - This mark is right next to the
Data Post out in the snowfield before you reach the
first building with the stairs and the next Data Post.
"M" mark - When you make it to the first
building, this mark will be behind the side of the staircase
leading up. Look next to the concrete wall below the
stairs.
"G" mark - When you reach the warehouse with
the fence around it (boss fight building), look in the
back of the building for a large circular metal structure
sticking out of the ground. This mark will be on the
very top of the pointed piece. Get as far away as you
need to and shoot it with a machine gun. Even though
it is very far off, it's not that hard to hit once it's
in your sight.
"A" mark - Look on the side of the mountain
up under the two Trilid hives on the far mountain wall
when you start. This mark will be almost directly under
them in a corner.
"M" mark - Look at the compass in the upper
right hand corner when you start and head to the west
corner of the camp. Walk over to the two tanks and stand
on the side with the ladder next to the furthest tank.
Look up toward the open portion of the building in the
background above the big mountain of snow. Keep staring
and you will see this target mark spinning on the right
side of that open portion of the building. Keep your
aim steady and fire at it to get it.
"R" mark - Leave the camp on the far left
side and stay against the side of the cliff overlooking
the large gap. Keep a sharp eye on the cliff on the
other side of the gap and you will see this mark lying
on the cliff across from you. This mark is incredibly
far away, so you need some precise aiming to shoot this
one. It is about the same size as the dot in the middle
of the targeting crosshair because of its distance!
"E" mark - When you get to the first building
with the Data Post, run to the very top of the stairs.
Look to the right of the door at the top and grapple
up to the platform beside it to find this mark.
"G" mark - This mark is right next to the
metal structure described in the "G" mark
normal location. Look up under the red square metal
piece that is half buried under the snow to the side
of the pointed piece of metal.
"I" mark - Pass the warehouse that you must
travel to in order to fight the boss and move toward
the building in the back with the snow mound to the
right side. Facing the building this mark is on the
far left side of the building.
"A" mark - Right when you start, while still
in the camp, head to the west side of the camp and move
past the two tanks in the west. Stand against the side
of the cliff and look up toward the building in the
back. This mark will be floating on the right side of
the divider in the open space on the building. Watch
for it to spin.
"E" mark - Stay against the side of the cliff
on the west side and leave the camp. Keep heading north
until you reach a side of the cliff that curves inward
more than any other piece. Walk to the north portion
of this curved piece to where you can see the biggest
chunk of the cliff wall below when you turn to face
the south. This mark is along the side of the cliff
wall and is extremely hard to see. While looking down
at the side of the cliff wall this mark is slightly
to the right of a crack that extends all the way down
the middle of the cliff wall. You have to jump and shoot
to be able to hit the mark so I would suggest jumping
and shooting the side of the wall until you see that
you have collected it if you can't make out the mark.
"I" mark - Upon reaching the building with
the stairs this mark will be on the top side of the
mountain almost directly to the left (north side) of
the building. Step away from the mountainside and out
into the snowfield to see it.
"R" mark - This is on the pipe that extends
into the warehouse where you fight the boss for this
stage on the right (south) side. Stand at the bottom
of the pipe to the left of the pointed structure described
in Normal "G" mark and duck then shoot this
mark while it spins on the inside of the building. You'll
have to look into a small opening in between several
metal pieces while ducking.
"G" mark - Run all the way to the far north
side of the snowfield until you get to the building.
Look off to the west side and look for a tiny mark at
the top of that mountain. You will need to have an energy
gun or rocket launcher to shoot it since it is so far
away. Use a charged shot with the energy gun for a bigger
shot that will most likely hit it.
"M" mark - Run all the way to the northeast
most section of the snow field and back away on the
east sloped portion while looking at the small mountainside
to the north to see this mark. It's in the far northeast
but you'll need to stand a little ways away from it
on the east sloped portion to see it.
"M" mark - Move past the second Spider Akrid
hive on the side of the mountain (left side) and grapple
up to the rock platform on the left. This mark will
be across from the gum grenade pickup.
"E" mark - After blasting all of the Spider
Akrid hives in the room below the mountain, look to
the right side of the doorway ahead in between a metal
crate and an explosive barrel.
"T" mark - When you first enter the room
with Snow Pirates, run over to the right side and look
behind the stack of crates to find this mark.
"E" mark - When the moth flies by the window
and breaks it, fall down to the platform below, turn
around, and look at the dark area to the right to find
this mark.
"O" mark - Upon entering the first GTB-22
Vital Suit, look to the left below the first platform
that you must jump up to in order to see this mark.
"R" mark - After jumping out of the area
with several platforms, look in the back of the buried
GTB-22 Vital Suit and the single tank to find this mark
up the snow hill near the side of the mountain.
"E" mark - At the very end of the path where
the giant moth dive bombs the area with eggs you will
find this mark in the left corner before dropping down
into the Spider filled room below.
"O" mark - After dropping into the room with
all the Spider Akrid hives, run down the hall ahead
and this mark will be near the left corner of the room
you come to.
"R" mark - When you first enter the room
with Snow Pirates, run over to the right side and look
behind the left side of stack of crates against the
side of the wall to find this mark. This is the same
stack of crates mentioned in the "T" mark
location for easy mode but it can only be seen on the
opposite side.
"M" mark - After grappling from the lift
that gets destroyed keep moving up the side of the mountain
and stay to the left side. This mark will be against
a slanted edge on the side of the cliff right before
you turn right to go down the path that leads to the
big room with the GTB-22 Vital Suit.
"T" mark - While jumping up the platforms
with the help of the GTB-22 Vital Suit, keep jumping
on the platforms on the west side of the room (look
at the upper right compass). While on the top platform
on the west side, look off to the east, below the platform
across from you, then look down, below the VS rocket
launcher pickup on the opposite side, to see this mark
on the right side of the middle steel beam below the
platform. Actually, you could just fall off the ledge
on the right side of the VS rocket launcher pickup and
let Wayne grapple the ledge to get a clear shot while
hanging.
"E" mark - When you jump through the roof
of the area with all the platforms, walk over to the
VS and the laser rifle buried under the snow. Look to
the left of the laser rifle snow mound to see this mark
on a sloped portion of the left cliff.
"E" mark - Behind the first Spider Akrid
hive that is on the left side of the mountain. Shoot
the boulders above the hive to destroy it then shoot
the mark.
"E" mark - Fall down into the hole with the
Spider Akrid and allow Wayne to grapple to the top of
the hole. While Wayne is grappled onto the side of the
hole, look up and you will see this mark in between
some ice stalactites hangin around the hole that you
just dropped through.
"R" mark - In the room with the Snow Pirates
and enemy Vital Suits, stand on top of the large stack
of crates on the left side then look in the space in
between the left wall and the back crates to find this
mark.
"T" mark - After the moth flies by the window,
fall to the platform outside then fall to the lift to
the side of that platform. Turn around and look on the
back right side of the lift to find this mark floating
in the air. If you move too far on the lift then the
lift will leave the mark.
"O" mark - In the room that you must ascend
with the help of the platforms using the GTB-22 Vital
Suit, when you get on the very last platform right below
the exit in the roof, abandon the Vital Suit and hop
down the south side (look at upper right compass) of
the top platform. You will land on a small ledge below
the platform. Fall off on the south side once again
and allow Wayne to grapple to the ledge. Look off to
the right while hanging to see the mark next to a pipe.
If you fall, remember that you can grapple your way
back up the platforms.
"M" mark - When you jump through the roof
of the room that you must ascend, stay against the left
side of the cliff until you reach the mountain wall.
Upon reaching the wall, fall off the left side so that
Wayne will grapple to the top of the cliff. Look to
the left while hanging to see this mark in the distance.
"E" mark - At the very beginning, turn around
and run toward the wall in the back while looking up
at the southeast side of the mountain to see this mark
on a ledge on that side.
"O" mark - When you make a turn to the south
and reach the Spider hive with the two boulders up above
it at that end, get up on the highest portion of the
raised area to the left (east) side. You should be standing
right by a machine gun pickup. Look up on the southwest
side of the mountain to see this mark on a small ledge.
"R" mark - Upon entering the room with several
Snow Pirates and Dongos, move to the southeast platform
and look in the small section in between the smaller
platform and the larger platform beside it. This is
right next to a pair of pipes that are hooked along
the side of the larger platform.
"M" mark - When you first get on the lift,
wait until the Explosive Akrid hits the side of the
rail that is carrying the lift up the mountain. Find
the destroyed portion of the rail then look to the left
of that destroyed portion to see this mark in the middle
indention on the left side that is not destroyed. You'll
have to wait until the lift is about to fall before
you can hit it. If you can't see it then just shoot
the middle of the rail past the destroyed piece until
you see the green light to confirm that you got it.
"E" mark - While jumping up the platforms
in the building where you exit from the roof, get out
of the VS when you get to the platform with the two
tanks on it in the northwest. Fall off the far northeast
side so that Wayne grapples the top of the platform
to see this mark underneath the platform.
"T" mark - Once the boulders fall on the
exit to the building that you jump out of, walk to the
far south side of the ledge that you are on and look
up toward the mountainside to see this mark on a ledge
in the east. You can actually jump up to the side the
mountain up above it with a VS suit and shoot it while
on foot for a better view of it.
"A" mark - When you grapple up to the first
actual room (not the alcove) look behind the piece of
concrete debris behind the Spider Akrid hive on the
ledge.
"U" mark - Before entering the room with
several Spider Akrid and barrels blocking the way, this
mark will be in the back of a piece of concrete debris
right next to the entrance. When you see an Akrid hive
on the west mountain wall this will be to the right
of that hive, behind the concrete piece.
"R" mark - Right before entering the cave
this will be to the left as you run down the path towards
the entrance.
"O" mark - Fall down the ledges below the
swarm of Trilid Akrid in the cave and this mark will
be to your left right after jumping off of the last
ledge and hitting the bottom. It is next to a VS shotgun
pickup.
"R" mark - While moving up the tunnel with
the second GTF-11 suit inside, this mark will be behind
the boulder that can be shot on the left side. This
is the tunnel right before you reach the very top of
the cave with the final Data Post on the top ledge.
"A" mark - When you first enter the portion
of the cave with the frozen column in the middle, enter
the right tunnel with the single stalactite overhead
to find this mark beside the set of three Akrid eggs
on the left.
"R" mark - Right when you start and while
facing the mountain, this mark will be on the right
side of the furthest piece of concrete debris on the
right.
"R" mark - When you run into the second room
with the Spider Akrid hive inside after escaping the
third avalanche, this mark will be next to the back
door of the room. This room has a machine gun pickup
inside.
"A" mark - This mark is behind a piece of
concrete on the right before you go through the entrance
of the last room while climbing up the mountain. There
is an explosive barrel across from it.
"A" mark - When entering the cave, fall down
the ledges in front of the Data Post then walk behind
the right side of the bottom ledge to find this mark
behind the ledge next to a small rock column.
"U" mark - In the middle of the tunnel that
leads to the final Data Post at the top of the cave,
look up on the right side of the tunnel while standing
to the right of the boulder to see this mark up above
on a hidden ledge on the side of the wall.
"O" mark - Upon entering the portion of the
cave with the frozen column, turn to the right and walk
over to the dark corner to find this mark.
"R" mark - Upon starting this level, run
directly ahead and this will be in the snow right next
to the metal crate. It's shockingly obvious for a Hard
mode target mark.
"R" mark - At the starting of this level,
while facing the mountain, move over to the right side
and look in between the last two concrete pieces. This
mark is at the very top of the middle piece. You could
also hang off the ledge outside of the first room while
moving up the mountain and get an even better view of
it.
"A" mark - While moving down the path that
leads to the entrance of the cave, get up on the left
side of the mountain wall on the raised area that can
be walked upon and look up on top of the mountain above
the cave entrance. This mark will be very far up on
the side to the left of the cave entrance on a sloped
portion of the mountain. It is very small because of
how far away it is and barely even noticeable.
"A" mark - After activating the first Data
Post when you first enter the cave fall down to the
first ledge below then fall down to the second ledge
and stop. While facing directly ahead, turn to the left
and walk to the left side (west). Look along the wall
of the cave and you will barely be able to see this
mark almost directly above the Trilid hive below. Stand
still and watch for it to spin since it is very far
away. You can also run up to the Trilid hive on the
left side while at the bottom of this area to be able
to see it a bit better. You can stand on the wall below
it to some degree while grappling though it is hard
to shoot while doing this.
"O" mark - Right before moving into the tunnel
that leads to the final Data Post at the top of the
cave. Look off to the left side of the entrance and
to see this mark on a small sloped portion of the ledge.
You have to move over to the far left side of the ledge
to see this.
"U" mark - When entering the tunnel that
leads to the first hole at the top of the cave, pass
by the stalactite with the glowing purple end and look
in the set of stalactites in the back of the glowing
one. This mark will be floating in the middle of them.
"A" mark - Run to the far north corner of
the beginning area below the mountainside and look up
on the mountain top to the northwest to see this mark
at the very top. When you get the energy gun, stand
on the furthest piece of the ledge extending outward
next to the outside Spider hive to be able to shoot
it.
"O" mark - When you grapple up to the very
top ledge of the mountain destroy the lone Spider Akrid
hive at the top then hang off the northeast side of
the ledge next to it (fall off and allow Wayne to grapple)
to see this mark below the ledge in some snow.
"R" mark - Upon entering the cave, turn all
the way around and run back to where Wayne entered the
cave. Run up to where the wall slopes upward then turn
around and look up to this mark on a curved wall up
above. You can actually see the shadow of this mark
on the cave wall while moving toward the glowing wall.
"R" mark - Move up the right side of the
ledge like normal while in the cave then stop once the
Spore Akrid pop up out of the ground in the area where
a hive is positioned up above some boulders. Turn all
the way around and look at the stalactites on the ceiling
up above to see this mark to the side of one of them.
"U" mark - After exiting the tunnel with
the GTF-11 Vital Suit at the very top of the cave, this
mark is on the ledge that a Wasp Akrid usually stays
perched on. Shoot the Wasp to make him move then shoot
the mark.
"A" mark - When you enter the cave portion
with the frozen column step away from the entrance then
turn around and look to the right (southeast) to see
this mark in a dark area in between the cave wall and
a stalactite.
"H" mark - After activating the first Data
Post, look straight ahead and to the left a bit to see
a bent streetlight. This mark is behind the concrete
piece to the left of that streetlight.
"U" mark - This mark is to the left of the
second turret. While turning the corner after moving
under the bridge overhead this mark will be in a corner
to the left.
"T" mark - Down the street beyond the second
turret, this mark will be in a dark section against
the right wall. Look to the left side and look into
inside that alcove.
"N" mark - At the end of the street where
you fight the second enemy Vital Suit this mark will
be on the roof of a building on the east side. Facing
the entrance to the path that you must enter, this on
the left set of buildings.
"D" mark - When you reach the inside portion
of the building at the end of the street, this mark
will be floating in the burning coal around the fire
inside of the dumpster.
"E" mark - While moving down the first corridor
in the PTX-140 Vital Suit, keep your eye on the top
portion of the right wall and this will be in between
some lights near the end of that corridor.
"R" mark - While in the Vital Suit, when
the door at the end of the first corridor opens, walk
inside of the next area and this mark will be floating
above at the top of the wall in front of you. The room
is dark so this mark stands out fairly well as long
as you look up.
"T" mark - After destroying the first VS
and while standing on the balcony next to the Data Post,
look back toward the area you just came from (to the
north) and get up on the railing to see this mark on
the side of the building right next to the railing.
"U" mark - Jump off the side of the balcony
with the first Data Post and this mark will be on the
south side.
"N" mark - Get up on the side of the building
with the first turret then face the tank on top of that
building. Look to the right of the tank to see this
mark on a ledge in the background to the left of the
bridge.
"H" mark - While moving under the second
bridge, just past the building with the second turret,
look on the left side to see this mark.
"D" mark - When you first enter the building
from the street outside, look behind the first blue
dumpster off to the side next to the wooden crate to
find this mark.
"E" mark - While piloting the PTX-140 VS,
when the door opens at the end of the first corridor,
move through the doorway then stop and look at the very
top of the other side of the doorway to see this mark
floating near the ceiling.
"R" mark - While moving down the second corridor
past the room with the catwalks in the Vital Suit, look
up to see this floating below the ceiling about midways
down. Shoot it on the way to the boss fight.
"T" mark - When you first start in this level,
turn around and move to the right. Look to the right
of the roofs of the buildings in the back to find this
mark in front of a tall portion of one of the buildings.
"R" mark - After activating the Data Post
on the balcony, get on the railing in the north (the
way you just came) and look in between the railing and
building to the right to find this mark in the far corner.
"H" mark - While on the ledge with the first
turret, stand on the right side of the turret and look
at the small dark alcove in between the building to
the right side to find this mark. This mark is very
hard to see thanks to how dark the alcove is.
"E" mark - This is in the very back of the
building with the first turret, but it is very hard
to get on the camera from that building. Stand to the
right of where the turret is and look at the space in
between the building in the back and the one to the
right of the turret. This mark will be floating beside
the left building (while looking back there).
Another way to see this particular mark is to get on
the ledge with the final Data Post (up above the second
turret) and look in the space in between the two buildings.
You can just barely see this from next to the final
Data Post though. Stand still and look for the spinning
coin. It really pays to have a plasma rifle so that
you can zoom in and see it better.
"U" mark - Inside of the building, after
fighting the second enemy Vital Suit, grapple up to
the first platform next to the fire like normal then
turn around to see this mark floating under a roof window.
Look up.
"D" mark - Right before falling off of the
building platform in front of the Vital Suit buried
in the snow that triggers a cutscene, look to the right
of the platform and this mark will be behind the curved
pipe. Walk over to the pipe to see it.
"N" mark - When you first start in the tunnel
with the PTX-140 suit, turn around, turn on your flashlight,
and look to the right to see this mark on the right
side of the NEVEC door.
"T" mark - Upon starting, turn around and
move to the left side (southwest). Grapple up to the
wall so that Wayne jumps in front of the space in between
the above buildings then shoot in the back of the space
in between the buildings while falling.
"U" mark - Defeat the Vital Suit on the balcony
of the building on the left side then get up on that
balcony. Stand on the railing on the south side then
look off to the buildings in the west. This mark is
on a sloped portion of the left side of the building
directly across from the south side of the railing.
Jump to see it more clearly then shoot it in the air.
"D" mark - Get up on top of the building
in the south and stand on the same level with the turret.
Turn to face the northwest side. You need to grapple
up to the wall on the west side then face northwest
while in the air. The mark is on a building in the background
past the bridge as you grapple up to the side of the
building.
"R" mark - Stand on the very top of the building
where the second turret is and face to the south. Look
past the second bridge (to the east a bit) and this
mark will be on a small tower on top of a building in
the background. It can be hit with a machine gun if
you stand at the edge of the platform.
"H" mark - When you fight the two Vital Suits
right before entering the building that leads to the
back area with the fallen Vital Suit, this mark will
be in between the top portion of the buildings on the
north side, but you will have to grapple up to them
in order to see it.
"N" mark - While still standing on the side
of the building and facing the Vital Suit in the snow
that you need to approach for the mid-stage cutscene,
this mark is on top of the metal crate to the right.
You will need to stand in front of the metal crate and
jump so that Wayne's head hits the ceiling in order
to get a good view of it. Jump and shoot the mark while
falling.
"E" mark - While in Wayne's father's Vital
Suit, pass through the first doorway as it opens then
walk into the area with the catwalks and stairs up above.
Turn to the right (facing south) then jump and this
mark will be on the piece of the catwalk in front of
a small Nevec door up high. This is directly above the
large Nevec door to the right upon entering the room.
"T" mark - Grapple to the top of the metal
container on the south side of the camp that contains
a GTF-11 suit to find this mark on top. This metal container
is next to a Data Post (#4 in the walkthrough) and a
metal platform.
"O" mark - Jump up to the side of the mountain
on the north side next to where you get the GTF-11 suit
with dual missile launchers to find this mark nearly
right above the VS rocket launcher pickup.
"N" mark - When first starting out in the
camp after fighting through the NEVEC camp, look behind
the first metal crate off to the side in front of the
data post on the dome-shaped building to find this mark.
"R" mark - When you make it to the building
across the snow field, look up above the section of
the building above the door that you must go through
to exit this area and shoot it before approaching the
door.
"O" mark - After shooting the very first
NEVEC soldier inside the facility, walk over to the
far right edge of that platform and look below to see
this mark along the side of the building behind the
railing. You can grapple to that ledge from the platform
below you.
"D" mark - This mark is located in the first
trench along the side where all the Bots are patrolling
with their red beams. Remember that you can hang from
the ledge above the trench and shoot it if you don't
want to leap into the area with all the patrolling Bots.
"A" mark - In the back of the two enemy turrets
look above the entrance to the large doorway. This is
right outside the metal shutter that you must shoot
in order to activate the Data Post and go to the boss
fight.
"T" mark - Look behind the container containing
the GTB-22 suit right across from Data Post #3. This
is before you enter the back part of the enemy camp
with all the GTF-11 enemy Vital Suits.
"O" mark - This mark is right above the entrance
doorway that leads to the corridor that will trigger
a cutscene. Look at the top of the rim around the doorway.
You will fight several enemy Vital Suits right before
entering the corridor beyond the doorway.
"A" mark - Leave the camp via the left side
while venturing out into the snowfield. Stay along the
cliff to the left and you will see this mark when you
run across two enemy Vital Suits off to the right side.
"N" mark - Run all the way across the snowfield
to the warehouse where you fought Basil in Mission 3.
I would recommend taking the left side along the cliff
outside of the camp to reach this area since only one
Armored Chryatis will attack that way. Move around to
the north end of the building (look at the compass),
turn your light on and walk into the small area outside
the northwest corner of the building to find this mark.
It is in between the actual wall of the warehouse and
a metal piece beside the wall.
"R" mark - Outside of the building that you
must go to enter the facility, this mark is located
along the grooves on the outside of the building across
from the staircase with the Data Post. Standing midways
on the staircase, jump off the edge and this will be
in the third groove while walking toward them.
"D" mark - In the area with the patrolling
Bots with red beams, on the lowest platform along the
west side, fall off the platform and allow Wayne to
grapple to the top of the area above. Lower the cable
all the way down toward the water below and look to
the right of the first pipe that is gushing out water
to see this mark in a corner floating above the water
at the very bottom. It's actually easier to hit if you
hang off the side that the Bots are patrolling.
"O" mark - In the area containing the patrolling
bots with red beams, go through the small doorway to
the right of the platform with the enemy missile turrets
then look to the left after moving through the doorway.
"O" mark - Get behind the two metal containers
on the north side of the enemy camp and look in between
them to see this mark. Data Post #2 is beside one of
these metal containers in the main walkthrough for this
stage.
"A" mark - While moving down the tunnel at
the end of the enemy camp, you will pass by several
open doorways (notice the rims along the side). While
moving by the second doorway, look off to the right
as you move past the right column and this mark will
be on the other side of the column while you turn around.
It will be on the left when you turn completely around.
This is the tunnel right before the mid-stage cutscene.
"D" mark - Walk all the way across the snowfield
outside the camp (heading north) until you reach the
building with the large snow mound on the right side.
Stand to the left of the snow mound and walk away from
the building a bit. Look up in the window portion of
the guard post to see this mark in the open area along
the side of the building. It is very hard to see since
it is dark and the mark is far away.
"N" mark - Walk toward the warehouse where
Wayne and Basil fought in Mission 3 and stand on the
side with the pointed metal structure. This is the same
structure described in Normal mode "G" mark
for mission 3. Move around the area in front of the
fence and look between the building and the pointed
metal structure until you see the spinning mark. Try
to stand on the fence and jump to see the mark better.
If you can stand on the fence while in a VS, you should
be able to get a clear shot at it.
"T" mark - Check on the side of the mountain
beside the truck that carries two GTF-13M (bike) suits.
This is just about in the same area as the "N"
mark, but closer to the building that is your destination
for this mission. Get up on the side of the mountain
for a better view.
"O" mark - After shooting the first NEVEC
soldier in the facility, walk down to the platform below
the first via the stairs or jump through the hole. Walk
over to the right side and look below the middle portion
of the staircase to see this mark. This mark is right
above the hole that you jump down to reach the platform
underneath.
"N" mark - Along the ledges in the facility
that all the Bots are patrolling with their red beams,
you must grapple to the very top of the furthest set
of ledges in the east, then look off the west side for
this mark. It will be very far up on the wall but you
should be able to see it spinning while looking off
the west side of the top east ledge. You may be able
to see this from the other platforms below the top one
as well.
"A" mark - When you make it to the tunnel
that will lead you to the camp and the snowfield where
the worm used to be, stop after moving through the first
doorway structure inside of the tunnel (not the actual
entrance). Turn back around and you should see a snowy
ledge to the north that leads back to the enemy camp
that you were at. Step toward the snowy ledge and look
up at the piece of concrete that is extending out of
the very top of the doorway on the outside. This mark
will be on that extension. You might need to move away
from it a bit to see it since it is very hard to see
and you will likely only make out the top half of it.
"T" mark - In the second area, this is on
the far right side of the building with the staircase.
Look on top of the building. The far right section is
a little lower than the rest of the building. It is
easiest to see this mark while approaching the building
from the right side while moving out of the camp with
the metal borders.
"R" mark - This mark is along the west cliff
wall like the "E" mark in mission 3 on extreme
was. This mark is not hard to see at all. Travel along
the cliff's edge while heading north then turn the camera
to face south and you will see this mark eventually.
It is about in the middle of the snowfield, a little
ways past the portion where you fight two enemy Vital
Suits. This is not along the same sloped cliff portion
as the other mark on mission 3. It is along a normal
cliff piece. You do not need your flashlight on to see
it.
"D" mark - Travel out to the far north end
of the snowfield and this mark will be around the left
side of the building at that end. Stand to the left
of the building and back away to see this mark.
"O" mark - Run all the way to the warehouse
in the northeast section of the snowfield where you
fought Basil. Facing the long side of the warehouse
that faces the snowfield, this mark is on the first
post on the right. This post is the only bent post on
the side of the warehouse and the mark is on the very
top of the post. Jump then shoot it.
(Keep in mind, for the next two marks you can get them
after you have reached the boss checkpoint. The area
is free of turrets, sentry guns, and the enemy Vital
Suit after the boss checkpoint is reached. Make sure
to bring a plasma rifle with you though. There is always
a plasma rifle on the very bottom platform on the side
you enter the facility from.)
"N" mark - When you first enter the facility,
look off the top platform with the staircase that you
come to and this mark will be near the far red building
at the very top on the right side. It is actually on
the snow mound next to the right side of the building.
It is best to bring a plasma rifle into the facility
with you. There is one in the snowfield next to a fallen
Chryatis body in front of the facility building. If
you can get on the ledge directly below the snow mound,
it is possible to hit it with a machine gun, but you
probably won't be able to see the mark.
"O" mark - While inside of the facility,
you will need to stand on the ledge with the two turrets
and the enemy Vital Suit and be equipped with a plasma
rifle in order to see this mark. Look toward the northwest
to see a bridge- like structure in the background. This
mark is behind the far left raised portion of that bridge
while facing northwest.
"V" mark - Grapple up the metal wall to the
right of the area with the Scorpion and this mark will
be on the second steel beam off to the left.
"O" mark - When you first enter the area
past the ramp with the Spider Akrid, look to the left
steel beam as you look off to view the second floor
to see this mark in the middle of the beam. The floor
below is where the Spider VS is first located.
"L" mark - In the lava room that is swarming
with Trilids, shoot the tank of the first set of tanks
on the far right to see this mark in the left corner
behind the tank.
"C" mark - Before entering the metal door
that will cause the mid-stage cutscene, while moving
up the ramp to the street above, this mark will be on
a piece of the railing around that street. Right after
getting off the ramp, move all the way to the mountain
wall up ahead then turn right to see the railing that
this mark is on.
"A" mark - After the first cutscene, fall
down the left side of the street when the street splits
then walk up to the metal bridge with the two stacked
metal crates blocking the way. This mark will be on
the right side of the bottom metal crate.
"N" mark - After fighting the enemy Spider
VS, walk to the back of the tunnel and look behind the
fourth right column on the side before dropping into
the hole to find this mark behind it.
"O" mark - Right before facing the boss of
this mission, you will move down a corridor with a big
pipe on the left side and some fans on the right side.
Look in between the first set of two metal bars that
support the big pipe on the left side to see this mark
lying on top of the bottom metal bar. You might need
to get out of the VS if you have one in order to see
this mark.
"V" mark - Grapple to the steel beams above
the Scorpion Akrid then find the rock alcove on the
left side across the first beam that has the VS rocket
launcher pickup in it. This mark will be along that
alcove.
"O" mark - In the bottom area with the Spider
VS, this mark can be found on the left side around some
crates. One of the crates has a rocket launcher on top.
"L" mark - When you enter the lava room with
the swarm of Trilid, this mark will be up on the ledge
at the top of the wall straight ahead in between some
pipes.
"C" mark - After the set of lava rooms, fall
down to the ground below and find the metal container
that holds the GTB-22 Vital Suit. This mark will be
on top of the container in the back portion. You fight
an Armored Dongo right near this container.
"A" mark - In the area after the cutscene,
fall down the left side of the street like normal when
the street splits then turn directly around. This mark
will be on a metal walkway below the street piece that
you just fell off of. You'll need to jump or grapple
to get to it.
"N" mark - Grapple to the middle beam above
the right metal bridge when you fall down to the rock
floor in the lava after the mid-stage cutscene. If you
stand on the railing on the right side of the street
above, you will be able to see it better.
"O" mark - On the way to the boss when you
walk down the tunnel with the fans on the right side
look in the very back of the circular hole behind the
second fan to find this mark. It is in the VERY back
at the bottom and is extremely hard to see inside of
a Vital Suit, so try to shoot it on foot.
"V" mark - Get up on top of the metal wall
next to the first two Scorpions and activate the Data
Post like normal. Stand in between the Data Post and
the two explosive barrels on the same platform and look
toward the steel beams (to the north). Start out near
the Data Post and walk over to the explosive barrels
while looking up and to the west and you will see this
mark up on a steel beam on top of the roof. Keep moving
the camera while walking toward the barrels and you
should be able to catch a glimpse of it. You can also
stand on the far north side of the right steel beam
to get a clear shot.
"O" mark - When you enter the top floor of
the room with the first Spider VS after moving down
the ramp with several Spider Akrid, exit the area through
the right doorway on the second floor and step out on
the platform where the GTF-11 suit is. Fall off of that
platform and allow Wayne to grapple to the side to see
this mark floating along the west side. You could also
stand right below the platform and look up at it.
"L" mark - Upon entering the first lava room,
walk over to the left side then when you reach the right
turn, fall off the west side so that Wayne grapples
the platform above. You're now hanging over the lava.
Move all the way down to where Wayne is almost touching
the lava then look under the metal wall on the east
side (in front of you) to see the bottom half of this
mark spinning on the other side. It is very hard to
see.
"C" mark - After the lava rooms, when you
open the container outside that has a GTB-22 Vital Suit
inside, head toward the lava pool and look up to the
left section of the suspended street in the back. This
is way up high. The mark is inside of a red car at the
very end of that broken street section.
In order to get up to that street, you will need to
grapple up all the ledges on the left side of the area
where two Armored Dongos and several Scorpions attack.
Grapple up to the ledge with the PTX-140 inside of a
metal container then walk up the side of the rock wall
to the street section above. Walk to the end of the
broken part of that street section and destroy the red
car at the end to reveal this mark.
"N" mark - Before the mid-stage cutscene,
exit the first part of the area from the street section
described in the "C" mark above. After the
cutscene, run toward the truck in the back and grapple
to the top of it. Face the direction of the gate that
you just came through and look up at the very top of
the mountain above the gate. This mark will be spinning
at the very top and to the left just a bit. If you entered
this area from the other entrance, then you will need
to get in a GTB-22 VS and jump all the way to the topmost
street to get on this street where the truck is.
"A" mark - When you make it down to the bottom
rock section with the metal bridges, move toward the
bridge described in "N" mark for normal mode,
which is the right bridge, then face away from the bridge
and look through the group of poles forming a railing
on the side of the cliff to see this mark against the
mountain wall above the lava.
"O" mark - When entering the giant room right
before the tunnel with the fans that leads to the boss
fight, the mark is down in the lava on the left side
as you enter the room. Move to the side with the two
platforms above the lava and fall down on top of the
first platform. Allow Wayne to fall on the west side
of the platform so that he grapples onto the side of
the platform. The further you are to the corner the
better. Look through the pipes on the north side and
this mark will be at the very top in the middle of the
back part. It is almost better to find it by shooting
since it is so hard to see. Try hanging off the other
side without the platforms while moving the camera around
if you want to catch a glimpse of it.
"V" mark - Defeat the two Scorpion Akrid
at the beginning of this mission then get up on top
of the metal crate that was blocking them from the outside
portion. Face the west mountainside and look up on the
snowy mountaintop to the right of the three Trilid hives
to see this mark on the very top of the mountain. To
get a better view, move across the first steel beam
up above and look at the mountain from the rock alcove
on the other side.
"C" mark - Stand near the Spider Vital Suit
at the top of the street after moving up the ramp at
the end of the second area with all the lava pools.
Look off to the lava fall to the northeast. This mark
is on the left side of the top of that lava fall. You
will definitely need a rifle for this one.
"O" mark - At the start of the third area,
if you took the normal way in by going up the ramp,
this mark will be near the middle of the lava fall to
your right (south) upon exiting the tunnel. It is very
hard to see! Facing the bars in front of the lava fall,
stand on the railing on the left side and then face
west to shoot this mark while on foot. It might be easier
to shoot it in a Vital Suit.
"N" mark - Move across the bridge on the
northwest side when you land on the rock portion of
the third area from the street above. This mark will
be up under the metal container with the PTX-140 Vital
Suit inside. Look through the bars at the bottom and
move to the left of the front side and duck to hit it
with your machine gun.
"L" mark - When you first enter the open
area where the two enemy Vital Suits attack - one of
them has two homing lasers - this mark will be on the
very top of the wall above the right tank as you enter
the room from the tunnel. Stand in the far northwest
corner and look toward the southeast wall up above the
tank to see this mark spinning on the highest portion
of the wall up above the tank. It is extremely small.
To hit it, get in a Vital Suit and jump then try to
hit it with a rocket from the VS rocket launcher. Make
sure that the lava bursts in the background are in the
back view as you jump so you can see it better. You
can also try to hit it with a charged shot from the
energy gun while on the ground.
"A" mark - Upon entering the open area right
before the boss fight, get on the first platform on
the side of the lava pool to the left. Fall off the
west end of that platform so that Wayne grapples the
platform then look to the southeast while hanging and
look below the lower platform to see this mark below
the corner closest to the wall.
"O" mark - This is in the same room as the
"A" mark, but it is on a curved steel beam
of the framework across the top of the first area. Move
to the east while keeping your camera to the west and
look up on the left side of the first curved steel beam.
This mark is just as small as the "L" mark
was and you will need to hit it the same way. If you
stand on the north wall and keep your camera to the
south while moving back and forth at around the middle
portion of the wall (below the big pipe) then you should
be able to barely make it out enough to hit it with
a charged shot from the energy gun.
"R" mark - Move down the ramp on the side
of the street at the beginning and blast open the metal
container at the bottom with the GTB-22 suit and the
GTF- 11 suit to find this mark on the left side of the
container while entering.
"A" mark - Look in the first lava pool that
you move by and this mark will be floating above a white
metal crate in the lava.
"I" mark - While falling down the platforms
in the area with Explosive Akrid this mark will be along
the north set of platforms while moving down. It is
on the platform right before the two tanks on the rock
floor at the bottom.
"N" mark - In the tunnel with the Spider
Akrid hives, when you have a choice of two separate
tunnels to drill past, choose the left tunnel and this
mark will be at the very end of the path right before
the dropoff. There is a machine gun and hand grenade
pickup right before you get to it.
"B" mark - Right after the first fight with
the Explosive Spider Akrid, fall to the area ahead and
fight off the Spore Akrid and Dongos and this mark will
be in the left corner of the area with the GTF-11 Vital
Suit.
"O" mark - Hop into the GTF-11 suit and move
further down into the tunnel from the "B"
mark then take the first left. Jump up the platforms
and this mark will be right next to the light on the
floor above.
"W" mark - As you come upon the final Data
Post for this area on the small bridge, look around
the right side of the walkway leading up to the Data
Post to see this mark across from a tank.
"R" mark - After moving down the ramp, grapple
up to the top area where the missile turrets are at
and move to the left side of that ledge. Jump up to
the street above by grappling to the railing then the
mark will be at the edge of the broken section of the
street.
"A" mark - In the room with the Explosive
Akrid and the single enemy Vital Suit, fall down to
the area below where the lava used to be and look against
the west corner.
"I" mark - When you come to the tunnel that
splits into two areas where you can drill, drill through
the left area then jump up to the left ledge once you
turn left again to find this mark to the GTB-22 Vital
Suit.
"B" mark - After dropping down to the tunnel
below the first tunnel, get in the GTF-11 suit and take
the right path. This mark is hidden behind a light right
before you reach the cracked wall that must be drilled
through.
"O" mark - Go back the way you came from
the "B" mark and take the left path. This
mark will be behind the tank on the left side when you
turn around after jumping up the ledges with the Explosive
Spider Akrid.
"N" mark - When you get in the metal room
with Explosive Akrid and Explosive Spider Akrid, get
up on the top platform and get inside the PTX-140 suit.
Use the suit to hover over to the cave entrance high
up on the north side of the wall. When you come to an
area where you need to jump up some ledges this mark
will be above the light at the top next to the two tanks.
Fall down in the hole ahead and backtrack to where you
were.
"W" mark - When the Armored Dongo spins through
the container when entering the room just before the
boss fight, walk into the container that the Armored
Dongo was in and look to the back right side to see
this mark.
"R" mark - Get up on the suspended street
to the left of the four missile turrets. Walk to the
middle of the street and look toward the mountain off
to the southwest side. Facing the southwest, this mark
is below the left lava flow that is cascading down the
very top of the mountain. This mark is extremely hard
to see without the use of a scope from a rifle or plasma
gun, but it is in front of the bottom portion of that
lava flow.
"A" mark - While moving past the lava pool
in the middle of the Nevec warzone in the volcano area,
this mark will be in a crevice along the west side of
the mountain below the street. You will need to look
up below the street to the left (west) while moving
by the lava pool to see this on the side of the rocky
wall below. This is right up above the trench where
the Trilids were flying around a Spider VS in the last
mission.
"I" mark - When moving down the platforms
after moving down the ramp where the lava drained jump
down to the platform with the plasma rifle. Look off
the edge to see a single explosive barrel on the side
of a platform. Fall down to that platform. The east
wall will have an orange seal against the side of the
wall along with a small ledge that you can grapple to
and stand on. Grapple to that ledge then shoot the orange
seal to reveal a hidden pathway in the back. Look down
into the lit up hole to see this mark.
"N" mark - This is hidden underneath the
very first GTF-11 Vital Suit that you find after dropping
down from the first tunnel. This is actually the second
GTF-11 suit if you took the hidden passage.
"B" mark - Get in the PTX-140 Vital Suit
on the second floor of the room with several Explosive
Akrid and Explosive Spider Akrid and hover over to the
high entrance on the north wall that leads back to the
cave. Right before the hole that leads back to the cave
where you just were, look up on the metal plated wall
to see this mark at the top left edge. It will be small
and hidden in the shadows.
"O" mark - While facing the container that
contains the PTX-140 suit described in the "B"
mark, get on top of the metal container and stand in
the back left (east) corner while on top. Look to the
northwest and rotate the camera up to the first steel
beam on the left up above. This mark is on the far corner
of that steel beam. If you have a rifle or a plasma
gun then use the scope on either of them to see it and
shoot it. If you don't then get in the PTX-140 suit
and jump then shoot it. You will not be able to see
it without performing one of these two methods.
"W" mark - This is at the top of the Giant
Spider boss room, but you must get it before falling
to the bottom floor to fight the boss. Stand on the
ledge up above the boss room after shooting the Akrid
seal and look directly up toward the big circular object
on the ceiling. This mark is on the right side of the
portion that faces you as you move through the Akrid
seal. It is floating next to one of the steel beams
supporting the circular object. If you happen to fall
then let the boss kill you and you will start back on
the ledge.
(Keep in mind that if you can make it all the way to
the checkpoint at the bottom of the second lava room
(on the ramp to the bottom), you can backtrack all the
way to the first area and not have to worry about any
enemy Vital Suits. All of the tanks filled with thermal
energy will respawn and the target marks will still
be there. There will only be some Nevec soldiers at
the beginning of the area. Jump off the bridge and run
all the way to the second lava room if the area becomes
too intense. Roll a bunch!)
"O" mark - Move or jump off the street that
you start on and this mark will be between two tanks
below. Go toward the tower with the two platforms right
before you reach the lava pool and this mark will be
up on the wall behind the two tanks near that tower.
The two tanks are below a high up street. Grapple to
the very top of the rock wall to see this mark on a
ledge up above the two tanks. It is closer to the right
tank. You can stand up on the side of the rock wall
in a way while grappling, though not very well.
"I" mark - Move to the other side of the
lava in the middle of the rocky area then look down
where the lava fall is flowing. Facing the lava fall,
this mark is on the left side. It is half submerged
in the lava pool, and very close to the lava fall. Move
to the area below the last few metal towers and shoot
it from there. You can easily see the top portion from
the left side, below the towers.
"A" mark - Right before entering the building
after moving up the hill by the two towers described
in the "I" mark, run to the north while up
against the railing in front of the entrance and look
up on the very top of the mountain wall to see this
mark.
"B" mark - In the first room with the explosive
Akrid, this mark is up on south ramp where the lava
used to flow out from the side of the building. Grapple
over to it then grapple up to the top portion and shoot
it while falling.
"R" mark - Beside the first Spider VS that
you come across, fall off the edge of the cliff to the
north and into the lava trench. Allow Wayne to grapple
to the top of the rock cliff. Lower yourself down toward
the lava and look toward the east side of the pool to
find this mark half submerged in lava inside of the
pool. Make sure you wipe out all of the Spider Akrid
in the room before trying this.
"W" mark - In the room where both Armored
Dongos roll out of the metal containers, stand in front
of the right container. This mark is in between the
right container and pillar to the left of it. You have
to face the corner and move past it until you catch
a glimpse of the mark then shoot it from the extremely
small space in between the pillar and the container.
"N" mark - This is actually in the same room
as the "W" mark and it's on the same side,
but it is at the very top of the wall on the long beam
that extends across the middle of the room. Jump to
the furthest of the three beams across from the two
tanks above the two metal containers. Stand on the left
(east) side of the furthest beam - get up on the concrete
extension connecting to it. Look up toward the long
beam extending across the top walls and this mark will
be on the furthest side to the south above where the
two tanks are. You'll need a plasma gun and you will
need to zoom in and fire at the furthest side of that
middle beam in order to hit this mark. Even with the
plasma gun, you will only see the tiniest fraction of
the left side of this mark while standing against the
far east side. Watch for the slightest motion to see
it spinning. You may actually want to try getting closer
to it by getting on the other beams. Either way, you'll
barely see it. It is possible to hit it with a machine
gun if you stand on the far east side of the first beam,
but you'll likely be shooting blindly.
"B" mark - At the starting, drop to the area
with the Scorpions below and this mark will be next
to the rocks covering the left door.
"L" mark - When you drop down into the tunnel
through the hole that the Wasps fly out of, go straight
down the tunnel and this mark will be to the left of
a fallen tank.
"I" mark - Upon dropping down to the large
area with the Armored Chryatis, from the tunnel described
in "L" mark, while still on the upper portion
of the street, drop down the right side and look for
the first light below. This mark will be between the
light and the wall. This light is next to the hidden
Spider VS.
"Z" mark - Once you reach the PTX-140 Vital
Suit at the bottom of either building you drop down,
face the front of the suit and jump on top of the platform
to the left to find this mark to the right of the right
light.
"Z" mark - After the first boss and the cutscene
that follows, this mark will be on top of the stack
of crates behind the first Data Post that you come to
when starting in the tunnel.
"A" mark - In the room after fighting with
all the Akrid and Nevec soldiers you'll eventually walk
out onto a bridge. Look to the right platform to see
the final Data Post in this level on some crates. This
mark is at the corner of that platform. Make sure to
shoot it before falling to the area with all the Vital
Suits below.
"R" mark - Get on top of the stack of crates
at the southwest end of the area with tons of Vital
Suits and this mark will be on the southeast crate on
the corner.
"D" mark - While still on the crates described
for mark "R", walk to the middle, face the
east and look below to find the first Spider Vital Suit
closest to you below. This mark is in front of the east
most column supporting the beams around the Spider VS.
"B" mark - When you first start out, jump
to the floor below with the Scorpions then blast through
the gate blocking the way to the tunnel on the right
side. This mark will be in between the right wall and
a piece of wall in front of the next gate. This is to
the right of a fallen tank.
"I" mark - Drop down the hole that the wasps
fly out of and move down the tunnel directly ahead.
To the right of the fallen tank and in the back, you
will find this mark behind a rock.
"R" mark - This is in the area with the Armored
Chryatis. Facing the entrance with the PTX-140 suit
and Data Post on the roof, destroy the truck in the
way and move behind the area in between the right side
of the entrance and building to the right and shoot
the black tanks. The mark will be between the wall and
a building on the right side.
"D" mark - When you drop down to the area
with the Armored Chryatis, walk to the northwest portion
of the buildings in the back of the area to find this
mark up on the right side of a building. This is next
to the right dropoff that takes you further underground
and to the right of the building mentioned in the "R"
mark description.
"L" mark - After the first boss fight and
mid-stage cutscene, take the left tunnel and enter the
big room where the Akrid and Nevec soldiers are fighting.
Get up on the platform with the metal container with
the PTX-140 suit inside. This mark will be in the back
left corner of the container when it is opened. The
container also has a Trilid hive on the right outer
side.
"Z" mark - Look for the Data Post on top
of the crates on the back left (northwest) portion of
the room with the Akrid and Nevec soldiers. This mark
will be behind the crates and between some item pickups.
"Z" mark - This mark is in a corner to the
right of the right (northeast) exit on the second floor
of the room with the Nevec soldiers and Akrid. There
is a gatling gun pickup right by it.
"A" mark - Get on the red rooftop housing
the Spider Vital Suits when you drop to the area with
several empty VS suits and this mark will be in the
middle portion of the roof. Use a PTX-140 suit or the
crates to the side to get up to the roof.
"B" mark - This is on top of the doorway
that Wayne has his back to when starting this mission.
Get in the GTF-11 Vital Suit and look toward the right
side of the top while facing the doorway.
"I" mark - Right before you drop into the
hole that the Wasps fly out of, shoot the loose boulders
behind the hole then jump over to that side. This mark
will be beneath the second boulder from the left
"R" mark - In the area with the Armored Chryatis,
get up on top of the entrance with the Data Post and
the PTX-140 suit. Look on the wall above the PTX-140
suit to see a ledge with a light up on it. This mark
is to the right of the light on that ledge. The actual
brightness of the light makes it hard to see, but get
in the Vital Suit and hover around the area in front
of the ledge to see it.
"D" mark - Move underground through one of
the holes in the area with the Armored Chryatis and
stand in front of the PTX-140 suit down below next to
the two tanks. This mark is in an alcove on a very small
ledge up above this suit. Jump up on top of the left
platform beside the Vital Suit then jump to the ledge
with the small doorway right next to the current ledge.
"Z" mark - After the first boss fight and
the cutscene that follows, move down the tunnel and
take the left path. When you come to the side of the
tunnel off to the left with the standard Vital Suit
armed with the missile launcher, get in the suit and
this mark will be right underneath it.
"L" mark - Make your way up to the metal
container with the PTX-140 suit inside up on the second
floor when you enter the area with the Nevec soldiers
and Akrid. Stand in front of the door to the metal container
and look in between the left wall and the left side
of the container to see this mark.
"Z" mark - While in the same place as the
above "L" mark, get inside of the PTX-140
suit then jump on top of the metal container. Stand
next to the pipe on the front corner of the container
then jump and hover to see this mark on top of the three
pipes that connect to the ceiling on the wall next to
the container.
"A" mark - In the big room with several Vital
Suits go to the southwest corner of the big stack of
crates. Stand near the red metal piece that is supporting
the stack of crates and squat then move back a bit to
see this mark between the red metal pieces and below
the crates.
"I" mark - In the tunnel that holds the first
PTX-140 Vital Suit, this mark is behind the strip of
metal that hangs from the roof beside the hole above
the PTX-140 suit. While approaching it from blasting
the doors down while moving down the tunnel it will
be on the left.
"B" mark - In the big area with all the wrecked
buildings (with the two Armored Chryatis'), get up on
the rooftop of the tunnel with the PTX-140 suit on top
then face to the east while standing next to the south
wall. This mark will be on the far wall that is in front
of the hole that you dropped into this area from. You
should see it spinning next to a giant column that supports
the top wall.
"R" mark - This mark is to the right side
of a light near the very top of the wall that you must
stand beside to see the "B" mark. Move far
away from the rooftop of the tunnel where the PTX-140
Vital Suit is and look toward the ledge with the light
up on it to see the mark spinning to the right of the
light. If you stand on the top of the tunnel then jump
and hover with a PTX-140 suit, you should be able to
shoot it with a gatling gun.
"D" mark - While on the rooftop of the building
with the PTX-140 suit, face the northeast and look on
the very top of the building on the far northeast wall
to see this mark spinning up above the right side of
the building. You can fly over to the northeast side
and land on the ledge with the Nevec metal shutter,
turn to the north, and jump while in a PTX-140 suit
for a perfect view of this mark.
"Z" mark - After the first boss fight, upon
making it to the bridge where the two Vital Suits on
the truck attack after the room with the several Nevec
soldiers and Armored Chryatis, this mark will be on
the right side of the wall below the bridge while looking
off the right side of the bridge. You can easily shoot
this from the floor below, just look up at the bottom
side of the bridge to see it.
"L" mark - When you reach the room with several
empty Vital Suits, walk over to the group of GTF-11
Vital Suits on the east side. While facing the front
of the row, this mark will be below the third Vital
Suit from the right on the back row. Get in the Vital
Suit and move it to reveal the mark below it.
"A" mark - Walk over to the big stack of
crates in the southeast and stand on the east side while
in a Vital Suit to be able to see this mark through
the red metal piece that is holding up some of the crates
in the middle portion of the crates. You can see it
perfectly while in a Vital Suit. To shoot it, stand
on top of the visible portion of the red metal piece
beside the crate up above then duck in the far corner
and shoot it. You have to hit it at the perfect angle
to nab it.
"Z" mark - Jump up on top of the stack of
crates and move to the northwest portion then look for
the Disk Grenade pickup. This mark will be inside of
the crack in between the crates to the east of the Disk
Grenade pickup. Stand on the south side of the crates
just a little ways away from the mark and turn around
then shoot it through the very narrow cracks in the
crates.
"S" mark - Descend to the very bottom of
the chamber and this mark will be in the middle of the
floor.
"T" mark - From where the starting point
is, descend to the platform near the bottom and look
under the platform and this mark will be floating a
few inches away from the bottom of the platform.
"A" mark - From where the starting point
is, fly down to the first platform and look on top of
the ring above the entrance to the dead end tunnel.
"R" mark - Right before you pass through
the first circular hole while ascending, look for a
set of doors with a "NEVEC" logo on them and
this mark will be on the walkway in front of the doors.
"D" mark - After moving through the first
circular hole, look around the top side of the circular
platform to find this next to the wall.
"U" mark - Right before you pass through
the second circular hole while ascending, look for a
set of doors with a "NEVEC" logo on them and
this mark will be on the walkway in front of the doors.
"S" mark - This mark is right above the doors
described for the "U" mark.
"T" mark - After passing through the second
circular hole look on the outer circular platform to
find this mark near the wall.
"S" mark - Descend to the very bottom of
the chamber and this mark will be in the middle of the
floor.
"T" mark - From where the starting point
is, descend to the platform near the bottom and look
under the platform. This mark will be floating a few
inches away from the bottom of the platform.
"A" mark - From the starting point, descend
to the platform near the bottom of the chamber and enter
the dead end corridor. This mark will be at the top
of the stack of crates near the left wall in the back.
"R" mark - Right before you pass through
the first circular hole while ascending, look for a
set of doors with a "NEVEC" logo on them and
this mark will be on the walkway in front of the doors.
"D" mark - After moving through the first
circular hole, look around the top side of the circular
platform to find this next to the wall.
"U" mark - Right before you pass through
the second circular hole while ascending, look for a
set of doors with a "NEVEC" logo on them and
this mark will be on the walkway in front of the doors.
"S" mark - Stop at the top of the second
circular platform then look up so that you are facing
the side closest to the exit hole above and that you
are on the side furthest away. Ascend next to the left
wall and you will find this mark about midways on your
way up to the exit hole. This one and the next one blend
in extremely well with the walls.
"T" mark - At the very top of the chamber,
right before you exit, while facing away from the side
closest to the exit hole, look on the left side and
this will be floating next to the wall. This is on the
opposite side from the "S" mark and is just
a little higher.
"S" mark - Descend to the very bottom of
the chamber and this mark will be in the middle of the
floor.
"T" mark - From the starting point, descend
to the platform near the bottom of the chamber and enter
the dead end corridor. This mark is inside of the bottom
crate at the top of the staircase in the back. Shoot
the crate to get it.
"A" mark - Start from the platform outside
of the dead end corridor mentioned in the "T"
mark description and move upwards until you are almost
at the Nevec door. Stop and look to the left to see
this mark floating against the wall. You can look on
the wall across from the Nevec door to see the shadow
of this mark if you have problems seeing it.
"R" mark - This mark is floating near the
wall just a little ways above the first circular platform
that you must ascend through. It is on the left wall
while in the same position as the above "A"
mark. Look on the wall without the lights to see its
shadow like the "A" mark.
"D" mark - This mark is nearly right across
from the bottom platform with the second Nevec door.
Stay against the west wall and look toward the wall
with no lights across from the Nevec door to see it
clearly.
"U" mark - Look in front of the second Nevec
door right below the second circular platform.
"S" mark - This mark is on the southeast
side of the east wall while moving past the second circular
platform.
"T" mark - A little ways below the exit,
look against the west wall to see this mark before leaving
for the final boss fight.
"S" mark - Just like on the other difficulties,
descend to the very bottom of the chamber and this will
be in the middle of the floor.
"U" mark - Right before you make it to the
second circular platform on your way up, this mark will
be in front of the Nevec door below that circular platform.
"S" mark - Look in the middle portion of
the east wall before moving out through the hole in
the roof to face the boss to find this mark. Watch for
it to spin. It's a little ways below the hole (about
halfway), not directly below it.
The rest of the marks for Mission 11 must be found
during the boss fight with Isenburg:
"R" mark - Descend to the area covered with
snow at the very bottom of the tower and fly to the
south side of the snowy area to find this mark by the
side of the wall. It stands out fairly well.
"T" mark - This mark takes a lot of work
to find. Go toward the bottom set of spikes and find
the spike on the east side. Move out while still looking
toward that spike (facing west). Set your VS to a constant
descend so that it will descend as far as it can go
and inch your way to the left without touching the camera.
Watch the searchlight rays on the left side and you
will see a dot pass by them eventually - that dot is
the mark! It might take quite a bit of moving to the
left, but it should show itself if you watch closely.
You can also see it when it passes by the tower but
it is a bit harder to see that way. This one takes a
bunch of searching to find even when you know where
it is since it is about in the middle between the invisible
wall in the back of you and up above the tower walls
up ahead. The most important aspect is to face west
as you move to the left. Make sure to turn off the descent
when you fly toward it to shoot it or it might get lost
again.
"T" mark - Notice the white spike-like platforms
that protrude from the middle tower. This mark will
be on the middle set of white spikes on the east side.
Face west and look for that spike to shoot it.
"A" mark - Ascend up to the very top set
of white spikes and look below the spike that is facing
to the west. Move away from the spike and face east
then look up under the spike to see this mark in front
of the framework holding it up.
"D" mark - While still at the spike described
in "A" mark and while still facing east, fly
away from the spike, but keep it in view. Fly backward
(heading west) until you can't fly anymore. Make sure
to stay all the way at the top. Move to the right very
slowly while looking toward the tower in the background
and this mark will pass by your view. This mark is in
the far west, and south just a bit, but you need the
light of the tower to see it.
|