| BASICS
Default Control Setup
A - Jump/Move Up Grapple Rope (when hanging)
X - Anchor (Grapple)/Release Grapple (when hanging)
Y - Change Weapon
B - Action/Pick up weapon/Melee attack (with
equipped weapon)
LT - Throw Grenade
LB - Turn left 90 degrees
RT - Fire weapon
RB - Turn right 90 degrees
Left Analog - Move
Left Analog (push) - Crawl/Crouch
Right Analog - Move Camera
Right Analog (push) - Reload
Start - Display Pause Menu
Back - Pull Up Map/PDA
D-pad Up - Zoom
D-pad Down - Zoom
D-pad Left - Turn On/Off Light
D-pad Right - Turn On/Off Light
By pressing the X button when the targeting crosshair
turns green, Wayne will be able to grapple up to the
targeted obstacle. Grappling will help Wayne to reach
high ledges and climb up the side of obstacles. The
grapple should be substituted for a jump whenever possible
since it is much quicker and more precise. Wayne will
automatically jump after reaching the end of the grapple
as he is pulled toward his destination.
He can also perform the following grapple attacks when
he has grappled an object or enemy:
X + RT - Grapple and fire weapon
X + LT - Grapple and toss grenade
Wayne can evade an oncoming attack by inputting the
following command:
Push in on Left Analog + Press Any Direction with Left
Analog + A
Evading is extremely important in later stages and
will sometimes save you from certain defeat while on
foot and up against bosses or other enemies. Wayne is
basically invincible during the actual rolling animation
and this should be taken extreme advantage of while
fighting a boss. Just about every boss can be fought
on foot if this skill is mastered along with the precise
timing of when to execute it.
In order for Wayne to survive, he must constantly collect
thermal energy. T-ENG is the orange substance that drops
from killing Akrid among many other methods.
- Harmonizer Life Support
The device attached to Wayne's arm, known as the Harmonizer,
works off of thermal energy and will start to affect
his life gauge if he cannot collect enough thermal energy
to keep it activated. Thermal energy will constantly
drain while Wayne is in the field and will drain even
faster whenever he performs any type of physical action
such as jumping or grappling. In turn, the Harmonizer
will restore Wayne's life gauge if he is harmed while
he has thermal energy. The Harmonizer will immediately
begin to heal Wayne when he takes damage. If Wayne's
life gauge ever falls below the zero mark then Wayne
will automatically die without the ability to recover.
- Vital Suit (VS) use
Vital Suits work off of thermal energy so the T-ENG
gauge will drop even more rapidly while Wayne is piloting
a VS, and will drop at an every faster rate when a VS
performs a special function.
- Replenishing T-ENG
Thermal energy can be found in many different ways
including:
- defeating Akrid, Snow Pirates, NEVEC soldiers, or
VS suits
- seriously damaging a boss
- destroying explosive barrels, vehicles, tanks, Akrid
eggs, etc.
- activating a Data Post
Lost Planet allows you to carry two weapons at a time
with you on your journey. Be sure to take advantage
of this and carry a weapon with heavy firepower and
one long distance weapon at all times. Below is a list
of every firearm in the game along with a ranking of
the amount of damage it deals, its rate of fire, range,
reload time, and the maximum amount of ammo that it
can carry.
Machine Gun
The Machine Gun is Lost Planet's standard weapon. It
holds the most ammo and is the most common so it's very
useful. The rate of fire can severely damage a normal
enemy quickly if targeted properly.
Damage: **
Rate of fire: *****
Range: ***
Reload time: ****
Maximum Ammo: 999 shots
Rifle
As usual, the rifle is perfect for long distance attacks
and it packs quite a punch with each shot. Use D-pad
Up to zoom in and D-pad Down to zoom out with the scope
to get a perfect shot.
Damage: ****
Rate of fire: ***
Range: *****
Reload time: ***
Maximum Ammo: 50 shots
Shotgun
The shotgun is excellent for close range shooting,
but it lacks range. This weapon is also good for groups
of enemies since the shots will spread quite a bit.
A point blank shot with a shotgun will finish almost
any normal enemy, seriously damage bigger enemies, or
take a good amount from bosses.
Damage: ****
Rate of fire: ***
Range: *
Reload time: **
Maximum Ammo: 100 shots
Energy Gun
The energy gun is powered by T-ENG, so you will use
up your precious thermal energy for each shot. The rate
of fire is very poor, the normal damage is not that
great, and the shots are slow. Fortunately, it can be
charged for a higher damage rate.
Damage: ****
Rate of fire: **
Range: ***
Reload time: N/A
Maximum Ammo: Depends on the T-ENG gauge
Plasma Gun
This is the best weapon to have while on foot. Each
shot only takes 5 units of T-ENG from the T-ENG gauge
and the shot is just as powerful as a rifle shot. Like
the rifle, this gun has a scope that will allow you
to zoom (d-pad up or down) for precision shots. Unlike
the rifle, this weapon makes a good close range weapon
as well. Most of the time it is best to substitute this
for the machine gun when a plasmas gun is found.
Damage: ****
Rate of fire: ***
Range: *****
Reload time: N/A
Maximum Ammo: Depends on the T-ENG gauge
Rocket Launcher
Each shot from the rocket launcher will put some serious
hurt on normal enemies and bosses. Its powerful explosion
will cause a shelled enemy to stagger from the force
of the hit. The main fault is that it requires quite
a bit of time to reload and must be reloaded manually
after each shot. One good aspect of reloading is that
you can still move during the reloading animation.
Damage: *****
Rate of fire: *
Range: *****
Reload time: *
Maximum Ammo: 20
Hand Grenades
These are standard grenades that will explode within
a few seconds of being thrown and sometimes explode
on contact. The grenade will bounce off of walls when
thrown towards a wall, which can help to damage enemies
below while on ledge - throw it toward a wall and have
it bounce below.
Damage: ***
Range: ***
Maximum Ammo: 20
Disc Grenades
The Disc Grenade is thrown much like a frisbee and
will explode upon contact. This will travel the furthest
of any of the grenades and these are much more accurate
than the other types.
Damage: ***
Range: ****
Maximum Ammo: 20
Gum Grenades
This grenade will stick to whatever surface it is thrown
toward or stuck to. These work very well in conjunction
with the grapple. Grapple an object then stick a gum
grenade on it as you jump off. The only flaw is that
the gum grenade will not bounce, so it will remain where
it lands and not travel a great distance. It seems to
take longer to detonate than the standard grenade
as well.
Damage: ***
Range: **
Maximum Ammo: 20
Plasma Grenades
Plasma Grenades will send out an electrical charge
that will stun any enemy that happens to be in the area
when it goes off for a couple of seconds. These are
very damaging when used against enemy Vital Suits. Throw
a plasma grenade then shoot the Vital Suit with a rocket
launcher while it is stunned. These can also be bounced
off of walls much like the hand grenade.
Damage: ** (Normal Enemy) **** (Vital Suit)
Range: ***
Maximum Ammo: 20
Keep in mind that while using any of the below weapons
on foot, the reload time will be extremely poor and
will require Wayne to stand still. Wayne will also only
be able to carry one at a time and he will be forced
to drop his current VS weapon while switching to another
weapon in his arsenal. Being so big, these weapons also
make some damaging melee attacks when the B button is
pressed - hitting an enemy with the butt end of any
of these heavy-duty weapons while on foot always seems
to bring a smile to my face though. Also, be sure to
take note that you can attach or detach any of these
VS weapons while standing next to a Vital Suit by tapping
the B button on either side (except for the GTF-13M
model that can only be equipped on one side).
EM Laser
The EM Laser can be charged just like the normal VS
laser gun, but it will take off more damage and will
stun any enemy that it hits. This weapon will momentarily
stun any normal enemy that is hit with the blast. Get
two of these on your Vital Suit and you will be an unstoppable
killing machine. They also work great in conjunction
with a rocket launcher or grenade launcher - shoot a
laser blast to stun the enemy then hit them with the
other weapon. Think of
this weapon as a Laser Gun +.
Damage: *****
Rate of fire: **
Range: **
Reload time: N/A
Maximum Ammo: Depends on the T-ENG gauge
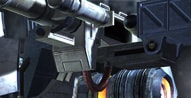
Gatling Gun
This is the standard weapon for any VS. Most Vital
Suits will already come equipped with a gatling gun.
The number of bullets that can be fired is rather impressive
and the reload time is good. Target an enemy with dual
machine guns in a weak spot to really lay down some
constant hurt.
Damage: **
Rate of fire: *****
Range: ***
Reload time: ***
Maximum Ammo: 999 shots
Grenade Launcher
This weapon can be extremely destructive if your aim
is good. The grenade launched out will explode upon
contact and hit the target in multiple areas for some
extreme damage, even more than the other VS weapons.
The only bad aspect of the grenade launcher is that
it is hard to aim while in a VS. The aiming seems slightly
off and doesn't fire directly where the crosshair points.
Damage: *****
Rate of fire: ***
Range: ***
Reload time: **
Maximum Ammo: 20
Homing Laser
The homing laser is another weapon that works off of
thermal energy. Much like the name implies, it will
home in on any heat source on an enemy and when fired,
a group of several lasers will be launched directly
toward the targeted heat source. Charge the weapon to
lock on to the target.
Damage: ****
Rate of fire: *
Range: ***
Reload time: N/A
Maximum Ammo: Depends on the T-ENG gauge
Laser Gun
The laser gun feeds off of your T-ENG gauge, so it
has infinite ammo and never needs to be reloaded as
long as your thermal energy last. It can be charged
for greater damage and takes quite a bit when fully
charged.
Damage: ****
Rate of fire: **
Range: **
Reload time: N/A
Maximum Ammo: Depends on the T-ENG gauge
Missile Launcher
Some Vital Suits and Turrets come equipped with this
weapon and this particular weapon may not be removed
from the Vital Suit or Turret. These only require a
reload after 4 shots have been fired unlike the standard
rocket launcher, which must be reloaded for every shot
fired.
Damage: *****
Rate of fire: ***
Range: *****
Reload time: **
Maximum Ammo: 24 shots
VS Shotgun
The VS Shotgun can be one of the most damaging weapons
on your VS, even more damaging than the rocket launcher
depending on how close you are to your opponent. Dual
wield two of these on a boss and that boss will usually
fall very quickly.
Damage: *****
Rate of fire: ***
Range: **
Reload time: **
Maximum Ammo: 100 shots
VS Rocket Launcher
This weapon basically remains the same as the normal
rocket launcher with all the good qualities and downfalls,
though at least you'll be in a VS suit while reloading.
The main difference is that the VS Rocket Launcher takes
off more than the standard rocket launcher.
Damage: *****
Rate of fire: *
Range: *****
Reload time: *
Maximum Ammo: 20
Vital Suits play a very important role as the game
continues to progress. Many of the later boss battles
nearly require you to have some sort of Vital Suit in
order to survive an enemies' attack and damage them.
Below is a list of all the Vital Suits along with a
bit of ranking and a special function list for each
one.
GTT-01 (Standard)
These are only found in the first few stages for the
most part and really have no special function whatsoever
except for the very basics, such as jumping and the
ability to load weapons on each side. When found in
later levels, these Vital Suits are nothing more than
walking coffins when up against the later enemies unless
they are equipped with some heavy firepower.
Movement: *
Armor: **
Special Functions:
N/A
GTF-11
The GTF-11 suit is the most common Vital Suit and gives
you the most basic of special functions. The movement
of the suit is lacking compared to later models, but
this suit will help out in boss fights since you can
use its hovering function to avoid oncoming attacks.
The special function dash is not very useful at all.
Movement: **
Armor: ***
Special Function:
Hover: A after jumping. A again to cancel hovering.
Dash: Press a direction with the Left Analog then press
Y to dash in that
direction.
GTF-13M
This Vital Suit is the weakest of all the Vital Suits
and will fall fast under heavy firepower, but it makes
up for this with its speed when transformed into a bike.
This particular VS can only be equipped with one gun
unlike the rest.
Movement: ***
Armor: *
Special Function:
Transform into bike: Y.
GTF-13M Bike Mode
Special Functions:
Accelerate: A
Decelerate/Reverse: X
Transform to VS: Y
Dashing Jump: LB
GTB-22
One of the most agile Vital Suits, this will allow
the user to double jump and perform a long jump to reach
a great distance. The Vital Suit is also fast unlike
the prior models and the response for commands is much
greater. The top portion pivots allowing for faster
turns when compared to most other models.
Movement: ****
Armor: **
Special Functions:
Double Jump: A after a normal jump (not a long jump)
Long Jump: Y. Y again to cancel.
Smoke Screen: X
GAB-25M (Spider)
The Spider VS is the most unique of all the VS suits
thanks to its own unique weapons and overall movement
style. The weapons cannot be detached or reloaded. The
laser vulcan runs off of thermal energy and the cannon
always comes loaded with 30 shots. The suit has four
legs that it uses to move around on and these legs will
actually allow it to crawl along some slopes where a
standard VS would have to jump. This VS is incredibly
slow while jumping and just as slow while hovering which
can lead to problems while using it during a boss fight.
On the flip side, it is built to last and can withstand
severe damage. Much like the GTF-13M this VS can transform
into a vehicle as well. The vehicle mode gives up the
laser vulcan for a drill.
Movement: **
Armor: *****
Special Functions:
Laser Vulcan: RT
Cannon: LT
Hover: A after jumping
Slide: Y while moving
Transform to Drill: Y
GAB-25M Drill Mode
Movement: ***
Armor: *****
Special Functions:
Drill: RT
Cannon: LT
Drilling Dash: X
Transform to VS: Y
PTX-140
This VS is the most agile of all the Vital Suits. It
feels much like controlling the main character and the
response time is great. The normal jump outshines most
of the rest of the Vital Suits and is second only to
the GTB-22 model with its long and double jump.
Movement: *****
Armor: ***
Special Functions:
Hover: A after jumping. A again to cancel.
Slide: Y while moving
Saw Slice: X
L-P-9999
The L-P-9999 is Wayne's normal VS under the full potential
of his Harmonizer. This VS can only be used in the final
mission of the game and has a big advantage over all
the others with the ability to fly.
Movement: *****
Armor: *****
Special Functions:
Ascend: Y to ascend. Y again to cancel.
Descend: A to descend. A again to cancel.
Laser Vulcan: X
EMF Blade: RT (blade); LT (blade shots)
Big EMF Blade: Charge RT then release (horizontal);
Charge LT then release (vertical)
|