| WALKTHROUGH
- Mission 07 - Caravan Ambush
"NEVEC is on the march, and you must overtake
them. Fight the marching soldiers and make your way
to their intended destination - the rear of the Crimson
Pirate Fortress."
| |
 |
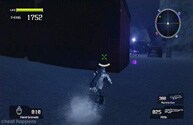
Activate the DATA POST (1/10) for a T-ENG boost. Use
your grapple to climb up on the side of the mountain.
This mountain will let you move all the way across it.
At the very end of the mountain, get off and move around
the right side of the set of metal containers up ahead.
Activate the DATA POST (2/10) near the front of the
container.  Facing the containers, rush over to the right container
and blast the controls on the side to open it. This
will cause all the Nevec soldiers in the area to be
alerted to your location. Get inside of the GTB-22 Vital
Suit in the metal container and rush outside. Blast
the controls to open the other container to find a LASER
GUN, GRENADE LAUNCHER, a VS ROCKET LAUNCHER and basically
every weapon in the game. Make sure to jump out of the
VS suit and get the PLASMA GUN and the ROCKET LAUNCHER.
Choose your favorites for the VS suit then run outside
and hunt down the GTF-13M enemy Vital Suits with your
heavy firepower.
If your VS suit gets destroyed, there are two other
Vital Suits in the metal containers across the snow
field - the right one has a GTF-11 suit with a missile
launcher. Activate the DATA POSTS (3/10) (4/10) near
the other metal containers then continue to the back.
There is yet another GTB-22 VS suit next to the enemy
Vital Suits in the back along with another GTF-11 suit
on a truck further ahead. Both suits are armed with
missile launchers and the GTF-11 has dual missile launcher
on it! You will need all the missiles you can get since
tons of enemy Vital Suits will pour out of the entrance
ahead. Make the most out of whatever rockets and Vital
Suits (a few more suits are spread about up ahead) you
can get and keep reloading and firing. When the carnage
is over, walk into the corridor where the enemy Vital
Suits came from then enter the mountain path off to
the side at the end for a cutscene. 
 |
|
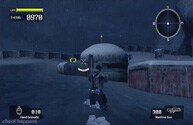
You'll start in a snowfield that you were at in Mission
4 and unfortunately Wayne has decided to ditch all those
weapons you had. Grab the MACHINE GUN on the middle
building then activate the DATA POST (5/10) on top.
 Walk to the back of the camp and collect the ROCKET
LAUNCHER and HAND GRENADES on the crate. There is really
no reason to do this since you'll find a better suit
the other way but if you want the homing missile launcher
move even further back to find several tanks for some
extra T-ENG and a GTF-11 Vital Suit with a homing missile
launcher.
  There is also an extra GATLING GUN to the side of it.
Continue ahead to where the light from the Data Post
is pointing. Grab the ROCKET LAUNCHER and hop into the
PTX-140 suit right before you exit the barriers to the
snowfield. Pick up the GATLING GUN on your way past
the barrier as well. Two Spore Akrid will pop up from
the snow in the back and two Chryatis will attack right
near you. You'll run across a VS ROCKET LAUNCHER on
your way toward the Spore Akrid. Activate the DATA POST
(6/10) next to the Spores when you kill them and take
note of the PTX-140 VS suit to the side. You may need
that in just a bit. Keep in mind that you can hover
over all the enemies in this snowfield and get to the
building in the back very quickly if the enemies become
too overwhelming.
| |
 |
Continue to where the Data Post is pointing and an
Armored Chryatis will jump out of the snow. These enemies
have the exact same weak points as the normal Chryatis
but you will need to blast through their heavy armor
first to expose their heat sources. These things can
be a real pain when fighting them with other Chryatis
thanks to their incredibly aggressive nature. They will
attack the same way as a normal Chryatis but they also
have a have lunge attack where they will fly straight
toward you. You'll find another PTX-140 suit around
the area with the Armored Chryatis. Activate the new
DATA POST (7/10) then grab the PLASMA GUN next to it.
Continue toward the location where the light from the
data post points. Armored Chryatis and normal Chryatis
will attack while moving toward the next destination.
Enemy Vital Suits will be waiting against the wall of
the building up ahead. Lead the Chryatis right into
the VS suits if the battles become too overwhelming
and head for the stairs. Go up the stairs and activate
the DATA POST (8/10) then enter the door at the top.

Keep in mind that there are other Data Posts in the
snowfield other than the ones that I have listed, but
they are far out of your way and not worth the effort
unless you are searching for Target Marks.
Grab the HAND GRENADES then continue down the corridor.
Kill the lone guard up ahead then move down the stairs
against the far right railing outside. Collect the MACHINE
GUN from the top of the crate then continue to the left.
Drop down the hole to land on the next platform and
activate the DATA POST (9/10) below and find a PLASMA
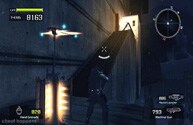
GUN further down. You can either move across the ledge
where most of the bots are patrolling or use your grapple
to get up on top of the ledges above to avoid the Bots
up ahead. If any of the red beams from the flying Bots
up ahead hit you then the flying Bots in the nearby
area will attack. You must wait until their middle portion
opens then fire at them as they try to hit you with
a laser blast. 
| |
 |
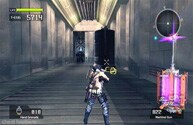
You'll have to do some fancy maneuvering with jumps
and ducking to get past the Bots' lasers. There is a
trench on the right side that you can duck into. The
missile turrets on the left side will start to shoot
at you once you get about halfway across the ledges.
Run over to the area where they are and go through the
small doorway below them. Enter the left room and fight
off the Nevec soldiers then take out the missile turrets.
There is a ROCKET LAUNCHER and PLASMA GUN available
in the room. Walk outside and shoot the metal shutter
on the right wall. Grapple up to that room and activate
the DATA POST (10/10) to the right.  Grab the MACHINE GUN and DISC GRENADES if needed then
get in the GTF-11 VS suit in the back. The elevator
will automatically take you up.
This boss will have a constant group of four probes
following him that shoot lasers. Use either a VS shotgun
or the gatling gun to destroy the probes then shoot
the Spider VS in the midsection with a rocket launcher
or shotgun. The probes fall easily to just about any
weapon. One good thing to do is to arm your VS with
two shotguns and double blast him. He won't last long
that way. The Spider VS must be hit with a heavy hitting
weapon (rocket launcher or shotgun) or it will only
take very minimal damage. He will mainly try to hit
your VS with constant plasma rounds from his Spider
VS or fire his cannon. He will sometimes jump to the
crates around the area while attacking. When he stops
and transforms into a bike, jump to avoid him as he
tries to ram you. Don't hit him while he is transformed
since it will take little or no damage from him.
The main annoyance of this battle is the constant probe
spawning. They will spill out lasers constantly. If
the boss destroys your VS then grab a rocket launcher
from off of one of the crates or get a VS weapon and
finish it off. It's not really all that bad on foot
but the probes can make the battle hard without a VS
since you can't dual wield weapons.
This boss will either be the most challenging boss
on extreme or one of the easier bosses you'll face.
If you choose to fight him on foot then get ready for
one of the most extreme battles of your journey through
this mode, though it can be done with enough patience
and skill!
Before making it to the Spider VS, you need to make
it to the area with the flying laser bots with about
2000+ T-ENG to survive. Grab a plasma gun in the snowfield
by the Chryatis corpse along the way to the building
or you can use the one on the very bottom platform inside
of the facility. I would recommend getting the one in
the snowfield though. Stand on the very top platform
on the opposite side of the platform with the turrets
and find the enemy VS then zoom in with the plasma rifle
and shoot at the very top of the enemy VS. It will take
about 6 shots and the Vital Suit will be nearly destroyed
when the pilot falls out, but it really doesn't matter
since all you need to do is to make it to the boss checkpoint
with that Vital Suit in any condition. Travel over to
the other side after sniping the soldier in the VS and
get inside of the Vital Suit. Blow open the gate like
normal and jump into the area above. You must make it
to the actual boss with the Vital Suit! If you can make
it to him with the VS, let him kill you and you will
start at the checkpoint prior to him with the Vital
Suit at full life. Even if Wayne is stumbling out of
the VS from lack of thermal energy, as long as you make
it to the boss, you will start at the checkpoint with
the Vital Suit. Dual wield both VS shotguns found around
the boss area during the boss battle and defeat the
boss like normal. He'll go down very quickly.
If you choose to fight him without the Vital Suit then
you will need to take cover behind the metal crates
very often. You'll need to bring a machine gun to destroy
the probes that hover above him. The probes will drop
T-ENG that will have to collect in order to survive
the battle. Fire at his middle portion or the small
portion below his middle portion where his legs are
connected. Use a rocket launcher and hand grenades.
Throw hand grenades often when he moves around the corner
of the box. To avoid his ram while in tank form, you
will need to immediately grapple up to a crate. The
moment you see him transform, you better grapple or
he will hit you. You can sometimes run to get away from
his plasma blasts, but this doesn't always work. Hide
behind a crate when he starts firing plasma shots. His
cannon can be dodged by rolling shortly before each
shot explodes when it hits the ground. Make sure to
get behind something while reloading, reload while jumping,
shoot while jumping, and do everything in your power
to cut down on recovery time. The fight is actually
kind of fun while on foot, but it is the most intense
battle you will face in this game.
|