| WALKTHROUGH
- Mission 09 - Thermal Energy Deposit
"Investigate the source of the large thermal
energy signature underground. Return to the canyon and
find a way to get down below. At the bottom awaits the
thermal energy source."
Time to backtrack through one of the volcano areas
from the prior stage, only this time with Nevec soldiers.
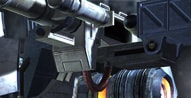
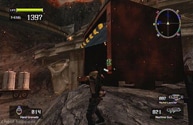
Grab the MACHINE GUN in between the two trucks.  Nevec soldiers will be lurking down the street ahead.
Toss grenades and shoot them with the machine gun. Pick
up the HAND GRENADES past one of the trucks then shoot
down the fence and tanks behind it if the Nevec soldiers
don't blow it down first. Make sure to single out the
one with the rocket launcher and take him down quickly.
Activate the DATA POST (1/5) and grab the ROCKET LAUNCHER
on top of the crates. Run down the ramp to the left
after activating the data post.
Nevec soldiers will be lurking down the street ahead.
Toss grenades and shoot them with the machine gun. Pick
up the HAND GRENADES past one of the trucks then shoot
down the fence and tanks behind it if the Nevec soldiers
don't blow it down first. Make sure to single out the
one with the rocket launcher and take him down quickly.
Activate the DATA POST (1/5) and grab the ROCKET LAUNCHER
on top of the crates. Run down the ramp to the left
after activating the data post.
 |
|
This next part can be incredibly difficult with the
sheer amount of firepower being launched your way. You
could actually jump off the far side of the current
street that you are on and bypass a great deal of the
carnage below but you'll miss out on the Vital Suits.
One way to make this part easier is stand on top of
the crates where the Rocket Launcher is and destroy
all four missile turrets off to the side. You will need
to zoom in to see them. You need to have a plasma gun
(if a soldier drops one) and a rocket launcher while
you're on foot. Throw grenades often at groups of soldiers
to defeat them quickly. Start by moving down the ramp
and blasting the soldiers along the way. Don't stop
to fire at the Vital Suits if they fire at you from
the background. You need to get down to the metal container
at the bottom and get inside of a Vital Suit! There
is a PTX-140 suit and a GTB-22 suit inside of the container
and you will need both of these.
Try to blast as many enemy Vital Suits as you can from
the safety of the container. Move around the outside
area and blast the Nevec soldiers with the gatling gun
and the rocket launcher (for groups). The soldiers are
actually just as bad as the enemy Vitals Suits at this
part because of the incredible amount of them. Use rockets
to defeat them when they are in groups.
Activate the DATA POST (2/5) on top of the crates then
continue along the rock path. An enemy Vital Suit will
be camping out on the metal tower to the right and a
few other Vital Suits will be off to the left in the
background. Use a rocket launcher to get rid of the
VS on the metal tower then move behind the tower to
find a GATLING GUN, HOMING LASER, and a VS ROCKET LAUNCHER.
Use the rocket launcher to destroy the other Vital Suits
in the distance. Be sure to take a rocket launcher with
you and move along the rock path to the left of the
lava pool. One of the VS suits here has a homing laser.
Destroy him quickly with a rocket launcher to prevent
damage. If all else fails, run from him and move past
the tanks in the back then grapple up the side of the
mountain near the towers. Shoot the Nevec soldiers on
the towers and continue to grapple up the mountainside
and you will find a DATA POST (3/5) at the top along
with a tunnel.
| |
 |
Enter the tunnel and blast the Explosive Akrid.
There is an enemy VS in here as well. You can actually
lure the VS near the Explosive Akrid and use them to
damage him. Pick up the HAND GRENADES on the way, the
GATLING GUN in the gap, and the MACHINE GUN near the
fallen soldier on the other side.
Explosive Akrid along with a few Nevec soldiers will
attack in the room ahead. Fall down into the gap where
the lava used to be to find a SHOTGUN then run down
the ramp on the east side to continue. Fire at the Explosive
Akrid in the area past the ramp and the first explosion
should be enough to clear most of the room.
Fall down to the first ledge right below the ramp and
collect the PLASMA GUN then grapple over to the DATA
POST (4/5) and the ROCKET LAUNCHER. There is actually
a secret area if you move down the left side of the
ledge with the Data Post - fall down to the ledge below
and shoot the orange seal on the ledge across from you
to see another room.
Fall down in that room to find a GTF-11 Vital Suit then
move down the path ahead to skip through quite a bit
of this level. I will continue with the long way since
you'll skip quite a bit. While on the ledge with the
#4 Data Post, lower yourself down on the right side
of the Data Post ledge (fall then let Wayne grapple).
Do the same for the next ledge then you will be on a
ledge with a SHOTGUN and a MACHINE GUN. Fall down to
the rock floor with the tanks at the bottom. Grapple
to the rock ledge with the drill (Spider VS).
Get inside of the VS and drill (X or R) through the
rock wall ahead. Transform into a VS when you get to
the room with the Spider Akrid and kill them with the
laser vulcan. Both rock walls in the room with the Spiders
will lead you the same way, but the wall to the left
will lead to a GTB-22 Vital Suit with a missile launcher
equipped. Smash all the Akrid eggs on the way to get
some extra T-ENG then continue forward. Get the VS SHOTGUN
along the way. When you get to the SHOTGUN pickup a
Dongo will try to roll into you from behind and several
Explosive Spider Akrid from the right tunnel will attack.
Don't shoot the Explosive Spider Akrid while right next
to them since they will explode upon dying. More Dongos
will try to roll into you at the end of the next tunnel.
Blast and push against them if you're in a VS. Fall
down into the pit with the Spore Akrid and grab the
ROCKET LAUNCHER. A GTF-11 Vital Suit is down below along
with a GATLING GUN. Move down the tunnel ahead.
 |
|
If you still have a Spider Vital Suit then drill through
the rocks up ahead. If not, then you will need to enter
the narrow path to the left side. Either way, you will
enter an area with plenty of Explosive Spider Akrid
eventually. You'll need to blow open an extra shutter
if you took the narrow passage. Blast the Explosive
Akrid first to help clear out the smaller Spider Akrid.
The top of this area has a PTX-140 suit in a metal container
though it is not equipped with weapons, but that is
where the GATLING GUN and VS ROCKET LAUNCHER on the
catwalk are going to come in handy! Walk into the next
room and an Armored Dongo will spin out of one of the
metal containers on the bottom floor. Get behind him
when he recovers from spinning then spam his heat source
with gatling gun fire. There is a Spider VS in the other
metal container next to the one that the Armored Dongo
came out of.
Be sure to activate the DATA POST (5/5) up the ramps.
Trash all the Akrid eggs in the space to the left then
blow open the Akrid seal and fall to the room below.
| |
 |
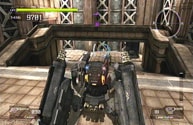
The heat sources on this guy are fairly obvious. He
has one on the middle portion of each leg and one on
the middle section of his back. Any of the Vital Suits
that were available to you before this fight will do
well for this battle. The Spider or PTX-140 suits work
fine, though I would recommend the PTX-140 suit on higher
difficulties. There is also another PTX-140 suit and
a GTB-22 suit in the room with the boss.
Stay away from the area underneath the boss or your
VS will get damaged badly! He likes to spread out webbing
to trap you in between his legs then try to stab you
with his feet and ultimately fall on you and the Explosive
Spider Akrid below him. Keep in mind that the webbing
can be shot in an attempt to escape, but it doesn't
always work that well. You could also destroy one of
his legs to make him drop the webbing. He will send
out a constant stampede of Explosive Spider Akrid that
will swell up and explode near your VS or explode once
shot. In order to win, you need to destroy two of his
legs so that he falls flat on his stomach then hover
over him and blast him with a rocket launcher, shotgun,
or grenade launcher on his back heat source. You can
also stand right beside him and blast him with either
weapon. The Spider VS works incredibly well at damaging
him while he is stunned since it does not have to reload.
He will regenerate his legs eventually and get back
to attacking normally. Keep in mind that the moment
when he actually starts to regenerate his legs, his
back heat source becomes immune to damage, so attacking
it at that time is simply a waste of ammo. Use rocket
launcher blasts and a constant shower of gatling gun
bullets to quickly destroy each leg. The more aggressive
you are at hitting his legs, the easier this battle
will be. If he doesn't have time to prepare his webbing
and generate Explosive Spider Akrid then he doesn't
have much of a chance. Thankfully, he will take some
slight damage while hitting him in the heat sources
on his legs so you don't always have to attack the heat
source on his back to damage his main health bar all
the time.
If he destroys your VS then quickly get in another
VS. This boss is very unfriendly when it comes to fighting
him on foot unless you have some extreme dodging skills
and can work the camera like a pro in order to tell
when he is about to attack. Use rolls to dodge his foot
stab. I would recommend using the plasma gun on his
heat sources if it comes down to fighting him on foot.
This fight is not overly difficult, but it can get that
way if you get trapped under him too much.
There is a hidden ledge up above the black tanks in
the boss room that has an EM laser and a grenade launcher
on it. The boss will actually perform a special egg
attack if you stand on the ledge. He will spit out a
horizontal row of eggs that will explode when they hit.
Be sure to get off the ledge when you get your item
of choice. If you want to get either of these at the
beginning of the fight then fall down in between the
crack on the first ledge. You'll always start on the
ledge if you die, so take advantage of that and suit
up.
Bring a PTX-140 Vital Suit with you to this fight since
there is not one available in the boss room. Find the
VS shotgun in the boss room and use that to fly and
blast his legs quickly. Make sure to destroy his legs
very quickly, one right after the other, since his movement
can make it hard to shoot the heat sources on his legs.
Move up right next to him when he falls and blast him
in his heat source on his back with your VS shotgun
to quickly drain his life. Once again, don't blast him
when he starts to regenerate his legs or you will just
be wasting ammo. Don't let the Explosive Spiders gang
up too much around you or they will damage your Vital
Suit very badly.
|