| WALKTRHOUGH
- PROLOGUE
This walkthrough was written while playing through
Lost Planet on normal mode. All the item locations remain
the same for each difficulty but the number of enemies
will sometimes change depending on the difficulty chosen.
On higher difficulties the T-ENG gauge will start to
drop faster and enemies will become much more aggressive
and will have a higher defense. All of the boss strategies
that are included were written while playing through
normal mode but have been updated to a hard mode perspective.
Here are a few tips that may help out during your journey:
- Learn where the heat source is on each particular
Akrid and find the best weapon that can be used to damage
that heat source well. Find the best weapon to use against
other enemies as well. Sometimes the most powerful weapon
is not the best choice.
- An Akrid will suffer damage no matter where it is
shot, so a hit that is not in a heat source is not a
vane blow. It all adds up.
- Use grenades often when fighting groups of enemies.
Use rockets from rocket launchers on far off groups
if you have the rockets to spare. This may sound a bit
overboard but in later missions it will definitely help
out.
- Take advantage of explosive barrels around areas
and shoot them when enemies are standing beside them.
Remember that cars and tanks will explodes as well when
shot and will damage enemies in the process.
- Dual wield powerful weapons while in a VS. A dual
wielding of two VS shotguns is one of the ultimate smackdowns
for a boss.
- Constantly reload your weapons. The rocket launcher
and VS rocket launcher must be reloaded manually so
make sure to have to reload them with the click of the
right analog after each use.
- When a Vital Suit is exhausted and another is in
view, take off the current weapons from the current
VS and equip them to the new VS if you want to keep
them. Remember that if a VS explodes with its current
weapons then there is no getting them back.
- The grapple can be used for escaping situations as
well as climbing. Using a grapple is much faster and
more precise then jumping so use it whenever possible.
- Use the grapple to break Akrid when they freeze or
turn to rock. This will save you some ammo.
- Keep your T-ENG high by constantly shooting breakable
objects such as cars, explosive barrels or tanks. If
you are about to get into a new VS and are ditching
an old one, allow an enemy to destroy the old VS so
you can collect the large amount of T-ENG from the explosion.
The only way that you can destroy your own VS is to
make an explosion go off close to it through a weapon
blast near a wall or an explosive barrel blast.
Prologue
When the beginning cutscenes end, you will be given
control of Wayne and start in a facility. Notice how
the T-ENG in the upper-left hand corner counts down.
The T-ENG is connected to your life bar above it and
will count down since Wayne's Harmonizer on his wrist
needs that thermal energy (T-ENG) to stay activated
and keep him alive. So long as you have T-ENG, Wayne
will recover from damage if he is hit by having the
T-ENG heal him. If Wayne runs out of T-ENG then the
Harmonizer will shut down and he will eventually die
from lack of thermal energy.
 |
|
Run through the doorway ahead. Gale will contact you
along the way and ask that you follow. Gale will fire
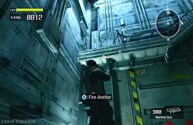
his anchor and use it to pull himself up to the stairway
above. Get below the stairway, target the side of the
platform below the broken railing so that the cursor
turns green, and use the X button to grapple up there
yourself.  Wayne will automatically hop a bit as he hits the side
of the wall to give himself an extra boost for reaching
the stairway. Run toward Gale and he will open the door
up ahead.
Wayne will automatically hop a bit as he hits the side
of the wall to give himself an extra boost for reaching
the stairway. Run toward Gale and he will open the door
up ahead.
Follow Gale and the soldiers down the hall. The soldiers
will block your way as Gale blows open a trapdoor in
the floor. Keep in mind that you can't shoot your comrades.
Fall down through the opening once the first few soldiers
climb down. Wayne will automatically grapple onto the
side of the opening so that you can lower yourself down
with the left analog. Use the X button while hanging
to drop onto the floor below.
As soon as Wayne plants his feet on the ground below,
a Dongo Akrid will roll into the area from an entrance
to the side. The soldiers will blast at him as the Dongo
rolls toward the back of the building. Find the orange
glowing segment on the back end of the Dongo (his heat
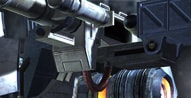
source) and shoot it with your machine gun (R button).
The Dongo will freeze upon losing its thermal energy
and shatter. A message will appear about the thermal
energy (T-ENG). As already mentioned, thermal energy
is needed to survive in order to keep Wayne's Harmonizer
activated and the Akrid are the carriers of that thermal
energy. Upon killing an Akrid it will always release
precious T-ENG that must be collected in order to survive.
Grab the T-ENG after reading the information and regroup
with Gale and his squad. Push in on the right analog
to reload the machine gun.
Follow the squad through the small doorway to the left.
Several Trilid Akrid will fly around the room above
as the soldiers fire at them. Gale will ask that you
activate the Data Post in the room. Blast through the
Trilid Akrid and find the red hives on the walls to
| |
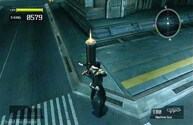 |
the side that is spawning them.
Focus all of your machine gun fire on the hives to rid
the current area of the constant Akrid threat. Always
remember to find the hives when fighting a whole group
of Akrid. The hives will drop quite a bit of T-ENG,
so be ready to collect it when one of them explodes.
Walk over to the tall circular object with the orange
glow emanating from the top. These are Data Posts that
you will activate frequently throughout the course of
the game. Activate the first DATA POST (1/2)
by standing next to it and tapping the B button. Wayne
will be open to attack while activating a Data Post
so make sure to always wipe out most of the enemies
in the current area before activating one. All Data
Posts will give Wayne a thermal energy boost for activating
them, give him access to the area map on his PDA (press
the Back button), and the light streaming from the top
will point the way toward the next Data Post or final
destination. A loud crash will put an end to the silence
as an Akrid claw burst through the wall to the right.
Once you gain control of Wayne, run down the path to
the right where the Data Post light is pointing. Gale
will motion to you and will contact Wayne through radio
if you don't hurry. Follow Gale up the stairs around
the side of the building. A few Trilid Akrid will fly
by
| |
 |
the open area to the left of the stairs. Blast them
while moving up the stairs but don't stop moving. One
of the soldiers will stop midway then turn and fire
as the giant Akrid, "Green Eye", continues
its rampage of the base. Keep up with Gale and ignore
the rest. Grapple to the top of the next floor when
Gale and the other soldiers pull themselves upward with
their anchors. Continue to follow Gale even as most
of his squad turns to fire at Green Eye. Gale will tell
you to enter the Vital Suit (VS) when you enter the
room containing them. He will suit up in one of the
Vital Suits and ride out ahead of you. Quickly activate
the DATA POST (2/2) before entering the Vital Suit.
Enter the VS by tapping the B button when the "Ride"
command appears.
Don't accidentally remove the side guns on each side
by tapping the B button near it - you'll need that.
The VS available to you is the PTX-140 type. This little
baby comes equipped with a saw (Tap X), a very quick
dash (press Y along with a left analog direction), and
the ability to hover in the air upon jumping (Tap A
after jumping; press A again to cancel the hover). Both
shoulder buttons will fire the weapons attached on the
sides. Right now the VS is equipped with a gatling gun
on each side. Fall to the doorway below and fall once
again to the room outside while in the Vital Suit.
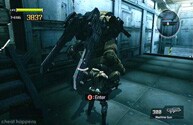
Wait in the area with the other two Vital Suits and
Green Eye will ram through the wall. Don't stand directly
in front of Green Eye since it will breath out a trail
of ice in front of it that will damage your VS badly.
Stay on either side of the room and blast at his green
glowing heat sources on either of his back sides. He
will lunge further into the room to try to hit the Vital
Suits in front of him and that is when you should nail
his heat sources with machine gun fire. He may try to
lunge toward your VS, so make sure to keep your distance
then punish him with machine gun fire to one of his
heat sources when he exposes them. A cutscene will interrupt
the fight eventually.
|