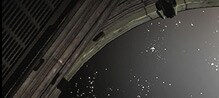
| WALKTHROUGH - CHAPTER 09, DEAD ON ARRIVAL As Isaac steps off the ship, --THE VALOR-- database file will play. Open the
--ITEM CHEST-- to the left, stomp the --ITEM BOX-- in the sitting area then use
the !!UPGRADE BENCH!! directly ahead if necessary. Move down the hall to the
left.
ITEM LIST
[ ] --"The Valor" database file--
[ ] Item Chest
[ ] Item Box
Further down the hall, an --ITEM CHEST-- will be to the left of a !!STORE!! and
an --ITEM BOX-- will be in front of the next door at the end of the hall.
 Step
into the next room. Open the --ITEM CONTAINER-- on the wall straight ahead
then open the next door. Step
into the next room. Open the --ITEM CONTAINER-- on the wall straight ahead
then open the next door.
ITEM LIST
[ ] Item Chest
[ ] Item Box
[ ] Item Container
The --RADIATION HAZARD-- database file will be received shortly after entering
the room and a new objective will be added.
ITEM LIST
[ ] --"Radiation Hazard" database file--
Objective Added:
[ ] Clear Radioactive Material (0/6)
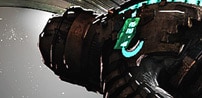
One of the Valor's weapon modules ripped open in the crash scattering
highly radioactive munitions through the Ore Storage chamber. The
radiation leak has ceased the Valor's airlock to seal itself. I need to
clear the chamber of the munitions before I can get onboard the ship.
This area does not have any gravity, so Isaac can move just about anywhere in
here. Before you can dispose of the green radioactive circular objects,
Isaac
must first open the door in the middle of the room. Walk toward the middle
door on the floor and stomp each of the six purple fuses around the door -
there are three on each side. There are two --ITEM BOXES-- floating around
this room (near the door) so look around the room for them before stomping the
fuses.
ITEM LIST
[ ] Item Box
[ ] Item Box
The room will enter a vacuum as all the air is drained out when the middle door
opens. A Stinger and a Lurker will attack directly afterwards.
Be sure to
take note of the two oxygen rechargers around the middle door. Eventually two
Dark Stingers and two more Lurkers will attack while Isaac moves around in this
room.
Look around the room and grapple each of the six green radiation balls with
kinesis then bring them down to the open door on the floor in the middle of the
room and then blast them out into space.
You will get a "Radioactive material
removed" confirmation when each of them is tossed out into space. Three of the
radioactive balls are up on a wall with circular metal pieces on it to the
left. Some of the radioactive balls are hidden behind the circular metal
pieces.
Objective Complete:
[X] Clear Radioactive Material (6/6)
Once all of the green radiation balls have been thrown out into space the door
on the side of the UMG Valor will open. Look up on the ship and find the
circular ring of orange lights then jump to it and open the door on the walkway
in between it.
Objective Complete:
[X] Enter the Military Ship
Open the next door once the door behind Isaac is sealed off and the air is
restored.
Gee god! What the hell was that up ahead? It just broke into a spasm then ran
to the left!
Anyway, open the --ITEM CHEST-- off to the right. The --FIND THE
SINGULARITY CORE-- database file will play eventually.
ITEM LIST
[ ] Item Chest
[ ] --"Find the Singularity Core" database file--
Objective Added:
[ ] Find the Singularity Core
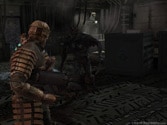
Made it inside. Now I just have to find a way to the engine room and
salvage the Singularity Core.
Avoid the flame up ahead or Isaac will get burned. Move by the glowing reverse
gravity panel and save your game at the !!SAVE STATION!! on the wall ahead.
Good thing they save their games on the USM Valor as well, eh? Enter the Cargo
Bay.
Oh, great. There's that crazy thing up ahead once again!
It will run away
soon. Open the --ITEM CHEST-- off to the right. Walk over to the escape pod
and use kinesis to grapple the --RANDOM AMMO-- inside and pull it to Isaac then
move further ahead toward the door that is blocked by debris and open the
nearby --ITEM CHEST--.
ITEM LIST
[ ] Random Ammo
[ ] Item Chest
[ ] Item Chest
The --INFECTED SOLDIERS-- database file will be received when Isaac moves
further down the right side of this room. Move over to the right side of the
area with the cargo and find the first crate with the glowing kinesis symbol on
it. All the crates in this room are on tracks, so they can only be moved in
two directions. Grapple the crate with kinesis then move it further ahead past
the bigger crates. Try not to move it all the way back to where it pushes the
other crate with the kinesis symbol. Step into the section off to the left
then turn and grapple the crate you were just moving from the side then pull it
to the right - walk sideways to the right while it is grappled. Grapple the
next crate across from the one you just moved and move it to the right as well
by walking sideways to the right while grappling. Step into the cargo area
that the crate was blocking and pick up the --RANDOM AMMO-- from it.
ITEM LIST
[ ] --"Infected Soldiers" database file--
[ ] Random Ammo
Run back around the corner then approach the other side where more kinesis
symbol crates are. Walk to the far right along that side then turn to face the
crate that blocks the way. Grapple the kinesis crate and move directly into
the area that you just stepped through. Grapple the left crate that was behind
the one you just moved and push it back further into the room. Turn to the
right and find the next kinesis crate then slide it over to the right. This
path will move Isaac into the back of the cargo room.
| |
 |
The enemy that has been keeping ahead of Isaac, the Stasis Slasher, will be
waiting at the end of the corridor of crates further ahead.
These things move
incredibly fast when they run toward Isaac. Shoot him with stasis whenever he
moves in front of Isaac then blast him like any other enemy. You have to be
careful while attempting to shoot them with stasis since they will sometimes
duck whenever they dash toward Isaac and the stasis shot will fly over their
head. The Force Gun's primary fire works very well against these type of
enemies without the need to use stasis, simply wait for one to run up to Isaac
then shoot it with a primary fire blast and it will most likely loose some
appendages and get knocked back. Run up to it and finish it off with more
blasts.
These enemies are just as deadly without a leg, so shooting off their legs
won't do that much to cripple them. Shoot off their appendages as you normally
would with a Slasher to kill them. They are tougher than the normal Slashers
but the main hard part about them is how fast they are! Two more Stasis
Slashers will attack after the first one is defeated.
Move on ahead down the corridor of crates then take the first left. Grapple
the crate in the left corridor with kinesis then push it directly ahead. Run
into the left corridor then smash the --ITEM BOX-- and take the --RANDOM AMMO--
from inside.
ITEM LIST
[ ] Random Ammo
[ ] Item Box
Look out for the reverse gravity plates up ahead. A Stasis Slasher will move
out a vent up ahead then attack. Approach the unlocked door off to the left
and use kinesis to move the small crates in front of it then enter the next
area.
You'll need to grapple the crates blocking the doorway and toss them out into
the room ahead. Look off to the left and open the first --ITEM CHEST--.
You'll need to grapple the small crates directly ahead and shoot them out of
the way to get to the --ITEM BOX-- and --ITEM CHEST-- on the left side of the
opposite side of the room. Don't mess with the stacked crates near the vent
across from the entrance side or a Stasis Slasher will bust through the vent
and attack.
ITEM LIST
[ ] Item Chest
[ ] Item Chest
[ ] Item Box
There is no point in moving the power unit away from the power plug. Move down
the walkway in the middle of the room. The --HAMMOND ASSISTANCE-- database
file will be received on the other side of the room. There is an
--ITEM CHEST-- containing a --GOLD SEMICONDUCTOR-- to the right as Isaac steps
off the walkway. Enter the next room.
ITEM LIST
[ ] --"Hammond Assistance" database file--
[ ] Item Box
[ ] Gold
Semiconductor
Take note of the --ITEM CHEST-- near the right wall as Isaac moves toward the
!!SAVE STATION!! up ahead. Mutilate all the soldier bodies in this hallway
before you mess with the closest door up ahead (it's an elevator door). The
furthest door is blocked from the other end. When Isaac attempts to open the
elevator door, the power unit beside it will explode. Infectors will attack
right after the power unit is destroyed, but if you stomped the bodies then
they will have nothing to infect, so take out a gun and defeat them. If the
soldier bodies are still there then you better blast the Infectors before they
use the bodies as a host since they will make Stasis Slashers out of the dead
bodies.
 |
|
| |
|
Run down the hall and grapple the power unit that powers the door at the other
end then pull it out of the power plug. Bring it back over to the empty power
plug beside the elevator door then plug it in to restore power to the elevator.
Enter the elevator and take it up. On the way up the elevator shaft, the --DR.
KYNE-- database file will be received.
ITEM LIST
[ ] --"Dr. Kyne" database file--
You'll likely notice a man yelling in pain here.
Look on the wall in the
middle of the burning debris directly ahead. A crew member is trapped on the
ceiling because of the reverse gravity plate below him. You can't shoot him to
end his suffering... then use kinesis to pull his dead body toward Isaac and
stomp his remains into the floor. The game won't allow it, so let's continue
down the hall to the side.
Step off into the right hall along the way to the next door and open the --ITEM
CHEST-- and --ITEM CONTAINER-- in the room with the dead soldier. Walk toward
the burning debris and grab the --RANDOM AMMO-- to the left behind it with
kinesis.
ITEM LIST
[ ] Item Chest
[ ] Item Container
[ ] Random Ammo
This room can be dangerous at first. A Divider will dash at Isaac
from the
area across from the door and a few Exploders will walk toward the door from
off to the right. Be careful about entering this room. You might want to
shoot the Divider with stasis then run to the area where he comes from and turn
back around to deal with the Exploders as they appear from the side. You can
also step back into the prior hallway.
Grab the --POWER NODE-- and take note of the --ITEM CHEST-- and --ITEM BOX--
off to the right. There is an !!UPGRADE BENCH!! off to the side. Two
Exploders will move through the open vent, near the door that Isaac entered
this room from, when Isaac walks further to the right, so be ready for them.
Pick up the --EMERGENCY-- database file from the shooting gallery area directly
across from the entrance door then open the nearby --ITEM LOCKER--.
ITEM LIST
[ ] Item Chest
[ ] Item Box
[ ] Item Locker,
[ ] --"Emergency" database file--
+ + Shooting Gallery Minigame + +
You may want to try out the shooting range minigame. Once Isaac begins the
game he will have infinite ammo with whatever weapon he has equipped. Shoot
the red figures and avoid shooting the blue figures until the max score is
reached as presented on the back board. Either the Plasma Cutter or the Pulse
Rifle is the best weapon to use here. There are five rounds altogether and
Isaac will receive an item after every successfully completed round - it
appears on the counter to the left of the controls. If you mess up during a
round, simply back away to cancel the game then move forward and restart.
Here is the required score and items won:
Round 1 - 1000 score
Reward: Random Ammo
Round 2 - 1200 score
Reward: Random Ammo
Round 3 - 1400 score
Reward: Medium Med Pack
Round 4 - 1600 score
Reward: Ruby Semiconductor
Round 5 - 2000 score
Reward: Power Node
Rounds 4 and 5 get very fast so keep your Plasma Cutter set to horizontal and
listen for the confirmation for each shot. If you fail to hit one back up then
move forward to try again. Don't pay attention to the scoreboard when you get
to Rounds 4 and 5 or it will be just enough to distract you away from a target.
Isaac can sometimes be the worst part of this entire game since the he covers
the left side of the camera if you stand in the middle, which is really the
best place to stand. Keep your gun aimed toward the middle then shoot a target
and return aim to the middle then wait for the next. On round 5, you have to
simply keep aiming and shooting.
Step into the next room outside when you're ready.
A soldier will die from a leg wound as Isaac enters this area.
Poor fellow.
You can mutilate his dead body if you want. Be sure to recharge your stasis at
the stasis recharger if needed. Enter the Infirmary.
A Stasis Slasher will show Isaac what happens whenever a living thing runs
through the lasers that revolve around the middle of the room.
It isn't pretty
and the same fate will befall Isaac if he happens to touch them. The robotic
arm controls the lasers and it can be shot with stasis. Wait for the arm to
point the lasers to the right then hit it with stasis and run over to the left
then pick up the --LARGE MED PACK SCHEMATIC-- and open the --ITEM CHEST-- and
run to the other side of the room very quickly.
A Stasis Slasher will attack from the other side while Isaac runs, but just run
by him or stun him with stasis quickly then run by him. He might get caught up
in the lasers himself. Open the two --ITEM CHESTS-- on the other side of the
room then enter the Barracks Corridors.
ITEM LIST
[ ] Large Med Pack Schematic
[ ] Item Chest
[ ] Item Chest
[ ] Item Chest
You'll hear a yell in here from an Exploder, so run down the hall to the right.
A Stasis Slasher will be the first to come after Isaac, so shoot him with
stasis then defeat him. Exploders will move down the hall toward Isaac next,
so shoot them with the Plasma Cutter or Pulse Rifle from a distance. An
Exploder will fall near Isaac but he should be far enough away to shoot it
safely. A few more Exploders will appear down the hall also. Grab the --POWER
NODE-- and use kinesis to pull the --RANDOM AMMO-- from the right side of the
burning debris toward Isaac.
ITEM LIST
[ ] Power Node
[ ] Random Ammo
Continue back down the hall then move down the end of the hall across from the
door that Isaac entered this area from. Open the --ITEM CHEST-- to the right
then move further ahead and open the other --ITEM CHEST-- to the left. Grab
the --RANDOM AMMO-- and --SMALL MEDPACK-- from in front of the debris and save
your game at the !!SAVE STATION!! on the right wall. You'll probably notice an
Exploder moving to the left behind the debris but it will step out of sight
quickly. Enter the Barracks.
 |
|
| |
|
A quarantine will initiate once you move further into this room. Run back to a
corner and stay there.
Stay in the left corner of this room so enemies might
possibly walk across the reverse gravity plating up ahead. A Pregnant will be
the first to appear in the back but it shouldn't come toward Isaac if you step
back quickly enough. Lurkers and a Stasis Slashers will be the first to attack
followed by Stingers. Another Stasis Slasher will attack eventually. There is
really too many enemies in this room to keep up with any type of pattern, so
just know that you'll face plenty of Stasis Slashers, Stingers, Lurkers,
Exploders, and a Pregnant.
If you approach this room cautiously by staying in a corner near the back then
it is not as bad as it can be. If you dart into the middle of the room then
prepare for an onslaught! Use the Plasma Cutter or Pulse Rifle to shoot at
distant Exploders, use the Force Gun or Line Gun for Stasis Slashers, use the
Flamethrower or Force Gun for Lurkers then fight off the Stingers with the
Plasma Cutter or Line Gun. If you stay away from the other end of the room
then the Pregnant and Exploders from that end will most likely not even move
toward Isaac. Once the lockdown has been lifted, all enemies in the room are
finished.
Check the second opening in the right wall and grab the --LARGE MED PACK-- from
inside. You'll find plenty of --ITEM CONTAINERS-- on the large pillars in the
middle of the room - there are seven unlocked containers. At the far end of
the hall is a !!STORE!! on the back wall and the --ORDERS-- database file along
the floor. Enter the Engine Corridors through the door at the back end of the
room.
ITEM LIST
[ ] Large Med Pack
[ ] Item Container
[ ] Item Container
[ ] Item
Container
[ ] Item Container
[ ] Item Container
[ ] Item Container
[ ] Item
Container
[ ] --"Orders" database file--
Grab the --RANDOM AMMO-- from near the debris. We're now on the other side of
the floor where Isaac exited the lift. The guy that is trapped by a reverse
gravity plate is still held up against the ceiling and it looks as if he is
still ticking - he's got some determination there.
ITEM LIST
[ ] Random Ammo
Move toward the !!SAVE STATION!! on the wall directly ahead and save your game.
Follow the hall as it turns to the left and open the --ITEM CHEST-- near the
end then open the next door.
ITEM LIST
[ ] Item Chest
A man will step into view then run to the right further ahead - he actually
opens a door.
Walk down the hall and open the two --ITEM CHESTS-- then stomp
the --ITEM BOX--. There are three more --ITEM CHESTS-- near the locked door at
the other end of the hall. Open the large door to the right that the man ran
to.
ITEM LIST
[ ] Item Chest
[ ] Item Chest
[ ] Item Chest
[ ] Item Chest
[ ] Item Chest,
[ ] Item Box
Find the two --ITEM CONTAINERS-- along the sidewalls then open them. Take the
lift to the top floor.
ITEM LIST
[ ] Item Container
[ ] Item Container
The flames coming from the burners in the very back of this room will burn
Isaac and damage him quite a bit if he steps out into the flames - thankfully
they won't kill him instantly. Isaac can stand behind the metal cylinders with
the kinesis symbol on them to avoid the flames. He can grab these cylinders
with kinesis and move them toward the back of this room to get further into the
room unharmed.
There are three purple fuses along the middle portion of each side of this room
for a total of six. The fuses must all be destroyed to shut off the burners in
the back of this room. Grapple either cylinder and push it toward the burners
then shoot or punch the purple fuses along the metal columns on each side. On
the right side they are on the left columns and on the left side they are on
the right columns.
It is best to only move the metal cylinders when the flames stop. If Isaac is
too far away from the metal cylinder when the flames start then he will get
burned and this can easily be done while using kinesis while the flames are
surrounding Isaac. You will have to move the cylinders to the right or left
sometimes to avoid the pipes near the metal columns.
Once all six fuses are destroyed, the flames will stop. Collect the
++SINGULARITY CORE++ from the device in the middle of the back portion of the
room.
Objective Complete:
[X] Find the Singularity Core
Once the core has been collected the --SINGULARITY CORE FOUND-- database file
will play and Isaac will receive the next objective.
ITEM LIST
[ ] ++SINGULARITY CORE++
[ ] --"Singularity Core Found" database file--
Objective Added:
[ ] Go to the Crew Deck
I've got the Singularity Core now. Removing it may cause some bad side
effects to the Valor's power system, so I should get out of here quickly.
I'm heading to the Crew Deck now, in hopes of repairing the shuttle docked
there.
The entire ship will now start to malfunction with short explosions throughout
the rooms now that the Singularity Core has been removed. The explosions for
the moment won't hurt Isaac and there is no hidden timer for getting out of the
ship. Find the corridor off to the right and move down it. Open the three
--ITEM CHESTS-- to the right at the first turn then continue to the left. An
explosion will engulf the next three --ITEM CHEST-- in flames but thankfully
the flames cannot hurt Isaac. Open the door to the left.
ITEM LIST
[ ] Item Chest
[ ] Item Chest
[ ] Item Chest
[ ] Item Chest
[ ] Item Chest,
[ ] Item Chest
Open the --ITEM CONTAINER-- on the wall to the left after stepping through the
doorway. As Isaac reaches the glass in the back, someone will step into view
from the other side. Ah, it's Hammond. What's up, boss?
ITEM LIST
[ ] Item Container
A Dark Brute will attack as it steps through the glass from the other side. Be
sure to shoot it with stasis then get in the back of it like all the rest. The
Contact Beam is the best way to defeat it quickly. If you don't have stasis
then shoot it with the Contact Beam from the front and it will eventually hunch
over to where you can get in some good back shots. The Line Gun works just as
well also. It will drop a --DIAMOND SEMICONDUCTOR-- when it is defeated. The
--HAMMOND'S DEATH-- database file will be received once the Brute is defeated.
ITEM LIST
[ ] Diamond Semiconductor
[ ] -- "Hammond's Death" database file--
Be sure to stomp the hell out of that Dark Brute body. Hammond's body can be
mutilated also, but you don't really want to do that, do you? Don't let sudden
memories of the ADS cannon accomplishment in Chapter 4 cloud your mind, Mr.
Clarke! Open the large door ahead then step back into the Engine Hall.
The door to the right is now unlocked so move through it. An explosion will
happen near the door that Isaac just went through that will set it ablaze.
A
warning message will soon sound over the intercom. Avoid all the flames in the
next few areas along with this one or Isaac will take damage.
Move down the hall to the left. Open the lone --ITEM CHEST-- off to the right
along the way. Use kinesis to grab the power unit along the way and then plug
it into the nearby power plug to the right of the elevator door to unlock it.
Open the --ITEM CONTAINER-- on the wall to the right then step inside of the
elevator. Big explosions will trigger in the hall outside but Isaac is safe in
the elevator. Take it down.
ITEM LIST
[ ] Item Chest
[ ] Item Container
Rush directly ahead and avoid the flames and the reverse gravity panel then
save your game at the !!SAVE STATION!!.
Walk back to the elevator door and
find the exit to the Valor off to the side. Exit the ship by stepping through
the airlock and then the next door ahead.
Isaac will once again enter the vacuumed zero gravity room outside. Leap to
the floor below as the USM Valor continues to explode.
Use the oxygen
rechargers surrounding the middle doorway in the center of the room if needed.
Find the walkway with the door on the opposite side along the wall then open
the door and step inside the airlock. Allow air to restore then open the next
door.
A Stasis Slasher will step out from the left corner up ahead, so take out the
Force Gun and blast our unwelcome guest. Step back into the Tram at the end of
the hall then interact with the controls to end this chapter.
|