| WALKTHROUGH - CHAPTER 08, SEARCH AND RESCUE The --GO TO COMMUNICATIONS-- database file will play as Isaac steps off of the
tram.
Objective Added:
[ ] Contact the Military Ship
Somehow a military ship heard our distress call. It's unbelievable luck.
Now I just need to see what's wrong with the Comms Array and contact the
ship.
Only one --ITEM CONTAINER-- is left behind on the back wall. Move into the
hallway.
ITEM LIST
[ ] --"Go to Communications" database file--
[ ] Item Container
Something will growl from the glass to the side as Isaac moves down the hall
ahead. Use the !!STORE!! if needed then step into the Atrium.
I really don't like this area, do you? It's such an open playing field for
enemy encounters!
All the --ITEM CHESTS-- around the sides of the room that were locked in the
past are now open, so start collecting Mr. Clarke. Enter the room off to the
left with the destroyed door and you'll find an !!UPGRADE BENCH!! inside along
with an --ITEM BOX--.
ITEM LIST
[ ] Item Chest
[ ] Item Chest
[ ] Item Chest
[ ] Item Box
When Isaac moves too far into the back of the Atrium room, the doors will seal
off as the are is put under quarantine. Exploders will fall from the ceiling
and attack.
 Stand in one of the sides of the Atrium near the a control panel
and shoot their exploding appendages with either the Plasma Cutter or the Pulse
Rifle. They will start to pile up as the battle continues, so get ready to run
if you start to miss a lot. Stand in one of the sides of the Atrium near the a control panel
and shoot their exploding appendages with either the Plasma Cutter or the Pulse
Rifle. They will start to pile up as the battle continues, so get ready to run
if you start to miss a lot.
Three Dark Slashers and a Dark Stinger will appear in the final wave of
enemies.
Bring out the Line Gun and fire at them. Try to cripple the Slashers
by shooting off their legs and that will help greatly. The area will unseal
once the final wave of enemies is finished. You might want to run down the
steps in the very back of this area and save your game at the !!SAVE STATION!!
on the wall.
Enter the elevator directly across from the stairs. The first floor cannot be
accessed at the moment, so take the elevator up to Level 3. The
--EAVESDROPPER-- database file will be received on the way up.
ITEM LIST
[ ] --"Eavesdropper" database file--
Step out of the elevator and stomp the --ITEM BOX--, open the --ITEM CHEST--
and then collect the two --RANDOM AMMO-- pickups along the side of the room.
ITEM LIST
[ ] Item Box
[ ] Item Chest
[ ] Random Ammo
[ ] Random Ammo
Oh look, a !!SAVE STATION!! up ahead. Don't save your game right away though.
A Spawner is on the far left wall down the hall, so run straight at it and
shoot it with force grenades. Another Spawner is on the left side of the same
wall - they're both on opposite sides of the middle door.
Shoot the furthest
one with stasis to limit his movements while you take on the other. You might
have to switch to another weapon (Plasma Cutter or Pulse Rifle) to defeat the
second Spawner since the angle you are shooting from is the extreme right. Aim
for its appendages as they move out of its stomach and attach to the wall
around it. This battle can really showcase how annoying these enemies are.
Return to the back hall and open the three --ITEM CONTAINERS-- along the
sidewall then save your game. Go back and open the door that the Spawners were
surrounding then step into the next room.
ITEM LIST
[ ] Item Container
[ ] Item Container
[ ] Item Container
A new enemy will appear from the back of the hall. This is the Divider.
All
of its visible appendages can be shot off and once any appendage is cut off of
it then it will fall and split into Crawlers. Shoot it with stasis then aim
for one of its legs with the Plasma Cutter or Line gun and cut the leg off.
While it falls, take out the Force Gun and get ready to blast the whole group
of Crawlers that it will leave behind. The Contact Beam can work well for a
Divider also if you don't have stasis since one hit will knock it down then the
next hit will likely make it split into Crawlers.
It's possible to kill a Divider and all Crawlers during one stasis hit if your
stasis is powered up enough. Each appendage becomes a Crawler, so simply aim
at each one with the Plasma Cutter or Pulse Rifle as it falls while slowed with
stasis and shoot off the appendage then the Crawler it becomes.
Open the three --ITEM CONTAINERS-- on the sidewall for some extra items then be
sure to grab the --RUBY SEMICONDUCTOR-- left behind by the Divider. Use
kinesis to move the items that are blocking the next unlocked door then open
it.
ITEM LIST
[ ] Item Container
[ ] Item Container
[ ] Item Container
[ ] Ruby
Semiconductor
Use the !!UPGRADE BENCH!! up ahead if needed then save your game at the !!SAVE
STATION!!. Step onto the lift then take it to the floor above.
Pick up the --ILLEGAL MINING-- database file on the catwalk at the top. Open
the next door.
ITEM LIST
[ ] --"Illegal Mining" database file--
Grab the --POWER NODE-- from the container to the left then step onto the cart
to the side. There is some --RANDOM AMMO-- along the wall to the right (look
over the right side of the cart), so grapple it with kinesis and bring it
toward Isaac to collect it. Activate the controls and the cart will take Isaac
down the corridor ahead. There are no enemies along the way but there is a
body floating in the middle of the tunnel.
It won't bite though. Step off the
cart at the end then open the next door.
ITEM LIST
[ ] Power Node
[ ] Random Ammo
The --MAIN ARRAY PROBLEM-- database file will play shortly and a new objective
will become active.
ITEM LIST
[ ] --"Main Array Problem" database file--
Objective Added:
[ ] Fix the Array
The communication dishes have taken some damage. I need to swap out the
broken dishes and create a circle of working dishes. That should align the
signal and allow us to transmit to the ship.
There is a !!SAVE STATION!! and stasis recharger on the wall to the right. You
can look off the right railing to see the dishes below that are mentioned in
the objective - this is the area we have to get to next.
On the left side of
the room, smash the --ITEM BOX-- then take the --MEDIUM AIR CAN SCHEMATIC--.
Open the door to the side.
ITEM LIST
[ ] Item Box
[ ] Medium Air Can Schematic
There is an --ITEM BOX--, a --POWER NODE-- and three --ITEM LOCKERS in this
room. Smash, collect, and open to your heart's content then move into the next
area off to the right. The right locker in the set of unlocked lockers to the
left has a --GOLD SEMICONDUCTOR-- inside of it. Grab the --RANDOM AMMO-- in
the airlock chamber then step outside.
ITEM LIST
[ ] Item Box
[ ] Power Node
[ ] Item Locker
[ ] Item Locker
[ ] Item
Locker
[ ] Gold Semiconductor
[ ] Random Ammo
This area has no gravity, so you can move just about anywhere in the room with
a zero-g jump. Three Dark Stingers are in the area, so jump off the walkway
before they spot Isaac.
Get on a wall and wait for them to attack while you
move around the wall then blast them with whichever weapon of your choice. Use
stasis if needed. Find the two --ITEM BOXES-- on the wall to the left from the
door where you first enter this area from.
ITEM LIST
[ ] Item Box
[ ] Item Box
The main objective in this room is to form a circle of working satellite dishes
by plugging the dishes in between the metal pieces along the wall. Grapple
dishes with kinesis to carry them to other parts of the room. The working
metal dishes are marked with a blue glow and kinesis symbol. The red dishes
are damaged and do not work but they can still be lifted with kinesis to pull
them out of their current slots.
Simply form a circle of working dishes by
pulling out the damaged dishes and plugging a full circular row of working
dishes into the plugs in the middle portion of the room.
Three working dishes are already plugged into the center circle by default, so
unplug the damaged dishes in that circle and replace them with working dishes.
You can view the red communications control display in this room to see where
all the working and damaged dishes are plugged. Damage dishes are showcased
with a red light while working dishes appear as a green light. Any circle of
working dishes can be made in order to get the Communications array working
again, but the closest circle at the bottom is already started for you.
Objective Complete:
[X] Fix the Array
The --ARRAY FIXED-- database file will be received after a circle of working
dishes have been aligned and communications will be restored.
ITEM LIST
[ ] --"Array Fixed" database file--
Find the walkway for the door in this room - it will look like an opening in
the wall since you're most likely standing on a wall at the moment. Jump to it
then open the door and reenter the Comms Control after stepping through the
airlock room.
Activate the console on the left side of the room on the railing and this will
set up communications for the military ship.
Objective Complete:
[X] Contact the Military Ship
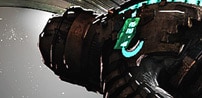
The USM Valor military ship will try to contact the USG Ishimura. The --FIRST
CONTACT-- database will play followed by the --BIG PROBLEMS-- database file. A
new objective will be added shortly.
ITEM LIST
[ ] --"First Contact" database file--
[ ] --"Big Problems" database file--
Objective Added:
[ ] Use the ADS Cannon to Clear the Blast Doors
The signal still isn't strong enough, and Kendra needs the blast doors
opened above the Comms Array. Something big is sitting right on top of
them, no doubt some kind of necromorph. If I can get to one of the ADS
turrets, I hopefully can blast it off into space.
Ah, another problem. There is never a dull second aboard the USG Ishimura!
Exit this room and step back into the Comms Hall.
Take the cart back across to the other side then reenter the Comms Elevator
Room 2F.
The elevator to the right will rise and a Dark Slasher will step off of it so
blast him and use stasis if needed. Save your game at the bottom then step
into the Comms Hallway.
Open the door to the elevator on the right. Step inside then take the elevator
up to the next floor.
Open the two --ITEM CHESTS-- up ahead then smash the two --ITEM BOXES-- mixed
in with the crates to the left of the next door. Open the door to the ADS
Cannon room.
ITEM LIST
[ ] Item Chest
[ ] Item Chest
[ ] Item Box
[ ] Item Box
Take the --POWER NODE-- from the container on the right wall then save your
game at the !!SAVE STATION!! on the left wall. Walk over to the controls for
the cannon and interact the controls on them then Isaac will have a seat in the
chair.
ITEM LIST
[ ] Power Node
Boss: Slug
Unlike the last boss battle, this one is set up in a shooter minigame. You'll
have to blast 'ole softy outside to get his attention and make him attack
Isaac. The slug will eventually raise its tentacles upwards. That's not
happiness to see us is it?
The Slug's tentacles will eventually grab an object then toss it toward the
cannon where Isaac is. The objects that will throw range from fuel canisters
to pieces of the ship itself. Each object that hits Isaac's side will damage
the ship's hull. The health for the ship's hull (hull integrity) appears on
the lower right portion of the screen during this battle and it will start at
100 for this battle.
Controls:
Left Cannon: L1 (or LT)
Right Cannon: R1 (or RT)
You'll have to cut off each one of the Slug's tentacles in order to damage the
Slug. The tentacles' weak point is the glowing yellow portion in the middle of
each one. Focus on one tentacle at a time and wait for the targeted tentacle
to raise up with a grappled object then blast it continuously in its yellow
weak spot with both cannons.
Once each tentacle has received enough damage, it
will break off from the slug. You'll need to blast the thrown objects as they
travel toward the ship, so try to keep a watch for any objects that the
tentacles throw then blast the objects with both cannons. The cannon can still
overheat just like last time, so don't get extremely trigger happy.
It's really hard to keep an eye out for objects when all five tentacles are
active since there are quite a number of tentacles to watch, but once only
about two are left, defending the ship's hull from incoming debris is much more
manageable. The most important part of the beginning of the battle is
whittling the beast's tentacles down to about two. Keep the cannon aimed
toward the middle of the screen then defeat the middle tentacle first. The
middle portion is where most of the objects will fly by, so you will probably
accidentally shoot some objects while shooting the middle tentacle. Pick a
side after that then finish each tentacle on the chosen side while trying to
watch for any thrown objects. Once you get down to two tentacles, focus less
on spamming them with fire and more on defending the ship since it is much
easier to watch the two tentacles' actions around that time.
TIP: If you shoot one of the tentacles in the yellow portion while it is
leaning over to grab an object then it will rise up once again.
If you can manage to keep the shield strength up to 50% after beating the Slug
then you will gain the "Slugger" trophy (achievement). Unlike the
accomplishment associated with shooting asteroids in Chapter 4, this one isn't
too bad since the battle can be sped up by defeating the Slug quickly and also
the hull strength starts at 100% instead of 85%. Knock off the tentacles as
quickly as possible and basically follow the tips that I have above.
The --IMPACT-- database file and the --HAMMOND RETURNS-- database file will
play shortly after the Slug has been defeated. You can still fire the cannons
the whole time the database files are playing, though you can't shoot anything.
Why not fire at the USM Valor up to the left side? Why did you open the escape
pod!? Die now for your foolishness!
ITEM LIST
[ ] --"Impact" database file--
[ ] --"Hammond Returns" database file--
Objective Added:
[ ] Go to the Cargo Deck
The military ship... it slammed into the Ishimura. Maybe some of the
marines are still alive and can help, but somehow I doubt it. Hammond says
he found a shuttle on the Crew Deck. I need to salvage a Singularity Core
out of the military ship to repair the shuttle. There is still hope, slim
though it may be...
Ah, the excitement never ends, does it? Save your game at the save station
then leave the room. We need to get back to the tram.
Take the elevator back down.
No enemies. Continue down the hall ahead and step through the big door at the
end.
Two Crawlers are in this area, so take out the Force Gun and blast them then
continue to the elevator across from the save station down the left hall. Take
the elevator to level 2.
You'll probably hear the creature before even stepping out of the elevator.
Yep, there is a Divider outside.
Get the Plasma Cutter or Line Gun ready then
step out of the elevator. It's only one of them and he is around the right
side of the elevator shaft so find him and shoot him stasis then cut off a limb
and shoot the Crawlers with the Force Gun whenever he splits.
Move on down the hallway. A Pregnant will step out from the very end. Use the
Plasma Cutter and shoot off his appendages. You might want to go for the legs
first of all. Enter the Tram Station.
Board the tram like usual then use the controls to go to the next area and end
this chapter.
|