|
WALKTHROUGH - CROFT MANOR
Please note that to do anything in Croft Manor, you must
beat the Bolivia level first. The Rewards will not be available
along with no access to other rooms besides the Living Room
if you have not beaten Bolivia.
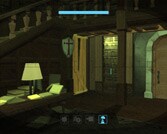
You'll start out in the Living Room  of Lara's Mansion. Look to the left to find a next to the door. Head into Zip's office
to the right of where you start and walk up to the PDA on
the right side of the room. Press the action button to open
the safe
in the back and retrieve --LARA'S GRAPPLE-- from the safe.
Walk back into the Living Room and head through the door on
the right. Walk down the hall and enter the Pool Room.
of Lara's Mansion. Look to the left to find a next to the door. Head into Zip's office
to the right of where you start and walk up to the PDA on
the right side of the room. Press the action button to open
the safe
in the back and retrieve --LARA'S GRAPPLE-- from the safe.
Walk back into the Living Room and head through the door on
the right. Walk down the hall and enter the Pool Room.
|
|
Jump into the pool and collect the
on your current side then swim to the opposite side and pull
the lever.
This will open one of the gates on the hole to the side of
the pool. Get out of the pool and walk toward the chairs off
to the left to find a
behind the chairs. Turn around and use Lara's grapple to pull
the shiny spear that the statue with the shield is holding
outward. This will pull the spear out on the statue on the
other side as well. Approach the fish statue in between the
two spear statues and pull it out of the wall.
A
will be right behind it. Push the fish statue right next to
the pool. Move to the other side and pull out each of the
fish statues along the wall. You can only pull them out a
little bit. Facing the wall, jump up to the left fish statue
and use the spear to swing over to the ledge below the balcony.
Move to the right along the balcony then jump across to the
fish statue on the other side. Use the spear to swing over
to the second floor on the other side.
Notice that there is a cross in front of the two female statues
with spears. Walk up to the two statues with the spears and
grab them then turn them both to where their spears
cross each other.
Press the tongue button on the statue to open the other gate
in the pool below you. Walk out onto the diving board and
pick up .
Don't jump in the water just yet! Move to the left side and
jump to grab the spear that you pulled out on the statue earlier.
Swing from the spear then grapple the shiny bell up above
you and use it to swing across to the next spear. Swing to
the other side and pick up --LARA'S BINOCULARS--
from the pedestal holding up the horse statue. Grapple the
shiny marble ball on the left fish statue and drag it off
the top of the statue. Roll the ball over the circular pressure
button to make the hanging plant over the middle of the pool
drop downward. Look behind the other fish statue to find a
. Hop back down
to the first floor and stand on the fish statue that you pushed
next to the pool. Jump to the top of the plant stand overlooking
the pool. While on the plant stand, look directly across from
you to see a shiny metal piece on the balcony ahead. Grapple
the shiny metal piece and pull yourself over to the balcony
then jump and collect the . Hop into the pool and swim through the tunnel
at the bottom that you opened earlier. Collect the near the front of the tunnel and continue
swimming to enter the Gym. The gate at the end will open automatically.
| |
 |
While still in the pool, grab the
from the left side. To get the other rewards in here you will
need to jump, swing, and climb from many different obstacles.
Please note that there are a bunch of different ways to get
these rewards other than the ones listed.
Walk over to the obstacle course in the middle of the room
that has a piece of stone with a crevice in it as its starting
point. Jump and grab the crevice then jump and swing on the
pole ahead. Jump to the vertical pole then leap to the pole
on the circular object. Leap to the pole on the wall. From
here you can:
A) Jump and grab the green climbing pads on the rock to the
left. Climb to the top of the rock then jump and grab the
pole across from you. Move to the end of the pole then swing
from it to the next pole. Move to the end closest to the ledge
up ahead then swing to the ledge and move to the right along
it. Fall to the area below and Lara will grab on to the side
and you will be able to pull yourself up to collect a .
B) Jump and grab the crevice to the right of pole then move
around the right side of the crevice. Jump to the crevice
up above and move to the right. Fall to the ramp below you
then jump and grab the ledge or crevice ahead. Jump to the
green climbing pads up above the crevice then climb to the
top and jump to the crevice on the right. Jump to the right
and grab the pole then swing to the next pole. From the second
pole, jump and grab the crevice up ahead then move to the
left and fall to get a .
(you must grapple the shiny ball on the obstacle above the
pool (with the pole) and swing it over to the left to do part
C)
C) Jump and grab the crevice to the right of pole then move
around the right side of the crevice. Jump to the crevice
up above and move to right. Fall to the ramp below you then
jump and grab the ledge or crevice ahead. Jump to the green
climbing pads up above the crevice then climb to the top and
jump to the crevice on the right. Jump to the pole across
from you and swing on the next two poles in front of you to
land on a lift. Grapple the shiny metal piece below the reward
in the back then jump to the alcove to retrieve the . Jump back to the lift platform then
jump and grab the last pole that you used to jump to the lift.
Line up with the silver reward on the piece of rock in the
pool below then swing on the pole and jump directly ahead
to grab on to a crevice right below the silver reward. Fall
down to pick up the .
While still on the same obstacle course that begins with
the crevice. While in front of the circular object, grapple
the shiny ball and pull the circular object so that the bottom
end swings to the right. Get back on the crevice and work
your way toward the circular object's vertical pole. Jump
to the vertical pole across from the circular object then
jump and grab the crevice across from it. Jump to the crevice
on the left then jump up to the crevice above that one. Jump
to the hanging vertical pole then jump toward the ramp across
from the pole. As you slide down the ramp, jump to grab the
green climbing pads on the rock in front of the ramp. It's
a small ramp so be prepared to jump quick. Jump to the left
to grab on to a pole. Swing to the next pole then the vertical
pole and jump to the crevice at the end. Move to the right
along the crevice and jump to the next crevice on the right.
Move to the right and jump to grab the pole across from you.
Move to the end of the pole, near the wall, then fall and
Lara will grab on to the side of where a is located.
Grapple the pole with the shiny metal ball and move it toward
the ramp to the side of it. Run up the middle ramp pad in
the middle of the room then jump and grab the pole ahead.
Swing from the pole to the vertical pole then jump and grab
the next pole. Swing to the ramp then jump and grab the crevice
in front of the ramp as you slide down. From the crevice you
can:
A) Jump to the crevice above then jump and grab the vertical
pole across from the crevice. Grab the next vertical pole
across from the current one then fall to the ramp and jump
to leap up to the area with a
B) Move around the right side of the crevice then jump to
grab the vertical pole to the right side. Jump and grab the
next vertical pole on the wall to the left. While on the wall
pole, jump to the crevice on the right. Move to the right
then jump and grab the ladder on the right. Climb up the ladder
then jump and grab the small pole on the wall to the left.
Jump to the alcove on the left from the pole then pull yourself
up and pick up another .
(In order to do part C, you must grapple the shiny metal
ball below the ladder and pull the ladder to the left so that
it sticks out of the wall.
C) Move around the right side of the crevice then jump to
grab the vertical pole to the right side. Jump and grab the
next vertical pole on the wall to the left. While on the wall
pole jump to the crevice on the right. Move to the right then
jump and grab the ladder on the right. Climb up the ladder
then jump to the lift on the right side of the ladder. The
lift will automatically move over to the next lift so that
you can jump and grab a .
Hop into the pool to get down.
Walk into the courtyard via the doorway and go down the hall
to the door at the end to get back in the living room. Enter
the second door up the stairs to the left. You can grapple
or shoot the spears on the top of Zip's office wall on the
second floor to make them lean down so you can swing across
them. Walk down the hall behind the door and open the door
at the end to enter Lara's Room.
Turn to the left upon entering and pull the two switches
on the sides of the medusa head engraving to reveal --LARA'S
HANDGUNS-- .
The room off to the right is the dressing room that will allow
you to change outfits
if you want. Head to Lara's bedroom. Look behind Lara's bed
to find a .
Go back to the second floor of the Living Room. Grapple the
shiny silver engraving
on the top of the wall right before you go down the stairs
and grab the
from the alcove that is revealed. Head to the other side of
the second floor and shoot the yellow circular piece on the
top of the wall to reveal a in that alcove. Head back to the side of the
second floor that you just came from and enter the first door.
Walk down the hall and open the door to enter the Library.
|
|
Walk toward the desk to find Alister sitting behind the desk
along with -- LARA'S PERSONAL LIGHTSOURCE (PLS)--
lying on the desk. Walk back to the door you just came through
and look to the left, while facing the door, to see a boarded
up wall.
Shoot the wall to reveal a
and a bookshelf. Pull the bookshelf out from the opening and
slide it over to the left pressure button
beside Alister's desk. Walk to the right of Alister's desk
and walk up to the wall on the right to see another bookshelf
suspended on the wall by a piece of wood. Shoot or grapple
and pull the piece of wood to drop the bookshelf. Push the
bookshelf over to the pressure button on the right side of
Alister's desk. This will open part of the wall to the right
[600].
Don't go there just yet however. Head up the stairs and enter
the room on the second floor. Look to your right upon entering
to find a
and pull the switch
in the back corner of the room to reveal another
behind a bookshelf. Go back downstairs and walk into the secret
passage.
Be sure to turn on the light while moving downstairs since
you will definitely need it here. At the end of the stairs
you'll find a .
Look around the side of the boxes on the right for a tongue
button.
Press the button to reveal the first secret message that will
help you obtain the gold reward. Walk over to the stone tablet
to read the message: "Above the Waters, Twin Sister turn
their backs one upon the other to leave the Ambages unguarded."
Blast through the three crates
further ahead with your handguns to find the final . Move up the stairs at the other end
of the dark corridor to find another tongue button. Press
the button to open the wall that will lead you into Lara's
Room. Go back through the hall leading out of Lara's Room
and head back to the Pool Room. Head to the second floor of
the Pool Room with the two female statues with spears and
turn them so that their backs face each other to reveal another
clue for the gold reward. "Within the Hall of Knowledge,
Tomes of Cerulean, Topaz, Viridian, and Crimson in turn reveal
their Arcanum."
Head back to the Library. While looking around the room last
time, you most likely noticed the different color books on
the bookshelf around the Library. Now the books are sticking
out of each bookshelf and must be pushed into each bookshelf
in a certain sequence to reveal the next clue for the gold
reward. Start with the Blue Book to your right as you enter
the Library. Move up the steps and enter the room above you
then push the Yellow Book. Push the Green Book in the middle
on your way back downstairs, then push in the Red Book next
to the two columns with the shields. The two bookcases to
the side will slide back to reveal the final and another clue. "Above the Hearth, revealed
visage and countenance touched in haste raise up the Steward."
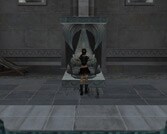
Head back to the second floor of the Living Room and look
to the right as you exit the hall. There are two tongue statues
on both sides of the hall now. Move over to one of the tongue
statues and lower the spears on the sidewall of Zip's office
with your grapple before pressing either button. Press one
of the tongue buttons, then quickly swing over to the other
and press it before the first statue rotates back outward.
The statues will turn around to reveal another clue to the
Gold Reward on both sides of the second floor. "The risen
Athena turns to face the Sun, whose burden then reveals the
Golden Laurel." An Athena statue will rise out of the
ground on the first floor immediately after pressing both
buttons as well. Go down the stairs and grab one side of the
Athena statue. Notice that the windows have a crest symbol
in the middle of the window engraving. Pull the statue around
so that it faces the sunlight pouring through the windows.
Step on the pressure button near the staircase after turning
the statue. The Athena statue will lower back into the floor
and a pedestal with the
will rise out of the ground near the entrance to Zip's Office.
Go back to the second floor and use the spears to swing to
the middle spear, move to the end of that spear, and drop
to the gold reward. After you collect the gold reward, the
pedestal will sink back into the floor.
Congrats, now Croft Manor is complete!
|