|
WALKTHROUGH - KAZAKHSTAN
"The sword fragment was taken to a secret Soviet
laboratory decades ago, a facility rumored to study the paranormal.
Alister is going to try to confirm the facts of the story
while I'm en route."
From the start of this stage,  leap off the cliff to start a Quick Time Event cutscene
where Lara will parachute
to the nearest building below:
leap off the cliff to start a Quick Time Event cutscene
where Lara will parachute
to the nearest building below:
Lara will leap down from the mountaintop and [ACTION] open
the parachute then land on the building ahead.
Lara will always land on the same building.
-- CHECKPOINT --
At the top of the building, run over to the chain gun
and kill off the mercenaries below. Aim for the explosive
barrels at first then start to fire at the mercenaries individually.
Take note that many of them will hide inside the building
or behind the crates below. Kill them until all is silent.
Pull yourself up to the section of the roof to the right of
the chain gun. Look for the flagpole with a pole extending
out of side to the left as you pull yourself up. Swing on
the pole and jump to the next roof across from it. Shoot the
box on top of the roof
to find a .
Jump to the ground and more mercenaries will appear.
Shoot one and get yourself an assault rifle then storm through
the rest. Enter the open building and walk through the doorway
surrounded by lockers on each side. Grab the
from the bottom shelf of the set of shelves off to the left
inside the room. Climb up the ladder
in the middle of the big room.
-- CHECKPOINT --
Manually aim at the mercenary on the tower next to you and
kill him. Hop up on the folded ceiling window and jump across
to the tower where you just killed the mercenary. You can
get down from this tower either by swinging down the cable
or using the ramp to the left side. Use the ramp
since you will land on the roof of the building beside you.
Mercenaries will run out from behind the buildings as you
slide down the ramp. Make sure to kill the one that rushes
toward the chain gun first. Shoot the explosive barrels around
the area to help you out a bit. Fall to the area below and
move toward the tower on the left side that is surrounded
by a fence and crates. Stand on top of one of the crates and
shoot the explosive barrel on the other side of the fence
to destroy half of the gate.
You can also throw a grenade at the section of the fence in
front of the explosive barrel to destroy it. Either way, shoot
the small crate
to find a .
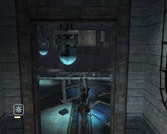
Walk up to the building with the medical symbol on the side
and open the door for a cutscene.
-- CHECKPOINT --
Inside the building there is an assault rifle in the back.
The two soldiers inside cannot be shot if you're wondering.
Go back outside and some more mercenaries will attack. Use
the chain gun to mow them down quickly. Get rid of the mercenary
with the grenade gun first (white shirt). Walk up to the control
panel for the door up ahead and press the action button to
open the gate.
-- CHECKPOINT --
Explosive barrels will roll down from the hill above. Hold
your finger on the lock on button then charge up the hill
while pressing the action button to shoot them as they roll
down. You'll eventually kill the two mercenaries at the top
with an explosion from one of the barrels. Enter the communications
building up ahead and walk to the back
for a cutscene. Climb the ladder off to the side.
-- CHECKPOINT --
You need to hurry to the train tunnel before Amanda gets
ahead of you. There is no time limit at the moment. Walk out
onto the ceiling window and jump to the ladder on the tower.
Use the cable
at the top of the towers to swing
to another tower. From the second tower, use the next cable
above you to swing on top of the building next to the train
tunnel. Mercenaries will start to fire on you from below.
Fall off the building and shoot them as you run to the train
tunnel. A cutscene will play that will show the train tunnel
open and Zip will tell Lara that she needs to hurry - this
is when the time limit starts. If you don't make it to the
train tunnel quickly then you will fail the level. Watch for
the mercenary with the grenade gun as usual. Two mercenaries
will pop out from both sides as you get close to the tunnel.
Approach the bike
and press the action button to get on it. Accelerate down
the train tunnel to start a cutscene.
-- CHECKPOINT --
This plays much like the motorcycle level from earlier, except
there are more obstacles and harder enemies this time. Like
before, keep your eye on the road
and your health. Health packs are a little harder to see this
time, but there are plenty along the path. Avoid the trees
and rocks while you blast the mercenaries on motorcycles
in the first area. Eventually the train will go into a tunnel
and you will be forced to take the mountain path beside it.
-- CHECKPOINT --
When you are on the first mountain path, you will constantly
get the choice of two paths ahead. Usually one of the paths
will be blocked and the other will be open. You can ram through
the barricades of the blocked path and still make it through
just fine. Most of the time, the low road will give you a
health pack.
-- CHECKPOINT --
Eventually the train will be beside you once again. This
time the enemies will be much worse. Mercenaries in vehicles
will drive up beside you eventually. They will try to ram
you at times and the mercenaries that fire from the sides
will damage you quickly. Make sure to defeat the vehicles
enemies first thing! When there is more than one they can
get quite dangerous. Be on the lookout for explosive canisters
and use them to your advantage when you have a group of enemies
near you. Eventually you'll reach one more mountain path.
-- CHECKPOINT --
Be sure to stay in the middle of the road at all times
since this path is much more twisting than before. Some of
the roads ahead are very narrow as well. Eventually you'll
do two jumps over the train
then move up the side of the mountain and be able to ride
along the side of the train. Make sure to move over so that
you actually get on top of the train as it heads for the bridge
ahead. Ride along the top of the train for a cutscene.
-- CHECKPOINT --
Lara will [CROUCH] duck up under the metal on the ceiling
and notice that the train is about to crash so she will [ACTION]
shoot at the ring holding the large metal cylinder up ahead
in an effort to stop the train. She will notice a tank along
the side as the train speeds ahead and will [GRAPPLE] grapple
to it with her magnetic grapple saving her from the collision.
-- CHECKPOINT --
While on the catwalk, grapple the shiny metal bar ahead with
the rope attached to it and pull it over to you. Quickly jump
and grab the rope
and the bar will move back to the other side. Swing to the
structure ahead then climb the ladder
when you land. Jump and grab the sign off to the right then
jump to the two poles
to Lara's left. If you don't move while on the poles, you
will grab on to the side of the sign on the other side while
jumping off the second pole. Lara will not take damage if
you miss the sign however.
-- CHECKPOINT --
Fall off the side of the structure you land on to find a
small crate
with a
- turn on your light to see the crate. Use the large crate
to get back on the metal structure then use your grapple to
pull the metal bar with the rope attached to it toward you.
Just like before, jump and grab the rope before it moves back
to the other side. Quickly climb up the rope since you will
be moving over some flames. Swing to the suspended catwalk
across from you. Jump and grab the brown piece of the wall
forming a ledge above the bottom door then jump to the area
above with the fan.
-- CHECKPOINT --
Shoot the fan
with the action button in order to get through
the area ahead. Slide down the ramp
ahead to find some fallen electric cables ahead of you. If
you manage to touch any of these cables then you will take
quite a bit of damage. Jump over the first set, then duck
and move under the second set. Make sure to hold the jump
button down when you jump over the cables so you'll jump further.
-- CHECKPOINT --
You'll eventually stumble across the body of a scientist.
Take the med pack and pick up his memo to learn a bit about
him. Walk to the next opening and jump to the pole ahead.
Swing to the rope then jump to the other side. For this next
ramp, you will need to slide down it and jump over the cable
as you get near the bottom. Crouch and move under the cables
ahead
then shoot the fan. Turn to the left and slide down the next
ramp ahead of you. You'll need to jump over a cable then shoot
the fan at the bottom afterwards. In the next area, move under
or over the next two cables.
Turn to the right to find another ramp. Slide down this third
ramp and jump over the cable in the middle but do grab the
pole
at the end. Fall down to the area below the pole to find a
small crate
containing a .
Climb to the large crate on the opposite side then jump and
grapple the metal piece
above you. Turn around while on the grapple to face the crate
you just jumped from and swing to the next side. Slide down
the next ramp and shoot the fan at the end. Fall into the
Generator Room below you.
-- CHECKPOINT --
When you fall, look off to the right to see a vent next to
Lara. Climb up the vent then pull yourself up to the catwalk
on the left. Stand across from the fenced area ahead and use
Lara's grapple to pull the door open. Step inside and shoot
the small crate
to find a . Now
you need to power up the generator ahead. Examine the map
to the side of the room before and after you turn off the
generator for some extra dialogue between Lara and Zip. Fall
back down and move over to the large white crate. Jump diagonally
to the vent across from the crate then jump to the right and
grab the catwalk. Hop across to the next catwalk ahead then
jump and grab the rope to refuel the generator.
Stand in front of the generator, then use Lara's grapple on
the shiny metal piece on the front to start the generator
(tug on it). Step through the door off to the side with the
green light to enter the next area.
-- CHECKPOINT --
|
|
If you come into contact with the green vapors
of the coolant up ahead then your life will drain at an incredibly
fast rate. Walk up to the overhead catwalk then jump and pull
yourself up to it. Jump and swing from the pole across from
you over to the next catwalk. Jump and grab the next pole
then swing from the pole over to the rope to get to the next
catwalk. Turn to the right and jump to the next catwalk then
jump and grab the overhead catwalk.
On the top catwalk there is a pipe with an electric current
flowing along it.
The current will move all the way to the left then reappear
on the right side and repeat the process. Grab the pipe when
the electricity moves to the left end then quickly more to
the left. When the electricity disappears, move all the way
to the left then jump directly across to the metal piece on
the wall of the other side. Shimmy to the right along the
metal piece
to move around the side of the wall. Fall down while on the
other side of the wall to grab ahold of a fallen catwalk piece.
Jump to the area behind Lara to grab onto another catwalk
piece then fall to the catwalk below. The pipe above you will
have an electric current flowing along it like the last one.
Wait for the current to move toward the opposite end then
jump and grab the pipe and move across to the other side.
Fall to the catwalk then fall to the area below near the door.
Open the door ahead for a cutscene involving a friend from
the past.
-- CHECKPOINT --
When you first walk into the room you'll likely notice the
big gun
off to the side. It has extremely low power for the moment,
so it's not going to do you too much good to try to use it.
Don't shoot the explosive barrels off to the side since they
will come in handy later!
** Do not push the metal crate off the side of the area with
the broken railing up the steps on the side. You will need
that there to obtain the Gold Reward later.
Slide down the broken catwalk [355] to the right of the gun.
Three mercenaries will attack. Walk around the right side
of the power supply structure to find a in the back. Move to the lowest pole on
the left side with the electric current on it. Wait until
the electric current moves upward then grab onto the pole
and start to climb it. When the electricity disappears and
starts from the bottom again, move to the top and jump to
the platform on the electric supply structure across from
the pole. Climb up on the area ahead and face the horizontal
pole in the distance. Jump to the two poles ahead then jump
to the rope. While on the rope, turn to Lara's left to see
a vertical pole. Jump to the pole
and look at the next two poles. You will need to time your
jumps so that you land on the pole as each electric current
moves to the top. When you jump to the first pole, wait until
the second current on the second pole moves all the way to
the top then jump to that pole. Lara will grab onto the pole
near the bottom. Climb to the very top of the second pole
then leap over to the top of the fenced area to the right
of the power supply structure. Move away from the explosive
barrel inside then aim for it and shoot it through the ceiling
part of the fence to destroy the front of the fence. Jump
to the area in front of the fence, then walk to the back of
the fenced area to find a inside a small crate in the back.
-- CHECKPOINT --
Walk over to the dead scientist
and grab the med kit and pick up his memo. Ignore the shiny
door leading to the inside of the power supply structure for
now since you don't have a power source. Walk through the
door with the green light in the back.
-- CHECKPOINT --
| |
 |
The cables above you pose no threat,
but something about them just screams danger - don't know
why. Near the end of the corridor you'll find some more busted
pipes with coolant leaking from them. Jump to the catwalk
in front of the coolant then jump to the pole. Swing onto
the next catwalk then jump to the next pole in order to swing
into the next room ahead. As you fall into the room you'll
likely notice the many mercenaries moving around inside the
room. Go ahead and surprise one of them with a grenade then
start moving and shooting until all of them are dead. There
are plenty of explosive barrels in the area so aim for them
to make your work easier. After the fight, use the grapple
and latch onto the power core to the side. Pull it just a
little bit and it will bounce on some of the catwalk debris
to the side. Jump on top of the power core and jump to the
broken ladder on the wall. Hop across to the catwalk on the
right side for a cutscene. Jump to the pole ahead then the
next catwalk. Turn to face the rope then jump and swing over
and grab onto the top of electric sphere in the middle of
the room. Shimmy all the way to the other side of the electric
sphere then jump to the pole across from it and swing to the
broken catwalk. Jump to the ladder to lower the bottom half
of it then climb to the middle portion and jump to the catwalk
on the right side. Walk to the end of the catwalk and aim
your gun at the explosive barrel in the control room past
the rope ahead then shoot it to destroy the glass up ahead.
Use the rope to swing into the control room. You'll find another
dead body with a health pack and another memo when you land.
-- CHECKPOINT --
Pull the lever
near the control panel to charge the power core with electricity.
Fall down to the floor below on either side of the control
room then grapple the power core
and pull it along the track. Be sure to stay away from the
electric current as you pull the core. The electric sphere
will charge it with even more electricity as it moves by them.
The power core will destroy everything in its path. When you
make it to the door, stand to the side of the door and tug
on the power core to make it charge through the door.
-- CHECKPOINT --
The power core will move through the coolant area and on
down the hall from there. Get up on the catwalk and swing
back across the coolant.
-- CHECKPOINT --
When you turn the corner your jaw will mostly likely hit
the floor when you see all the electricity up ahead that the
cables are now carrying. Too get by this area, grapple a cable
then pull it toward you then let it swing. The cable will
not electrify until it moves through the middle section. Run
or jump through the middle section while the cable swings
either backward and forward to get through this area in one
piece. Up ahead, you will run into two cables that dangle
across from each other. Grapple one cable then tug on it,
then grapple the other cable and tug, but hold the second
in place until the other swings back toward you then release
the second so that they both swing back and forth together.
As long as they both meet in the middle at about the same
time, you will not have any problem with getting through the
next two sets of cables.
-- CHECKPOINT --
Walk through the door to find the power core in the room
ahead.
Stand to the left side of the power supply structure then
grapple the door and pull it open.
The power core will automatically move inside the power supply
structure. Now the doors to the side will open
and the Tesla gun in the room ahead will now be charged. Walk
up to the clanging doors and roll or run through them as they
open. A cutscene will start
as you walk into the room.
-- CUTSCENE --
Move over to the dead body and grab the med kit and the memo.
Run or roll through the second set of clanging doors. Some
guards will attack you from the other side. They have shields,
but you have some explosive barrels to the side! Jump into
the Tesla gun and pick up an explosive barrel
from the side with the Lock On button (hold it) and fire them
at the mercenaries by pressing the fire button.
Use the crates above the mercenaries (look up) to hit them
if you run out of explosive barrels.
** Do not pick up the metal crate up the steps to the side
while using the Tesla gun since you will need that to get
the Gold Reward in just a few minutes!
After defeating the mercenaries, while facing the catwalk
across from you, turn to the right and look up. There are
four crates in the wall directly above the reddish caged area.
Use the Tesla gun to pull each of the four crates out of the
area above and throw them to the side. The area where the
crates were has a small ledge that you can grab ahold of,
which you will need in just a bit. Now for the hard part,
use the Tesla gun to grab the lift to the left. Pull the lift
all the way to the right side then start to fire at it with
the fire button so that it moves further up the sloped end
of the track. Aim for the top part of the lift when firing
and moving it. It may take a few tries, but keep moving the
lift back to the left then pull the lift quickly back to the
right and fire at it until it moves all the way up the sloped
right end. When the lift is all the way to the right, exit
the Tesla gun and push the metal crate up the steps toward
the reddish caged area. You will have to shift the crate to
the side a bit, but it will not fall off thanks to the remaining
railing along the sides. Stand on the crate and jump diagonally
to the dark area where you removed the four crates with the
Tesla gun to grab onto that ledge. Move to the left a bit
then jump and grab the ledge on the wall above. Move to the
left across the wall then fall to the suspended catwalk piece
below. Jump to the lift that you moved earlier (the lift should
be above the large metal door with the X on it below). Turn
on the your light and look to the right some more to see another
catwalk. Jump and grab the side of the catwalk then pull yourself
up.
-- CHECKPOINT --
Turn around to face the wall behind you to see the
inside a small space in between the wall. Jump to the pipe
in front of the gold reward and use it to swing across to
it. Get back to the lift and turn to face the other side across
from the Tesla gun. Jump over to the catwalk to continue forward.
BUG ALERT: If you manage to fall below, while maneuvering
through any of the obstacles above and are still alive, then
be sure to die by stepping on a grenade as it goes off or
by getting shocked to death on the pipe so that you start
back at a checkpoint above. If you don't die you may get stuck
when you try to climb back up the power supply structure.
The black doors have stopped clanging in the middle room and
the door will sometimes not let you through the middle opening
between the doors no matter how much you try to get through
it.
-- CHECKPOINT --
Jump on top of the shiny lift in front of the coolant vapors.
Use your handguns and manually aim at the pipes
in the background to shoot and destroy them. Grapple the shiny
metal piece on the sidewall and pull yourself over the gas
vapors. Grapple the next shiny metal piece in the back and
use it to cross the remaining vapors. Hop on the next lift.
Look ahead and you'll see some electric cables blocking the
area. Grapple the shiny metal piece on the side of the wall
and pull yourself quickly toward the cables
then duck as you reach the cable on top.
-- CHECKPOINT --
Jump to the next lift and shoot the pipes out of the way.
This one works the same as the other lifts except you will
need to jump over the cable as you make it to the end. Remember
that Lara will have a bit of delay before she jumps so press
the jump button a little early depending on how fast the lift
is moving. Hop off the lift and run down the right hall. Open
the door and go into the next room for a cutscene.
-- CHECKPOINT --
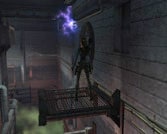
From the start of the battle,
rush around the room and pull each of the four levers
spread out on the sides
to move the machine pieces away from the fragment in the middle.
Jump and roll while moving in between levers to avoid the
beast's attacks. After all four levers have been activated,
the fragment in the middle will be lowered and four electric
spheres will fall around it. Step inside the Tesla gun.

|
|
Now your objective is to fire at each of the four electric
spheres
around the area until they fly back and charge the surrounding
spheres with electricity that will shoot throughout that portion.
It should only take two shots per sphere. Once each of the
spheres are in place, the fragment in the middle, up above
the Tesla gun, will be free from the force field that was
around it earlier. When that happens, jump out of the Tesla
gun and grapple the fragment to retrieve it and end the boss
fight. If the beast gives you problems during any part of
this boss fight you can pick him up in the magnetic field
(lock on) of the Tesla gun and throw him into an electric
current (fire) while it is activated (when the sphere is against
the wall). This is not really too much of a boss battle since
you can't really hurt the beast.
|