|
WALKTHROUGH - ENGLAND
"The map on the knight's shield leads to a site that
claims to have unearthed King Arthur's grave, a distinction
also claimed by countless others. But this particular site
meant something to a knight one thousand years ago, so it
may mean something to me."
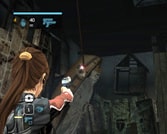
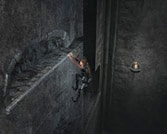
If you approach the sword in the stone in the back there
will be some extra dialogue with Zip, which will lead to some
extra dialogue later. Lara will look directly up at a vent
cover  at the beginning of this level. Use the grapple to tear off
the vent cover then slide the box
on the bottom floor directly under it. Jump and grab the side
then hold the crouch button as you pull yourself up
to keep from falling suddenly. Shoot the small crate
to find a .
Tear the next vent cover
from the wall by using the grapple. Duck and go through the
vent hole.
at the beginning of this level. Use the grapple to tear off
the vent cover then slide the box
on the bottom floor directly under it. Jump and grab the side
then hold the crouch button as you pull yourself up
to keep from falling suddenly. Shoot the small crate
to find a .
Tear the next vent cover
from the wall by using the grapple. Duck and go through the
vent hole.
-- CHECKPOINT --
You'll drop to the outside of the museum in the rain. Move
over to the gate in the back to see a fuse box on the opposite
side. Each of the windows has a board above them that can
be grabbed on to. Jump and grab the top of the window
next to the gate then jump and grab the ledge above you. Shimmy
to the left over the gate
then drop to the other side. Pull the lever
on the fuse box to turn the power to the museum back on. When
the lever is pulled, electricity will flow through the water
on the other side of the gate, so those extra boards above
the windows on that side will finally come in handy. Zip and
Alister will also have a hilarious discussion about Excalibur
if you examined the sword in the stone from earlier. Climb
up the pipe to the left of the fuse box and jump back over
to the ledge that you used to cross over the gate. Shimmy
along the ledge then drop to the first board above the window.
Move to the right and jump to the next two boards on the side
then jump to the right one more time on the last board to
get over the electrified water. You can now open the door
to the left of the vent hole. Look over to the right as you
enter to see some green toy sea serpents. I'd hate to meet
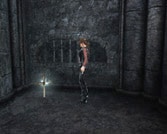
one of those in real life! You can kick the toy castle. Move
over to the area with the sword in the stone. A recording
will play as you walk toward the stone. Have Lara pull the
sword with the action button to open the tall door.
-- CHECKPOINT --
Look over to the right side as you enter to see an opening
on the wall. The three knights to the right are staring straight
at it. Jump to the opening and pull yourself inside. Remember
to duck as you enter to make sure you don't fall. Shoot the
small crate in the room to reveal a . Go back through the hole and jump back
to the other side. Stand on the board next to the two poles.
Jump to the first pole
then swing to the next. When you grab on to the second pole
it will swing and hit the wall. Right when it hits the wall
jump to the pole across from the wall. While swinging on the
third pole
jump and grab the wood piece across from it. The wood piece
will start to move downward so jump back to the pole that
you were just on and turn back around as the wooden floor
moves downward. Jump to the wooden floor and quickly run into
the room before the floor turns upward again. If you fall
during any of this, there are some ledges next to the board
across from where you jumped to the first pole.
| |
 |
The coffin on the side of the wall has a shiny metal ring
that is keeping it suspended - shoot it to make the coffin
lean over. Use the coffin to jump to the other side. If you
fall to the floor below, there are some ledges that will help
you back up once again. Don't worry about the sword just yet.
Look to the right of the display on your current side to find
a vent. Duck and move through the vent. Shoot the small crate
on the other side to find a . Crouch and move back through the vent and pull
on the sword to make some boards fall from the side to reveal
a shiny metal object to the left of the tall door. Stand away
from the shiny metal object and grapple it with Lara's grapple
then pull it to open the door. Quickly roll through the door
before it closes.
-- CHECKPOINT --
Look toward the top of the wall on the right to see a shiny
vent cover. Get in the forklift
and move two crates (one on top of the other) under the shiny
vent cover. Lift the crates up just a bit to carry them. Don't
knock too many crates down the stairs or don't fall down the
stairs with the forklift or you'll mess this up. Move a third
crate
next to the two that are stacked on top of each other in order
to get on top of them, then use your grapple to rip the vent
cover out of the wall. Jump the crates and jump up to the
vent. On the other side the characters will have some extra
dialogue and you will find a.
Go back the way you came and move the remaining crates out
of the way.
Barrel down the stairs while in the forklift. You can't get
the forklift back to the top once you move it down the stairs.
Ram the sarcophagus
at the bottom with the forklift to find a .
Turn your attention to the crates to the left and move them
to the side with the forklift. Ram the wall the crates were
blocking
to find a secret passage.
The spears ahead pose no threat while you have your handy
forklift. Drive right through them to break each set of spears.
When you reach the gate, move the two metal pieces on the
front of the forklift underneath the gate, by lowering them
and driving into it, then lift the gate up
along with the two metal pieces. The gate will move upward
automatically once you move it far enough. Plow through the
next set of spears then ram the wall at the end with the forklift
to start a Quick Time Event cutscene.
Lara will ram through the wall then start to fall with the
forklift, but she quickly [JUMP] jumps to grab the side of
the floor above.
-- CHECKPOINT --
Look to the right to see a
lying along the side of the wall and look directly ahead to
see another
in a small space along the left side of the wall. Go down
the stairs and jump to the small ledge on the left wall and
|
|
jump across to the ledge
on the right. The second ledge will start to crumble so shimmy
to the right quickly then drop to the stairs below you.
The stairs will start to crumble as well so jump to the next
section of stairs directly in front of that section. The stairs
will last a little bit longer than the ledge did. Walk down
the next set of stairs and jump to the pole across from them.
Swing to the alcove up ahead, then hang off the side.
Jump to the ledge on the right and quickly shimmy across it
before it falls. Pull yourself up to the opening that you
eventually hang from and look to the left (use manual aim)
to see a . Fall
to the stairs below the opening. Jump to the rope near the
end of the stairs and swing across to next set of stairs.
This set will crumble so quickly run to the end and jump to
the next section of stairs. Walk to the end of the last set
of stairs and jump to the ledge on the left wall then shimmy
all the way to the right and drop. Hang off the side and fall
to the debris below and slide to the bottom floor.
Look off to the right to see the roman numeral "III"
etched on the stone under the arch. This will help you to
get the gold reward, but we have to find numbers "I"
and "II" first before this one will help. Run up
the steps ahead.
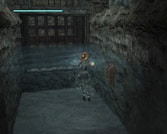
-- CHECKPOINT --
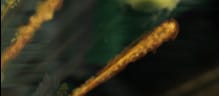
Turn to the left and jump the gap to get over the burning
oil below.
Further ahead, look to the right to see flames coming out
of the gratings on the floor up ahead.
Use Lara's grapple to grapple the metal crate on the other
side and pull it toward you. Push the crate over the first
set of flames that constantly spew up and die down. Get on
top of the crate
and wait until the second set of flames is about to stop then
jump and land on the grating and jump again to move over the
other flames. Grapple the metal crate and bring it through
the flames so it can help you on the second row of flames
on the other side. Use the same technique to pass over them.
The first set will always remain on. Grapple the crate once
again and pull it through the second set of flames once you
reach the other side. Push the crate up to the middle of the
gate and climb on top of it. Grab the side of the gate to
hop on top of it
and jump to the other side.
-- CHECKPOINT --
| |
 |
On the other side, pull the switch
to the left after landing to make the gate open. Pull the
crate under the gate. The choice is up to you where to start
next. For now, I will refer to the current crate as Crate
1. Push Crate 1 up under the set of rotating blades to the
left to clog them up then move to the other side to find a
.
The blades will always slow down if you keep pushing to allow
you to push the crate underneath them. Pull Crate 1 out of
that set of rotating blades and push it under the right set
of rotating blades (keep it to one side). Grab Crate 2 on
the other side and push it through the blades that Crate 1
is holding. Go ahead and push Crate 2 up under the middle
set of rotating blades. Grab Crate 1 from the right and push
it underneath the middle set of blades that Crate 2 is blocking.
Pull both crates into the current area. Push one of the crates
underneath the second floor area on the left (keep it to the
right side of that area) and push the other crate underneath
the second floor area on the right. Jump and grab the right
side of the ledge on the left side and completely push in
the "I" stone at the top. Push until it stops. Fall
back down and climb up to the area on the right side and push
the "II"
stone until it stops. Pushing these stones will help you to
get the gold reward later.
Push Crate 1 underneath the last set of rotating blades
then push Crate 2 to the other side of the blades. Push Crate
2 into the first row of flames
then stop and grab Crate 1 out from under the blades. Push
Crate 1 directly behind Crate 2 so that you push Crate 2 further
into the flames. Push Crate 1 until you it is in the first
row of flames. Hop on the crates and walk to the end then
jump across the flames ahead of you. Walk up to the gate ahead
and pull the lever
to the right to open the gate. The gate will close behind
you. Walk up the stairs to the left and the next set of stairs
to the right.
-- CHECKPOINT --
Step on the large pressure button to see that it opens the
gate in the distance and to hear some extra dialogue from
your team. Jump into the lake off to the left and swim to
the other side. Climb up on the right side to see a
in the distance behind some bars. Stand across from the bars
and grapple the shiny chandelier and pull it back so it will
swing into the bars. When the bars fall, grapple the reward
and pull it toward you. Zip will mention a coffin across from
you as well. Turn around to see the coffin behind some bars.
Grapple the shiny chandelier over the lake and have it swing
into the bars in front of the coffin. Grapple the coffin
inside and pull it out into the lake.
Jump on top of the coffin and use the shiny torches along
the sidewalls to pull Lara and the coffin toward the pressure
button. No matter what way the coffin turns, Lara will not
fall off while you pull at the grapple usually. Make sure
that the camera is facing the torch before you grapple it.
Grapple the torch in the area with the pressure button and
keep pulling until the coffin moves out of the water. Move
to the other side of the pressure button and pull the coffin
over the pressure button
to open the gate in the distance. Move through the new opening
and step on the grating next to the doorway up ahead.
-- CHECKPOINT --
|
|
Tilt the camera to look through the grating and you will
see the next bronze reward below you. Move through the entrance
to the waterway and jump into the water then swim under the
small space below the entrance to retrieve the . Swim back out and pull the switch
inside of the water to open the floodgate next to the floating
coffin in the back. Get up on the coffin
and jump over the floodgate on the right as the coffin passes
by it.
If you miss the jump use the torch next to the floodgate to
bring Lara and the coffin back to the floodgate. Lara will
gain an extra boost in her jump when leaping to the floodgates
so you won't have to worry about grabbing on to the side most
of the time. If you swim to the right you will see a silver
reward overhead that we will get in just a moment. Swim down
the channel to the left then make another left and pull the
lever
under the water to open the gate and let the coffin from earlier
into the current channel. Let the coffin float past the channel
you just came from then grapple the torch to the right of
the silver reward to pull yourself over to it. Jump to the
alcove and grab the .
Use the torch to the side to pull the coffin back out of the
channel then use the next torch to the side of the closed
floodgate on the other side to pull you back across. Leap
over the closed floodgate
to get carried with the current toward a waterfall. Swim toward
the back of the cave and pull yourself up to the cave floor
above. Notice the disturbing yell as you swim toward the cave
floor.
-- CHECKPOINT --
While standing in front of the tomb,
grapple both of the lantern poles on each side of the entrance.
Move the right lantern pole toward you and move the left lantern
pole toward the left side. Jump and grab the first ledge on
the far left side
then jump to the top of the platform. Swing on the pole
and jump to the ramp. While sliding down the ramp, jump to
grab the lantern pole that you just got through tugging on
to make it rotate toward the entrance. Look up to see a lantern
that you can grapple to in between the two lantern poles.
Swing and jump toward the next lantern pole then grapple to
the lantern above and swing across to the next lantern pole.
The lantern pole on the other side will rotate and position
you in front of two narrow platforms when you grab on. Hop
up the two platforms then jump and grab the crevice
at the top. Move to the right then jump and grab the board
below the window. Move to the right some more then jump and
grab the next board below the window to the right. Move to
the right once again then jump to the right and Lara will
automatically turn diagonally while jumping and grab the chain
to the side. Climb all the way to the top of the chain and
leap to the roof of the tomb.
Move toward the left side of the roof and look behind the
stalagmite in the very back to find a .
Move toward the area with surrounding columns to find a rope
that extends downward into the tomb below. Jump to the rope
and slide directly down into the tomb for a cutscene. After
the first cutscene,
walk over to Bedwyr's coffin
on the left side for another cutscene. When the cutscene ends,
grab the front of Bedwyr's coffin and slide it over to the
broken column on the right side of the tomb. Hop up to the
top of the broken column
and jump to grab the rope on the side. This will make the
bell in the back move upwards. You need to find a way to strike
the bell as it moves upward. Jump back and get behind the
bell and grapple the shiny chandelier in the middle of the
tomb. Pull on it
so that it moves back and forth and hits the rope above the
bell. Quickly run back over to the broken column and jump
to the rope to raise the bell. The chandelier will strike
the bell
and a cutscene will activate.
-- CHECKPOINT --
The front door to King Arthur's Tomb will open after the
cutscene. Rush through the door up ahead for another cutscene.
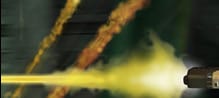
A Sea Serpent [455] will rise up out of the lake and attack.
He will shoot green liquid at you and try to bite or ram you
constantly throughout this battle. He will always roar right
before he tries to bite or ram you. Jump to the side or roll
to the side to avoid his attacks. Do not fall into the lake
or he will grab you and throw you back out, which will take
over half your life.
| |
 |
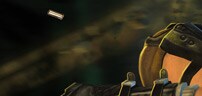
Look around the area to see four levers. In order to hit
him, you will have to draw his attention to one of the four
bells along the sides of each lever. Target and shoot a bell
with the handguns to make him look toward the bell. While
he is staring at the bell, make sure the camera is facing
the lever you want to pull then grapple the lever next to
the bell you just rang and tug on it to make a cage with spikes
come crashing down on his head.
He will destroy the corresponding bell after the cage hits
him. Do this for each of the bells and levers and you will
defeat him after all of them are gone. This can be a frustrating
boss battle if you don't line up the camera just right with
the levers in the back and if you constantly tap the grapple
button. The best thing to do is to make sure that the lever
you want to grapple is the only one on the current camera
angle, then after shooting (when Lara puts her guns in her
holsters) press the grapple button one time to grapple the
lever.
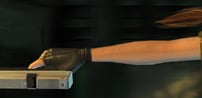
After the battle, jump into the water and swim over to the
middle left lever and pull yourself up on the cave floor in
front of the lever. Get on top of the dead sea serpent
and move across him until you can see a ledge above, then
jump and grab onto the ledge [461]. Jump to the area overhead
and go down the tunnel.
-- CHECKPOINT --
Jump and grapple the chandelier
above the gap to swing over the gap. Jump and grab the pole
ahead then swing to the ramp. While sliding down the ramp,
jump to avoid the gap near the bottom and a Quick Time Event
cutscene will start.
Lara will continue to slide down the ramp, but suddenly another
sea serpent will pop up out of the water in front of her.
Lara will [JUMP] jump to avoid the sea serpent's mouth as
it tries to bite her then [GRAPPLE] grapple the overhead gate
up ahead and swing to the other side while avoiding a second
bite from the sea serpent. While still in the air,
she will aim one of her guns toward the metal ring holding
up the gate and [ACTION] shoot the ring to drop the gate and
trap the sea serpent.
Shoot the middle ring holding the gate and jump to grab either
of the engravings
on the sides and grab the top of the gate. Move over to the
middle and grab the rope that once held the gate. Swing to
other side of the gate to grab
on the bottom floor. Make your way back up to the ladder and
swing to the platform across from the rope. Pull the lever
on the right to open the gate in front of you.
Slide down the ramp and fall to the area below. There are
some mercenaries down the hall ahead of you, but you can pull
the lever to the side to burn them alive. This will burn the
items that they carry also however. Pull the lever once again
to make the flames stop. Run down the hall and some mercenaries
will appear on the second floor to the left. Shoot them and
move the crate
over to that area if you want to retrieve the item they drop.
If you haven't yet, make sure to push in the "I"
and "II" stone engravings on each side so you can
get the gold reward in just a second. Push the crate up under
the rotating blades
and move to the other side. In the next area a mercenary will
appear behind the bars on the wall in front of you and another
will appear on the other side of flames. Throw a grenade at
the one behind the flames. Hop over each section of flames
on both sides. You can drag a crate into this area with you
to make the jumps much safer. On the other side of the burning
oil lake up ahead, a mercenary will charge toward you and
shoot.
-- CHECKPOINT --
Rush into the catacombs ahead and shoot the enemy with the
grenade launcher that storms out from behind the stairs. Push
in on the stone with the "III" on it to make the
stone door in the back open to reveal the if you pushed in the "I" and
"II" stone earlier. Stand on the debris to the side
of the lift then jump and grab on to the lift.
Push the green button
to make it rise to the top floor. Shoot the mercenary on the
top floor then grapple the shiny metal piece on the right
coffin and pull the lift over to it.
Grab onto the ledge then jump over to the floor on the left.
-- CHECKPOINT --
Up ahead a pitbull and a mercenary will attack. Shoot the
pitbull first as it darts toward you. The mercenaries in the
hall ahead will hide behind crates so shoot the crates or
step around the crates then shoot them.
Grenades work very well for this area and the next room. Another
pitbull will attack as you move further down the hall. In
the room up ahead, mercenaries with shields will run into
the room from the right side. Bullets do very minimal damage
because of their shields so have a grenade ready and throw
it toward them as they dash into the room. In the room up
the stairs ahead, kill the two mercenaries for a cutscene
that will end the level.
|