| WALKTHROUGH - CHAPTER 11, ALTERNATE SOLUTIONS
When Isaac steps off the tram the --FIND THE MARKER-- database file will play
and a new objective will be gained.
Objective Added:
[ ] Transfer the Marker
The Marker is being stored in the Cargo Bay of the Flight Deck. I have to
transfer it from there up to the Hangar Bay. Kendra seems more interested
in the shuttle than in Kyne's plan to trap the Hive Mind. I can't really
blame her. We need to get off the Ishimura.
ITEM LIST
[ ] --"Find the Marker" database file--
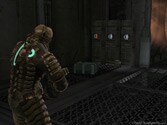
An !!UPGRADE BENCH!! is off to the right and a !!STORE!! is to the left. Check
in the sitting area to find an --ITEM BOX-- at the far end. Walk into the Tram
Station Hall through the unlocked door further ahead.
ITEM LIST
[ ] Item Box
An Exploder will be all up in your face when Isaac opens the door but it will
quickly jump into the ceiling.
 Check out the restroom further down the hall
and stomp the --ITEM BOX-- in the middle stall in the left restroom area. Walk
back outside. Check out the restroom further down the hall
and stomp the --ITEM BOX-- in the middle stall in the left restroom area. Walk
back outside.
ITEM LIST
[ ] Item Box
A !!SAVE STATION!! is on the right wall in the middle of the hall. Stomp the
--ITEM BOX-- near the locked door across from the save station. The door at
the opposite end of the corridor is locked, so enter the corridor off to the
right and open the door to the Cargo Room.
ITEM LIST
[ ] Item Box
Another !!UPGRADE BENCH!! is off to the left. There is a Pregnant and an
Exploder roaming the catwalks below - you most likely heard the Exploder when
Isaac first entered this area. These can be shot at now or you can wait until
Isaac moves down to their level. It's good to shoot the Exploder from the
current floor, but wait until Isaac reaches the bottom floor before dealing
with the Pregnant. Accidentally shoot its chest and you'll have two Lurkers to
deal with.
| |
 |
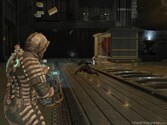
Take the lift to the bottom floor. Open the two --ITEM LOCKERS-- up ahead then
find the --RANDOM AMMO-- on the floor near the lift. If you move further down
the catwalk on the current right side, two more --ITEM LOCKERS-- will be in the
next area along with a container containing a --POWER NODE-- on the left wall.
There is some --RANDOM AMMO-- on the catwalk off to the left. The catwalk off
to the left leads to an area with four --ITEM LOCKERS-- that can be opened and
a single --ITEM BOX-- to the side.
The final corner area on the other side
contains two --ITEM LOCKERS-- and two --ITEM BOXES--.
ITEM LIST
[ ] Item Locker
[ ] Item Locker
[ ] Item Locker
[ ] Item Locker
[ ] Item
Locker
[ ] Item Locker
[ ] Item Locker
[ ] Item Locker
[ ] Item Locker,
[ ] Item Locker
[ ] Power Node
[ ] Random Ammo
[ ] Random Ammo
[ ] Item
Box
[ ] Item Box
[ ] Item Box
Walk over to the controls next to the area with the item boxes and initiate the
command to retrieve the cargo. The Marker will be lifted up onto the cargo
tracks.
Isaac will have to move the Marker along the cargo tracks using
kinesis.
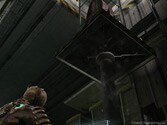
Don't even try to grapple the Marker at first. A Pregnant and two Slashers
will dash down the catwalk further ahead. An Exploder and another Slasher will
appear on your current side, so be sure to look around your current area often!
If you try to move down the catwalk toward the Pregnant and Slashers then a
Tentacle will appear from the gap on the right side and slap Isaac.
You'll need to stay on your current side and fight off the enemies with
whatever weapon of your choosing. The Force Gun works great on the majority of
them except for the Exploder. Once the enemies are defeated, move along the
middle catwalk and get the Tentacle to show itself by stepping near it along
the catwalk then blast it in its yellow portion with the Pulse Rifle or Plasma
Cutter to cut it in half. The best way to make it stand still is to move
toward it then back away as it tries to crush Isaac. Keep stepping toward it
and away from it while shooting to keep it from moving back into the gap.
Stasis does not work against it.
| |
 |
Don't worry about the Marker right now. Move on down the middle catwalk and
eliminate the second Tentacle that will appear along the right side of the
catwalk. Return to the Marker once it is defeated and grapple it then move it
to the right and then walk over to the other side and pull it to the right
while stepping down the middle catwalk. You need to slide it all the way to
the other end.Just by moving the Marker to the first right corner, a pair of Dark Slashers
will appear on your side and another Pregnant and more Slashers will appear on
the other side of the middle catwalk. Thankfully, no more enemies will bother
Isaac as he moves toward the other side. Grapple the Marker and slide it all
the way to the wall on the other side and the platform will rise and deliver it
to the Hangar Bay.
Objective Complete:
[X] Transfer the Marker
The --MARKER TRANSFERRED-- database file will be received. A Dark Slasher, a
Slasher, a Pregnant and a Lurker will attack from the side catwalks. Run
toward a corner room and fight them off from inside. The Force Gun or Line Gun
will be your best option here. Don't move onto another catwalk besides the
middle catwalk since a Tentacle will attack from the gap below the two side
catwalks.
ITEM LIST
[ ] --"Marker Transferred" database file--
Objective Added:
[ ] Meet Kyne at the Hangar Bay
The Marker is on its way up to the Hangar Bay. Kyne should be arriving
there now.
Run across the middle catwalk to get back to the other side. If you choose
either of the sides then a Tentacle will attack from the gap below. Take the
lift back to the second floor walkway then reenter the Tram Station Hall.
Save your game then move all the way down the hall to the left. The
--RENDEZVOUS-- database file will play when Isaac reaches the middle of the
hall. Step into the Tram Station at the end of the hall.
ITEM LIST
[ ] --"Rendezvous" database file--
Enter the elevator to the immediate left and take it up to the next floor.
Enter the restroom area down the hallway off to the left. Stomp the --ITEM
BOX-- near the right restroom then exit. Enter the Flight Lounge.
ITEM LIST
[ ] Item Box
Save your game via the !!SAVE STATION!! off to the left. Enter the Security
Panel Access and stomp the --ITEM BOX-- inside then exit back out into the
Flight Lounge.
ITEM LIST
[ ] Item Box
Right when everything looks nice and quiet while on your way to the Hangar Bay,
the doors will seal off as a quarantine initiates. A whole armada of Slashers
will enter the room and attack.
The Force Gun or Line Gun is very highly
recommended here. These enemies can really pile up. You'll face normal
Slashers and a few Dark Slashers.
The room will stop the quarantine once all
Slashers are defeated. Be sure to grab the --MEDIUM MED PACK-- and --RANDOM
AMMO-- from below the cubbies to the right.
ITEM LIST
[ ] Medium Med Pack
[ ] Random Ammo
Don't exit the Flight Lounge just yet. The door in the back of the Security
Panel Access unlocks after the quarantine, so step into the Elevator Hallway in
the back of this room.
Move along the hall then make a right near the middle of the corridor and open
the unlocked door and collect the --RUBY SEMICONDUCTOR-- and smash the two
--ITEM BOXES-- inside. Run all the way to the end of the hall outside and grab
the --STASIS PACK--. The door to the elevator is locked. Reenter the Flight
Lounge then open the door to the Hangar Bay.
ITEM LIST
[ ] Item Box
[ ] Item Box
[ ] Ruby Semiconductor
[ ] Stasis Pack
The --LANDING THE SHUTTLE-- database file will play as Dr. Kyne docks the
shuttle into the Hangar Bay when Isaacs steps out onto the walkway ahead.
Objective Completed:
[X] Meet Kyne at the Hangar Bay
As Dr. Kyne lands the shuttle, the --LOAD THE MARKER-- database file will play
shortly before a new objective is gained.
ITEM LIST
[ ] --"Landing the Shuttle" database file--
[ ] --"Load the Marker" database
file--
Objective Added:
[ ] Position the Marker
I have to move the Marker along the loading tracks and position it
underneath the shuttle.
The good doctor wants us to load the Marker onto the ship from the bottom floor
of the Hangar. There is just one little thing that we need to do up here
though. The all-great "Peng Treasure" is nearby. The Peng Treasure is near
the entrance to the Hangar Bay in between the two walkways in this area. Look
off the right walkway, as you're facing the closed door that the shuttle came
through, and move along the walkway to see a small golden statue in the middle
are between the two walkways - a spotlight shines down on this section. Equip
the Plasma Cutter then walk against the railing so that Isaac's aim can focus
on it then simply grapple it with kinesis and collect the --PENG TREASURE--.
ITEM LIST
[ ] Peng Treasure
So what does the Peng Treasure do? Well, it will give you the "There's Always
Peng!" bronze trophy (or the same labeled achievement that is worth 15G). It
can also be sold at a Store for 30,000 credits. Move back into the entrance
area then open the door to Runway 2.
If you have difficulty grappling the Peng Treasure then you can wait for the
gravity to be deactivated in this area and then collect it afterwards. At that
time, the railings along the side of the walkway will sink into the grooves
along the walkway allowing Isaac to grapple it easier.
Stomp the nearby --ITEM BOX-- then enter the next room. There is nothing out
on the walkway to the left.
ITEM LIST
[ ] Item Box
Move along the catwalk then open the next door.
Deactivate the gravity in this room by interacting with the nearby controls to
the right.
Gravity will be deactivated in the Hangar Bay. Before jumping
anywhere, move around the opposite side of the current walkway then open the
two --ITEM LOCKERS-- against the wall.
ITEM LIST
[ ] Item Lockers
[ ] Item Lockers
Zero-G jump off the walkway and land on the floor near the shuttle. Find the
--ITEM BOX-- on one side below the walkway you jumped from then open the three
--ITEM CONTAINERS-- on the wall of the other side. Four Lurkers will attack on
the other side of the current floor.
Fight them off (don't stand still too
long) then stomp the two --ITEM BOXES-- near the large clamps and open all
three --ITEM CONTAINERS-- near wall by the Marker. The red explosive canisters
below the shuttle can be shot at the Lurkers but they really fire too many
projectiles at Isaac to hit them properly so use either the Flamethrower or the
Plasma Cutter to shoot them.
ITEM LIST
[ ] Item Container
[ ] Item Container
[ ] Item Container
[ ] Item Container,
[ ] Item Container
[ ] Item Container
[ ] Item Container
[ ] Item Box,
[ ] Item Box
[ ] Item Box
Before messing with the Marker, please note that the other side of the Hangar
can be jumped to and you will find many pickups over there as well. There are
three --ITEM CONTAINERS--, one --ITEM BOX-- and one --LARGE MED PACK--. The
med pack is floating near the side closest to the Flight Lounge. Don't forget
that you can also grab the Peng Treasure in between the two middle walkways if
it hasn't been collected yet.
ITEM LIST
[ ] Item Container
[ ] Item Container
[ ] Item Container
[ ] Item Box,
[ ] Large Med Pack
Wow, that's a bunch of item collecting there, so hop to it. When you're done,
return to the Marker.
The Marker must be moved along the tracks with kinesis
and the controls must be used along certain portions of the tracks in order to
move it further. You'll have to get along the side of the Marker and drag it
in order to move it, so move to either side with the gray metal casing then
grapple it and pull it out of the alcove.
No enemies yet. Run over to the first set of controls by the yellow border
along the track then interact with them to rotate the border so that the Marker
can be move into the square. Get on either side so that Isaac is facing the
inside Marker then grapple it and move to the first square in the middle of the
tracks. You'll have to move the Marker over to the side across from the square
and then run back to the controls and rotate the square to rotate the border
and allow the Marker to slide to the other side of the tracks.
 |
|
| |
|
Hmm, still no enemies. Grapple the Marker and move it onto the square again.
The yellow border should now allow it onto the tracks on other side of the room
so move it all the way to the next square. Two Dark Stingers will attack along
the way, so listen for the battle music to begin then let go of the Marker and
fight them off.
The red explosive canister below the shuttle can be grappled
with kinesis and launched at them in order to damage them, but it really
doesn't help out that much.
You'll need to interact with the controls near the next yellow border to rotate
it so that the Marker can be moved past the border. Two Lurkers will attack
once the Marker is moved onto the square. Simply move the Marker under the
ship and Dr. Kyne will contact Isaac.
Objective Complete:
[X] Position the Marker
The --RESTORE GRAVITY-- database file will be received then a new objective
will be added.
ITEM LIST
[ ] "Restore Gravity" database file
Objective Added:
[ ] Restore Gravity to the Hangar Bay
Kyne can't get the Marker onboard until I restore gravity to the Hangar
Bay.
Simply jump back to the walkway with the controls for gravity then reactivate
the gravity. The walkway is near the area where the objective is received.
It's best to jump to the ceiling then find the walkway below and jump to it.
Objective Complete:
[X] Restore Gravity to the Hangar Bay
The --COME ABOARD-- database file will play shortly after the Marker is loaded
and a new objective will appear.
ITEM LIST
[ ] "Come Aboard" database file
Objective Added:
[ ] Meet Kyne at the Shuttle
The Marker is on board. Now we can all finally get off this ship.
Step back into the Control Room Catwalk area then enter Runway 2.
Dr. Kyne is on the walkway through the doorway to the right. Walk toward him.
Kendra is already on the ship, so let's meet up with the good doctor and end
this nightmare.
Objective Completed:
[X] Meet Kyne at the Shuttle
The --BETRAYAL-- database file will play shortly after the events that take
place on the walkway. The --NICOLE'S ALIVE-- database file will play
afterwards.
ITEM LIST
[ ] "Betrayal" database file
[ ] "Nicole's Alive" database file
Objective Added:
[ ] Meet Nicole in Flight Control
Nicole's alive! I don't know how she tracked me here, and I don't care.
Kendra betrayed me, this whole time, she was some kind of covert agent.
She's murdered Kyne and taken the Marker and the Shuttle. If Nicole can
help me get the Marker back, I still might be able to end this nightmare.
Oh! Ohoho! It seems a new person has just been added to the very top of Isaac's "People to stomp" list. If you want, you can take out your aggression on the
body left behind on the walkway. It's a little wrong really, but I won't tell
anyone how cruel you are. Step back through the Control Room Catwalk area.
The door beside the gravity control panel is now unlocked, so open it.
Grab the --RANDOM AMMO-- from the middle of the walkway then continue to the
next door at the top and open it to enter the Control Room.
Stand outside the room and blast the tentacle pods on the floor with your
Plasma Cutter - aim for the tentacles. A Spawner is on the wall up ahead but
he won't attack until Isaac enters,
so finish off the pods then equip the Force
Gun and run into the room then fire force grenades at him to finish him off
quickly. Open both of the --ITEM LOCKERS-- off to the left then enter the next
room up ahead.
ITEM LIST
[ ] Item Locker
[ ] Item Locker
Nicole is around the corner.
Objective Complete:
[X] Meet Nicole in Flight Control
Nicole will speak to Isaac then a new objective will be added.
Objective Added:
[ ] Remote Pilot the Shuttle
I can override Kendra's control of the shuttle from here, and bring the
shuttle back.
Be sure to open the two --ITEM CONTAINERS-- and collect the --POWER NODE-- and
--DIAMOND SEMICONDUCTOR-- from the room.
ITEM LIST
[ ] Item Container
[ ] Item Container
[ ] Power Node
[ ] Diamond
Semiconductor
You can't save until the ship is remote piloted. Move over to the controls to
the left of Nicole then override the shuttle controls.
Objective Complete:
[X] Remote Pilot the Shuttle
A most pleasing --TERRIBLE MISTAKE-- database file will be received shortly
after overriding the shuttle controls and another objective will be added.
Objective Added:
[ ] Fly the Shuttle to the Colony
Nicole is completely driven to return the Marker to the Colony. If we can
continue with Kyne's plan, and use it to trap the Hive Mind, we just might
be able to survive this. Together.
Once the shuttle docks in the Hangar Bay outside, the !!SAVE STATION!! in the
current room will activate. You'll have to wait if you want to save here.
Simply move through Control Room A then through the catwalk area afterwards to
return to the Hangar Bay. Enter the other catwalk area then reenter the Runway
2 area.
ITEM LIST
[ ] --"Terrible Mistake" database file--
There is a group of Dark Stingers out on the walkway ahead.
They will enter
the room where Isaac is, but they don't seem to want to attack in the room very
much - they back off from the room and move back out to the walkway. Take out
the Line Gun or Plasma Cutter then blast them when they land near Isaac. Since
they are at such a long distance at first, force grenades works well against
them also.
Step out onto the walkway then board the ship by moving up the ramp. Open the
door to the control room to end this chapter.
|