| WALKTHROUGH - CHAPTER 07, INTO THE VOID SPECIAL NOTE: The "Attach the Beacon" database file requires plenty of
backtracking in order for it to play. You have to enter the Mining Bay and
destroy all four tethers but DO NOT plant the beacon on the asteroid.
Afterwards, backtrack all the way to the Mining Controls room and try launch
the asteroid to receive this file.
The --DISTRESS CALL-- database file will play as Isaac steps off of the tram.
Objective Added:
[ ] Find the Mining Access Key
Kendra located the Mining Access Key on the Processing Sub Deck. That must
be where the mining supervisor died. I knew these men. I can't believe
they are all dead.
[ ] Find the S.O.S. Beacon
The beacon could be our only way off this goddamn ship. It's stored
somewhere on the Maintenance Sub Deck. It sends out a strong sub space
broadcast that should alert any ship in the sector.
[ ] Plant the Beacon
I need to secure the SOS Beacon to the asteroid. Once the asteroid is
launched, the beacon will clear the Ishimura navigation array, and it will
be able to broadcast a clear signal.
There is a --ITEM CHEST-- off to the right and an --ITEM CONTAINER-- on the
wall in the sitting area.
 Enter the hall up ahead. Enter the hall up ahead.
ITEM LIST
[ ] --"Distress Call" database file--
[ ] Item Chest
[ ] Item Container
Find the --ITEM CHEST-- around the right corner in the room ahead and then the
--POWER NODE-- in the container around the left wall. While facing the next
door, look up on the big pipe to the right to see some --RANDOM CREDITS-- lying
on a metal piece on top of it near the ceiling. Grapple the credits with
kinesis then collect them.
ITEM LIST
[ ] Item Chest
[ ] Power Node
[ ] Random Credits
There is a !!SAVE STATION!! to the right up ahead. Enter the right section of
the room and open the --ITEM LOCKERS-- inside then collect the --RANDOM AMMO--
from the cubbies off to the right and the --SMALL MED PACK-- from the narrow
corridor to the left near the !!STORE!!. Enter the section on the other side
and open the --ITEM CHEST-- to the left then use the !!UPGRADE BENCH!! off to
the right if needed.
ITEM LIST
[ ] Item Locker
[ ] Item Locker
[ ] Contact Energy
[ ] Small Med Pack,
[ ] Item Chest
[ ] Item Chest
Now that all the item collecting is done, walk over to the elevator directly
ahead and use the controls on the door to call it up. The --ELEVATOR PROBLEM--
database file will play shortly after the main the elevator kicks the bucket.
ITEM LIST
[ ] --"Elevator Problem" database file--
Step onto the elevator and take it up to Deck B - Processing. A total of four
Slashers will drop from the ceiling while the elevator rises,
so take out the
Force Gun and get close to them as they land then blast them to get rid of them
quickly. Step out onto the Processing Antechamber.
Pick up the --TEMPLE AND ELIZABETH-- database file on the floor directly ahead.
ITEM LIST
[ ] --"Temple and Elizabeth" database file--
Enter the left room and open the two --ITEM CHESTS-- inside. No matter which
way you take here, Isaac will be taken to the right side of this area.
Slashers will eventually attack along with a Pregnant.
In the back center room
with the corpse in the chair, open the --ITEM LOCKER-- then walk into the
hallway ahead. There is some --RANDOM AMMO-- below the hallway on the side of
this area - look off the left railing in the right hall and grapple it with
kinesis to bring it toward Isaac then collect it.
ITEM LIST
[ ] Item Chest
[ ] Item Chest
[ ] Item Locker
[ ] Random Ammo
Save your game at the !!SAVE STATION!! on the right wall of the right hallway
then continue down the corridor ahead. Pick up the --RANDOM AMMO-- in front of
the door at the bottom then enter the Mineral Processing area.
ITEM LIST
[ ] Random Ammo
Something will creep by the outside grating in front of Isaac. The door to the
left is locked, so move down the right corridor. A Slasher will step out from
the left corner soon enough. Use the !!STORE!! off to the right if needed then
check the two --ITEM CHESTS-- and pick up the --PROCESSING ROOM PROBLEM--
database file.
ITEM LIST
[ ] Item Chest
[ ] Item Chest
[ ] --"Processing Room Problem" database file--
Continue down the hall to the left. Step past the convenient hole that the
crashed asteroid made for you and pick up the --SMALL MED PACK-- lying near the
body in the dead end hallway further ahead.
There are some items on the other
side of the debris that can be pulled toward Isaac with kinesis, but you'll
reach that area later.
ITEM LIST
[ ] Small Med Pack
Move through the hole in the wall that the crashed asteroid made. Shortly
after entering, the --CLEAR THE BOULDERS-- database file will be received.
ITEM LIST
[ ] --"Clear the Boulders" database file--
There are a total of two --ITEM BOXES-- floating in this room if you can find
them.
ITEM LIST
[ ] Item Box
[ ] Item Box
Stingers will attack once you move further into this room. You need to destroy
the four boulders in this room so gravity can be activated once again. Jump
around the room and find all four boulders then grapple each one with kinesis
and fire them at the flame beam in the middle of the room.
You will receive an "Anomaly Destroyed" message whenever each boulder burns up completely. here
is also a counter displayed on the wall next to the gravity controls that will
tell you how many more boulders are in the room.
Lurkers will attack once the first two boulders have been destroyed.
A message
saying that gravity can now be restored will be issued once all boulders have
been destroyed. Find the gravity controls on the walkway beside the walkway
that Isaac entered this area from - it's to the right while stepping through
the hole.
Use a Power Node to open the door behind the controls before messing with them
and pick up the --RANDOM AMMO--, --MEDIUM MED PACK and --RUBY SEMICONDUCTOR and
then open the --ITEM CHEST--.
ITEM LIST
[ ] Random Ammo
[ ] Random Ammo
[ ] Random Ammo
[ ] Medium Med Pack,
[ ] Ruby Semiconductor
[ ] Item Chest.
Before activating the gravity, run back to the nearby store through the hole in
the wall and pick up the Line Gun, Force Gun and the Pulse Rifle if you don't
have them. Things get ugly once the gravity is activated again.
Once gravity is restored, catwalks will form along the sides of the current
walkway. Now the enemies attack!
Slashers will dash toward Isaac from both
catwalks eventually, a Pregnant will move down the left catwalk and Exploders
will fall from each of the four ends of the room - onto the walkway. Keep the
Slashers away from Isaac by using the Force Gun to knock them back. If the
Pregnant's chest is hit then destroy the Spiders with force grenades or a force blast. Aim quickly at Exploders from a distance and shoot them with the Pulse
Rifle or the Plasma Gun.
If the enemies start to bombard Isaac then take out the Line Gun and slice
through the whole group of them. The Exploders make this battle very deadly
especially with how they leap down from the ceiling. When they get close, they
won't hesitate in exploding no matter what Isaac is doing. You can take
shelter in the Power Node room and shoot them but you won't have that great of
a view of the outside action. Really the safest place is the middle of a
catwalk - don't stand on a concrete section of the walkway since the Exploders
fall from the ceilings above them. Locating the Exploders is the most
important part of this battle since they can sneak up behind you so very easily
while Slashers attack.
When all the insanity ends, find the door that leads to the Mineral Processing
Control Room then step inside.
TIP: If you enter the Mineral Processing Control Room early and let the door
seal off, all the outside necromorphs, except for the Pregnant, will begin to
fall into the room from the overhead vents. This can make the battle a bit
easier since you won't be surrounded. They fall next to Isaac, so make sure to
have the Force Gun ready.
Pick up the --RANDOM AMMO-- and open the three --ITEM CHESTS-- then grab the
++MINING ACCESS KEY++ from the dead body on the right side of the room.
The
--KEY FOUND-- database file will play once the mining access key is picked up.
ITEM LIST
[ ] Random Ammo
[ ] Item Chest
[ ] Item Chest
[ ] Item Chest
[ ] ++MINING
ACCESS KEY++
[ ] --"Key Found" database file--
Objective Complete:
[X] Find the Mining Key
Open the door to the hallway in the back of the room.
Take the --POWER NODE-- from the container on the right wall. Follow the hall
ahead. The lights will go out. Oh no! But they'll quickly come back on.
Relief. Open the door at the other end. This will take you back to the
Mineral Processing Area hall, so quickly open the door to the right to reenter
the Processing Antechamber.
ITEM LIST
[ ] Power Node
Be sure to save at the save station! A Stinger will likely drop down from the
ceiling somewhere in this area then attack.
It is just one, so don't worry
much about him if he does. Get back to the Mining Elevator.
Take the elevator down to Level D - Maintenance.
Grab the --RANDOM AMMO-- from the top shelf over to the right and the --MEDIUM
MED PACK-- from the lower shelf to the left.
ITEM LIST
[ ] Random Ammo
[ ] Medium Med Pack
If you start to hear a crackling sound like the sound of an appendage entering
a person's skull in order to turn them into a Dark Slasher then you'd best run
down the hall to the left up ahead and start blasting the two Infectors in the
organic covered area.
These things will stay down here and make Dark Slashers
out of the two bodies if you allow them to. Run toward them and flame them or
just shoot them a few times with any weapon to kill them quickly.
Collect the --GOLD SEMICONDUCTOR-- from near the right end of the hallway
directly ahead when you first enter then take the --KYNE'S HOSTAGE-- database
file from near the shelf and the --STASIS PACK-- from the shelf and open the
--ITEM CHEST-- nearby. Open the next door.
ITEM LIST
[ ] Gold Semiconductor
[ ] --"Kyne's Hostage" database file--
[ ] Stasis
Pack
[ ] Item Chest
There is a !!SAVE STATION!! on the right wall as Isaac enters. Walk directly
ahead then grapple the lift up ahead with kinesis to pull it toward Isaac.
Step on the lift then look over to the left walkway up ahead to spot a glowing
object. Keep trying to grapple it with kinesis and you will eventually get the --SMALL MED PACK--.
ITEM LIST
[ ] Small Med Pack
Activate the lift. While the lift is moving across, pods will attack from the
side walkways by shooting acid balls at Isaac.
Take out the Plasma Cutter then
flip the front portion horizontally and then aim for the tentacles that stick
out of the pods then shoot them off. It's best to move from side to side if
you fail to hit them a lot. There are a few --RANDOM AMMO-- pickups along the
walkways with the pods that can be retrieved with kinesis, but you'll so busy
shooting pods that it's quite hard to retrieve them.
ITEM LIST
[ ] Random Ammo
[ ] Random Ammo
[ ] Random Ammo
A familiar looking woman (Nicole) will appear and talk to Isaac once the lift
stops.
Step off the lift after she speaks then take the --RANDOM AMMO-- from
off the floor to the left, the --RANDOM AMMO-- on the shelf to the right, the
--MEDIUM MED PACK-- on the top shelf to the right and open the two --ITEM
CHESTS-- to the right. Make sure that all of your guns have full ammo in them
before entering the next room.
ITEM LIST
[ ] Random Ammo
[ ] Random Ammo
[ ] Medium Med Pack
[ ] Item Chest
[ ] Item
Chest
Nicole will begin to unlock the door to the Storage Room in the back of Isaac
as he turns toward the side that she is on. For this part, you need to protect
Nicole while she unlocks the door behind Isaac. You can use a variety of
weapons here. I recommend using the Pulse Rifle or Plasma Cutter for the first
few Slashers that appear on her side then switch over to the Force Gun as they
appear on your side.
When more than one at a time starts to appear, shoot
force grenades over on her side then blast the Slashers that appear on your
side with force blasts. Be careful with your gunfire since Isaac can actually
hit Nicole during this battle and wound her - if she dies then the game is
over.
The Force Gun is your best option for most of this portion - the force grenades
help out extremely well. The Pulse Rifle and Plasma Cutter work ok also.
Remember that you can grapple any ammo or items that the Slashers leave behind
on her side using kinesis. There is an explosive canister on your side that
can be launched over to Nicole's side and there is also some --RANDOM AMMO--
hidden with the canisters.
ITEM LIST
[ ] Random Ammo
Nicole has no visible health bar, so you basically have to keep the Slashers
away from her at all times without any sort of damage warning. She can take a
few hits before dying, but don't rely on her defense. A Lurker will appear on
the left wall during the final wave, so blast it with the Force Gun or
Flamethrower.
Nicole will unlock the door for Isaac then walk back into the
next room. Be sure to look through the dead bodies on the other side of the
room to make sure that you don't leave any items behind. Grapple the dead
appendages with kinesis and search through them for anything that glows (an
item). Open the door to the Maintenance Storage Room.
Wow, look at what we have here! Pick up the two --RANDOM AMMOS-- from the left
shelf then the --LARGE MED PACK-- and --LEVEL 4 SUIT SCHEMATIC-- off the right
shelf. There is a --POWER NODE-- in the container on the back wall. Grab the
++SOS BEACON++ from the counter in the middle of the room. The --BEACON
RECOVERED-- database file will play after picking up the beacon.
ITEM LIST
[ ] Random Ammo
[ ] Random Ammo
[ ] Large Med Pack
[ ] Level 4 Suit
Schematic
[ ] Power Node
[ ] ++SOS BEACON++
[ ] --"Beacon Recovered" database file--
Objective Complete:
[X] Find the SOS Beacon
Leave the storage room then step back out into the Maintenance Chamber.
Step on the lift and take it back across. I'm sure you're fearing the worst
here. Well, while Isaac rides across this time, Lurkers and pods will attack.
Take out the Pulse Rifle and blast them. The Force Gun's force grenades can
work well here, but you have to hit one of the Lurkers directly with a force
grenade since it will roll off the side of the platform otherwise. If you can
hit them directly with force grenades then it will defeat just about all the
enemies on that one side. Isaac is a sitting duck right here for projectile
fire, so you have to stay constantly moving back and forth with what little
space that you have if you can't hit them.
| |
 |
Two Slashers will be waiting on the other side as the lift stops, so don't let
the enemies on the sides distract you when the lift gets close to the other
side.
Blast them with the Force Gun as the lift stops. The save station is
far enough away from the other enemies to where they won't be able to hit
Isaac, so go ahead and save your game at the save station even with enemies
still in the room. They can only fire if you step toward them then quickly
back up toward the save station.
Be careful while trying to get on the elevator since a Slasher is playing dead
right across from it.
While stepping into the elevator, the --ELEVATOR FIXED--
database file will play and you'll gain some new objectives.
ITEM LIST
[ ] --"Elevator Fixed" database file--
Objective Added:
[ ] Plant the Beacon
I need to secure the SOS Beacon to the asteroid. Once the asteroid is
launched, the beacon will clear the Ishimura navigation array, and it will
be able to broadcast a clear signal.
[ ] Destroy the Gravity Tethers
Mined asteroids are fixed in place by gravity tether beams. I need to
disable all of them in order to launch the asteroid away from the ship. A
clean shot past their outers casing should do the trick.
Step onto the elevator and take it to Deck C - Mining.
Right off the bat, two crawling Slashers and two Lurkers will attack from
directly ahead.
Use the Force Gun to start off shooting them then switch over
to the Flamethrower for the Lurkers, or continue to use the Force Gun. There
is an --ITEM CHEST-- in the alcove on each side of this room. The objective
marker will tell you to go right, but you should go left to avoid some
backtracking.
ITEM LIST
[ ] Item Chest
[ ] Item Chest
A Slasher will move toward Isaac from the back of this room, so go ahead and
enter the room then defeat him while he walks forward.
Off to the immediate
left is a !!SAVE STATION!!. Walk up the ramp to the left and take the --SMALL
MED PACK--, open the --ITEM BOX, then grab the --SUPERVISOR'S CHOICE-- database
file from the floor - one of the most insane files in the game! There is a
!!STORE!! on the left wall. Make sure you buy the Level 4 suit if you haven't
yet.
ITEM LIST
[ ] Small Med Pack
[ ] Item Box
[ ] --"Supervisor's Choice" database file--
Smash the three --ITEM BOXES-- on the cart while walking to the back of the
room. Facing them, the one on the left has Spiders inside of it.
ITEM LIST
[ ] Item Box
[ ] Item Box
[ ] Item Box
Move up the ramp to the left and open the --ITEM CHEST-- off to the left.
There is an !!UPGRADE BENCH!! off to the left further ahead. If you mess with
the upgrade bench then a Slasher is going to jump down from the ceiling and
land to Isaac's right when Isaac backs away from the bench. I'd back up and
shoot him with the Contact Beam then stomp on his body a bit and throw each
piece off the side of the railing with kinesis for doing that if I were you,
but that's just me.
ITEM LIST
[ ] Item Chest
The power unit that is plugged into the power plug supplies power to the small
lift to the side but there is no use to moving up to the control room at the
moment since you need to destroy the tethers and plant the beacon on the
asteroid in order to send it out into space. Grapple the power plug with
kinesis and bring it along with you then leave the room - keep in mind that
you'll have to return this power unit to this power plug later in order to use
the elevator. Step back into the Extraction Room then walk down the hallway on
the other side.
Exploders will attack in the Extraction Room,
so drop the power plug and defeat
them - you might want to run toward the elevator in this room since two of them
will surround Isaac. Place the power unit into the empty power plug on this
side in order to power the small lift.
Take the lift down to the bottom floor
Control Room Hallway.
Follow the hall ahead. Use the stasis recharger along the right wall near the
end if needed. There are six --ITEM CONTAINERS-- along the sidewalls of the
hall ahead. There is also a --MINING TIMELINE-- database file and a --GOLD
SEMICONDUCTOR-- on the floor up ahead. Enter the Mining Bay to the right by
using either door.
ITEM LIST
[ ] Item Container
[ ] Item Container
[ ] Item Container
[ ] Item Container,
[ ] Item Container
[ ] Item Container
[ ] --"Mining Timeline" database file--
[ ] Gold Semiconductor
This room has no gravity, so you can move anywhere in it. There are two --ITEM
BOXES-- floating around in this room.
ITEM LIST
[ ] Item Box
[ ] Item Box
There is a slight new enemy in this room. Watch out for the Dark Stingers.
They are the same as ordinary Stingers but they take more hits and are more
aggressive much like the Dark Slashers.
Use either the Plasma Cutter or Line
Gun to defeat them easily. The Force Gun and really just about any other gun
will work just as well, but they have tough armor! Don't stand in one spot
while fighting one since there are three of them in this room. They jump down
and attack soon enough.
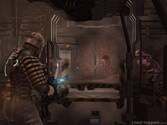
Once all three Stingers are destroyed find the tethers in this room that
support the asteroid by holding it in place with a grapple beam. They have a
spinning piece on them. Stand right next to the spinning piece and shoot it
with stasis then blast the lighted area inside with any weapon to shut off each
tether. Destroy the TETHER (1/4) on the floor and the TETHER (2/4) on the
ceiling. But this is only two, where are the others?
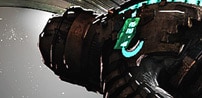
Turn your attention to the asteroid. You see the circular metal pieces that
move back and forth on it? Those pieces will tear Isaac to shreds if they hit
him. While on the floor facing the asteroid, look to the left side to notice
that the circular metal pieces move away from the lower left side eventually.
When they begin to move from that side, zero-g jump to that side of the
asteroid then quickly run around the left side of the asteroid.
Isaac will step out into space and enter a vacuum area with zero gravity. Two
Lurkers will attack on this side.
The SOS beacon can be placed in the center
of this side of the asteroid in order to fulfill one of the objective but DON'T
PLACE THE BEACON YET IF YOU WANT TO GAIN ALL DATABASE FILES FOR THIS CHAPTER.
Find the TETHER (3/4) on the right and TETHER (4/4) on the left and shut down
each of them by shooting them with stasis then blasting in between the rotating
metal pieces and hitting the light with a gun.
Objective Complete:
[X] Destroy the Gravity Tethers
If you want to gain all database files, then don't plant the SOS Beacon but
destroy all the tethers. Once the tethers are destroyed, step back around the
asteroid and move back into the Mining Bay. Travel all the way to the Control
Room by going up the elevator in the Mining Hallway and using the Mining Access
key on the door - you'll have to place the power unit into the power plug near
the lift in that area again. Walk over to the controls for the asteroid and
examine them to receive the --ATTACH THE BEACON-- database file.
NOTE: If you accidentally plant the beacon and still want to get the database
file then jump onto the asteroid and allow the circular metal pieces to kill
Isaac and you will start at the beginning of the room without having placed the
beacon.
ITEM LIST
[ ] --"Attach the Beacon" database file--
To accomplish the beacon objective, simply stand on the asteroid and press the
X (or A) button to plant the SOS beacon on it.
Objective Complete:
[X] Plant the Beacon
Getting out of the back of the asteroid without hitting the outside circular
metal pieces is one of the hardest parts of this room, but it's still not that
bad, just a little tricky. Move to the right side of the asteroid then watch
for the side where the circular pieces both move away from - they meet on this
side then both of them move separate ways away from this side. Quickly run in
that direction once they move away then leap off the asteroid and into any part
of the Mining Bay below - just target a surface then jump. Jump to the floor
afterwards then exit the room.
Be sure to recharge your stasis at the stasis recharger along the wall then
move back to the lift. A single Slasher will appear in the hall ahead, so be
ready to blast him.
Take the lift up again.
The caged circular portions of this room now shoot out fire, so time your runs
to step past them when they go out.
You need to grapple the power unit for the
elevator then pull it out and take it with you all the way over to the Mining
Hallway - stand on the opposite side of the flames away from the power unit
then grapple to get it out of the plug easier. You might want to shoot the
power unit through the flames in each section where you have to cross some
flames to avoid walking really slow by them. The other side of the Extraction
Room has flames currents also. The flames will not automatically kill Isaac,
but they will damage him badly.
Plug the power unit back into the power plug up the second left ramp in order
to power the elevator. Move over to the elevator once it is active and take it
up. Use the Mining Access Key to open the locked door at the top.
Take the --POWER NODE-- from the container on the right wall then open the
--ITEM CHEST-- against the back wall. Walk over to the controls near the
window on the other side of this room and interact with them. If you haven't
placed the SOS Beacon then you'll receive the "Attach the Beacon" database file
and will have to run all the way back to the asteroid and attach the beacon but
if you have already placed it then the asteroid will be launched out into space
with the SOS beacon attach.
Objective Complete:
[X] Launch the Asteroid
The --ASTEROID LAUNCHED-- database file will play once the asteroid has been
launched and a new objective will be received.
ITEM LIST
[ ] --"Asteroid Launched" database file--
Objective Added:
[ ] Go to the Bridge
The beacon's on its way broadcasting loud and clear. Now we cross our
fingers and hope someone picks up the signal. The chances are slim but
it's our only hope. Kendra says there's something wrong with the
Communications Array, which means if someone tries to reach us, we can't
hear them. Got to get back to the Bridge and fix it.
When Isaac tries to leave the Mining Control room, the door will seal off and
the area will be placed under quarantine. Many Slashers will drop from the
vents in the ceiling and attack.
The first few are normal Slashers but the
last few are dark Slashers. This close quarters battle with several Dark
Slashers at once can get pretty bad if they trap Isaac, so run away if they get
too close then shoot them from a distance with force blasts and force grenades.
The Line Gun works great for Dark Slashers as usual. Leave the room after the
battle.
Return to the Mining Elevator in the Extraction Room.
Choose to go to Deck A - Preparation while interacting with the controls. A
single Dark Slasher will drop from the ceiling and attack.
Have the Contact
Beam charged and awaiting his descent or get ready to blast him like normal
with a weapon.
Three Crawlers will attack in here. Use the Force Gun to easily hit them
without much effort.
Try to hit more than one per blast. Continue through the
next door.
Run back to the tram then enter it and use the controls inside like normal to
end the chapter.
|