| WALKTHROUGH - CHAPTER 06, ENVIRONMENTAL HAZARD Objective Added:
[ ] Poison the Leviathan
I can dispense the poison through the filtration system of Food Storage.
It should kill anything alive inside.
Walk forward and pick up the --CROSS REPORT 1-- database file from the floor
then grab the --RANDOM AMMO-- in the sitting area off to the right.
ITEM LIST
[ ] --"Cross Report 1" database file--
[ ] Random Ammo
Move down the hall ahead and enter the restroom off to the right. Walk inside
the left stall area and open the --ITEM CHEST-- then take the --RANDOM AMMO--
from the floor. A few Spiders will jump out of the middle toilet and attack.
Enter the stall area on the other side and open the --ITEM CHESTS-- then
collect the --MEDIUM MED PACK-- from near the stalls.
ITEM LIST
[ ] Item Chest
[ ] Item Chest
[ ] Item Chest
[ ] Random Ammo
[ ] Medium Med
Pack
Exit the restroom then continue down the hall and take the elevator up to the
next floor.
Crush the --ITEM BOX then take the --FORCE ENERGY SCHEMATIC-- from the floor.
Open the next door.
You see that body up ahead? You can't stomp it... it's Hammond.
 Walk up to it
to engage in a conversation with him. There's some --RANDOM AMMO-- to
Hammond's right and an --ITEM BOX-- off to the left. The --HAMMOND'S ALIVE--
database file will play at the end of the conversation then a new objective
will be obtained. Walk up to it
to engage in a conversation with him. There's some --RANDOM AMMO-- to
Hammond's right and an --ITEM BOX-- off to the left. The --HAMMOND'S ALIVE--
database file will play at the end of the conversation then a new objective
will be obtained.
ITEM LIST
[ ] Item Box
[ ] Item Box,[ ] Force Energy Schematic
[ ] Random Ammo,
[ ] --"Hammond's Alive"-- database file
Objective Added:
[ ] Destroy the Poison Pods (0/8)
According to Hammond, the necromorphs have transformed some of the crew
into these "poison pods" which are contaminating the air. I need to find
and destroy them.
Walk around the corner to the left and move into the next room.
The --GETTING TO THE LEVIATHAN-- database file will play as Isaac steps into
this area. Use the !!SAVE STATION!! in the middle of the room to save your
game then open the --ITEM LOCKER--.
Make note of the !!STORE!! if you need to
drop off any items or buy anything. Open the door on the left side of the room
and continue into the room on that side.
ITEM LIST
[ ] --"Getting to the Leviathan" database file--
[ ] Item Locker
The --TRUST-- database file will be received as Isaac moves through the first
corridor. Open the next door.
ITEM LIST
[ ] --"Trust" database file--
The spray that moves out of the pipes in the next room can damage Isaac so time
your runs to step down the corridor as the pipes stop spraying - the middle
pipe does not spray, so Isaac will be safe in front of it.
The first room to
the right doesn't contain anything useful, the second room has an !!UPRGRADE
BENCH!! inside and the third room is locked. Open the --ITEM CONTAINERS-- on
the far left wall then take the lift up to the second floor catwalk in this
area.
ITEM LIST
[ ] Item Container
[ ] Item Container
A Slasher will drop form the ceiling onto the catwalk at the top - it's nothing
a little Plasma Cutter to the appendages won't solve. Continue into the next
room on the other side.
This room can get pretty violent inside. Slashers and Lurkers will show up as
Isaac ventures further into the room.
The Slashers can really pile up in this
room and they dash frantically with extreme aggression when moving toward
Isaac. It is best to stay on the constant move and shoot their legs off while
fighting them to keep from getting surrounded. Use the Line Gun in this room
for the most part but switch to the Force Gun if the enemies start to pile up.
Don't worry about shooting the Lurkers with the Flamethrower, since there are
so many Slashers - try to shoot the Lurkers' appendages as they try to attack.
There are a few explosive canisters lying around that can be launched at groups
of Slasher but with their aggression it can be hard to aim right.
TIP: You can enter the Inner Greenhouse A room on the left side of this area
and blast the Slashers from the doorway as they try to enter. The Slashers
will start to enter the room from the vents on the ceiling and on the floor.
Be sure to shoot the pod to the side early if you do this since killing it will
replenish the oxygen on the room.
For item pickups, there are two --RANDOM AMMO-- pickups down the corridor to
the left when you first enter and there is an --ITEM CHEST-- and an --ITEM
CONTAINER-- on the right side of the room. Enter the room on the back right
side of this area. The left door to that room is the only one that is
unlocked.
ITEM LIST
[ ] Random Ammo
[ ] Random Ammo
[ ] Item Chest
[ ] Item Container
Isaac will have to use his oxygen tank to breathe in this room because of the
contaminated air from the nearby pod. Find the POD (1/8) in the back of this
greenhouse (the bloated hunched creature) and stomp him to death or shoot it
twice with the Plasma Cutter to destroy it.
The contaminated air from around
the area will be sterilized as the room cleans the air and Isaac will be able
to breathe again. Remember to always shoot the pods in a contaminated room
first even if other enemies are around so you don't have to worry about oxygen.
Stomp the --ITEM BOX-- near the pod. A Dark Slasher will smash through a vent
in the back and attack in a few seconds - he'll follow Isaac into the outside
area if you happen to leave. A Lurker will appear outside of the greenhouse
while leaving. Enter the other greenhouse on the other side of this area.
ITEM LIST
[ ] Item Box
Find the POD (2/8) inside and destroy it. There is some --RANDOM AMMO-- on the
floor of this room.
ITEM LIST
[ ] Random Ammo
When Isaac steps back outside, a Pregnant be staring at him from the corridor
ahead. Shoot at his top appendages as he runs and you'll be able to kill him
before he reaches Isaac. Find the elevator in the middle of this area. There
is a --LARGE MED PACK-- below the door that holds the containers for the
feeding system in the back of the elevator.
To get the large med pack, interact with the controls for the feeding system
near the elevator then shoot the feeding container with stasis as the door
opens and it moves out of the floor. Quickly run to the other side of the
elevator shaft and look down toward the feeding containers and find the Large
Med Pack then grapple it with kinesis and collect it! The door for the
containers in the floor must still be opened in order to collect the med pack.
Take the elevator up to the third floor.
ITEM LIST
[ ] Large Med Pack
Smash the three --ITEM BOXES-- on this floor then take the --RUBY
SEMICONDUCTOR-- from the floor on the opposite side. Take the elevator back
down to the second floor.
ITEM LIST
[ ] Item Box
[ ] Item Box
[ ] Item Box
Pick up the --RANDOM CREDITS-- from the nearby catwalk floor then enter the
Hydroponics Controls on the opposite side of the area. If you look off to the
left before entering the Hydroponics Controls area, you can see an item shining
on the left side of the railing of the walkway across from Isaac.
Grapple it
with kinesis and bring it toward Isaac then pick up these --2300 CREDITS--.
ITEM LIST
[ ] Random Credits
[ ] 2300 Credits
Open the nearby --ITEM LOCKER--. What's all this crap about becoming whole?
My Isaac only mutilates! You see all the dead bodies in this room? Smash
them. Run over to each one and tear them apart with stomps. Find the POD
(3/8) on the other side of the room then stomp it as well.
ITEM LIST
[ ] Item Locker
Two Infectors will attack afterwards
but if you followed my advice then they
won't have any bodies to change into Dark Slashers, so take out a weapon and
punish them for their attempts at creating an army of necromorphs. Leave this
room then enter the room on the opposite side of the catwalk.
Turn to the right and open the --ITEM CHEST-- in this corridor then save your
game at the !!SAVE STATION!! to the left. Enter the next room.
ITEM LIST
[ ] Item Chest
Right when Isaac steps into the next hall, a new enemy will move toward him
from off to the right. This is the Exploder.
Aim for its glowing yellow arm
and shoot it a few times to make the arm explode along with it. Both the Pulse
Rifle and the Plasma Cutter work well for these enemies. Their other
appendages can be shot also but there is really no need to defeat them this
way. The yellow arm can also be cut off with a shot to where it will fall to
the floor - this can be useful for when you fight these in groups with other
enemies. Isaac can actually grapple the arm with kinesis and shoot it much
like an explosive canister.
More Exploders will appear in the room, so don't move forward that much until
they stop coming - you have to move forward a bit to make some of the later
Exploders attack though. These enemies look so easy, don't they? Haha, wait
until they start showing up with other enemies then come back at me with your
answer to that question. The Exploders attack by slapping Isaac with their
glowing appendages to create an explosion that will kill them and damage Isaac
pretty badly, so just imagine fighting them in an intense group of Slashers,
Stingers or Lurkers. Shooting off their leg and right arm to stop them will
become important later mainly for when they get too close to Isaac. They use
both their right leg and right arm to support them while they move, so both
have to be shot off in order to stop them.
Run to the other end and step into the next room.
There is a stasis recharger to the right and two --ITEM LOCKERS-- directly
ahead. The area surrounded in mist up ahead is without gravity. Step inside
the zero gravity area and grapple the --ITEM BOX-- suspended in the air then
pull it down and break it.
ITEM LIST
[ ] Item Locker
[ ] Item Locker
[ ] Item Box
Look up at the ceiling. The spikes in any of the zero gravity area cannot kill
Isaac since he can't jump into them so don't ever worry about them. Find the
ceiling door with the glowing kinesis symbol then grapple it and pull it to the
side to open it.
Don't jump toward it just yet - take out the Flamethrower and
use flame bursts to heat up the Lurkers that move through the doorway.
Jump through the doorway on the ceiling. Look around the next room and find
the next door with a glowing kinesis symbol on it.
Grapple the door then move
it to the side in order to open it then leap through it.
A single Lurker will attack in the next portion of the room, so flame him with
long range flame bursts.
Find the alcove with the explosive canister on the
wall then jump into the alcove. If you can't line up perfectly with it then
jump to the wall below it and run up the wall toward it since the area is
sloped - like you're running uphill. Enter the next room through the door and
open the next door in the hall ahead.
Isaac will enter an air filtration room with flames shooting below him.
There
is an --ITEM CHEST-- off to the right as Isaac enters. Move up the stairs to
the left and pick up the --RANDOM AMMO-- on the catwalk. Walk to the elevator
on the right side of the room and pick up the --CROSS REPORT 2-- database file
along the way. Take the elevator to the bottom floor.
ITEM LIST
[ ] Item Chest
[ ] Random Ammo
[ ] --"Cross Report 2" database file--
There is a stasis recharger on the wall near some explosive canisters and some
--RANDOM AMMO-- lying among the explosive canisters. Be sure to recharge your
stasis before you enter the area ahead.
ITEM LIST
[ ] Random Ammo
Punch the purple fuse box to the right of the door along the right side of the
wall to open the door that leads to the room with the first flame.
Yeah, you
have to run through all these flames, but it's not as bad as you think. The
fuse box for the next door across from the current door can be seen. I'd shoot
the next fuse box if I were you, so you don't have to wait for it to open. If
you look through the closing metal blinds on the wall directly across from the
first door, you can see the third fuse box as well, so shoot it. Now all of
the doors in the flame rooms are open except for the fourth door.
Speaking of the metal blinds, watch them for a few seconds and notice how they
close seconds before the flames shoot. You can watch these to tell when a
flame is about to shoot from the wall to the right. In order to get through
this area easily, look toward the wall where the flame shoots from then shoot
the wall with stasis and this will slow down the flaming process big time.
Peak into each room and shoot the flaming mechanism then run to the next flame
room and do the same thing until Isaac reaches the other side. There are only
three flame rooms.
You'll have to hit the fuse box in the third flame room to open the final door.
A Slasher will attack directly after the door is open, so have a Pulse Rifle
ready to tear right through him, or just shoot his legs with the Plasma Cutter.
Enter the room and blast the POD (4/8) to the left.
Find the elevator on the
right side of the area and take it up to the top floor.
Walk to the right and open the --ITEM CHEST-- and smash the --ITEM BOX--. Move
up the stairs and enter the control room then snatch the --MEDIUM MED PACK--
and --POWER NODE-- and then open the --ITEM LOCKER--. Exit the control room
then run past the elevator
and open the door around the corner to the left up
ahead then step inside the elevator and take it down to the floor below.
ITEM LIST
[ ] Item Box
[ ] Item Chest
[ ] Medium Med Pack
[ ] Power Node
[ ] Item
Locker
Now you're back in the West Grow Chamber. Two Lurkers and a Pregnant will
attack Isaac. Use the Force Gun to defeat all of them. Aim upwards while
shooting the Pregnant in order to hit his top appendages. If you hit his chest
then just shoot a force grenade to get rid of the Spiders. Wait for the
Lurkers to show their appendages and then shoot them from up close with a Force
Gun blast or you can still use the Flamethrower or Plasma Cutter. Exit this
room via the door on the left side that leads to the hallway outside of this
area.
The vents on the right wall will bust open but nothing is going to eat you up
from inside the wall... this time. Take the elevator down and maneuver through
the spray below then get back to the Atmosphere Control room.
Save your game. Did I even need to say that? Hopefully not. Now it is time
to take on the east side, so open the door on the other side and step through.
Pick up the --CORRUPTION-- database file from the small corridor.
ITEM LIST
[ ] --"Corruption" database file--
Now, I'm going to prepare you for this, so you can get the best of a certain
little ass behind the next door. There is a Spawner on the wall directly
across from the next door.
When the door opens, run directly toward him with
the Force Gun equipped and spam him with force grenades (both sides of him)
until he starts to yell in pain during his dying animation. You have to be
quick or he will start shooting many pods in front of him. He will likely
shoot a few pods, but hammer him down with grenades and he won't last long.
You can shoot him with stasis to keep him from shooting pods when Isaac first
enters the room if you want.
Check out the rooms on the right side of this corridor. The first room has an
!!UPGRADGE BENCH!! inside.
Be sure to arm your Force Gun then blast the
Slasher as the second door is opened then open the --ITEM CHEST-- and take the
--RANDOM AMMO-- from inside.
ITEM LIST
[ ] Item Chest
[ ] Random Ammo
The final room is a power node room, so place a power node into the control pad
on the side of the door to unlock the door. Enter the room and collect the
--2000 CREDITS--, --RANDOM AMMO-- pickups, --LARGE MED PACK-- and open the
--ITEM CHEST-- and then leave.
ITEM LIST
[ ] 2000 Credits
[ ] Random Ammo
[ ] Random Ammo
[ ] Random Ammo
[ ] Large
Med Pack
[ ] Item Chest
Take the elevator up to the top floor then open the door at the other end of
the hall. A report about something abnormal in the East Grow Chamber will play
over the intercom.
All is quiet for the moment. When Isaac moves ahead a Brute will attack from
the back of this area.
Work him into an open area - don't fight him in a tight
corridor. Shoot him with stasis then get behind him and blast at his
appendages with the Contact Beam or any other weapon. He shouldn't last long
at all if you use the Contact Beam. The Brute will leave behind a --POWER
NODE-- once he is defeated. Search the room over for the --ITEM CONTAINERS--
along the surrounding walls and the --ITEM BOXES-- in the right hallway. Enter
the greenhouse in the back right.
ITEM LIST
[ ] Item Container
[ ] Item Container
[ ] Item Container
[ ] Item Box,
[ ] Item Box
[ ] Power Node
Collect the two --RANDOM AMMOS-- and --MEDIUM MED PACK--. The --ITEM BOX--
inside the room has Spiders inside of it. Leave this current greenhouse.
Enter the greenhouse on the other side of this area.
ITEM LIST
[ ] Random Ammo
[ ] Random Ammo
[ ] Medium Med Pack
[ ] Item Box
Destroy the POD (5/8) inside. There is a stasis recharger behind the pod and
two --ITEM BOXES-- to its right. Run to the other side of the room and grab
the --RANDOM AMMO-- then stomp the other --ITEM BOX--. Run back outside.
ITEM LIST
[ ] Item Box
[ ] Item Box
[ ] Item Box
[ ] Random Ammo
Move over to the elevator. There is a pod below the door for the feeding
system in the back of the elevator. Activate the feeding system then shoot the
food container with stasis when it lifts out of the food storage area then
quickly run around to left side, behind the elevator shaft, and shoot the POD
(6/8) below.
If you screw up then remember that there is a stasis recharger in
the greenhouse where you destroyed the last pod. Take the elevator to the
third floor (level 3) when you're done.
Find the POD (7/8) on the opposite side of the catwalk then destroy it.
Take
the elevator down to level 2.
Stomp the --ITEM BOXES-- around the right corner in the back of this area then
move past the explosive canisters and then follow the catwalk nearby. Collect
the --CROSS REPORT 3-- database file and the --SMALL MED PACK-- from the end of
the catwalk.
Look over to the left and notice the shiny item along the groove
in the wall. Use kinesis to bring it toward Isaac then collect the --RANDOM
AMMO--. Run to the other side and open the door on that side.
ITEM LIST
[ ] Item Box
[ ] Item Box
[ ] Small Med Pack
[ ] Random Ammo
[ ] --"Cross
Report 3" database file--
Collect the --POWER NODE-- from the wall container to the left as Isaac enters
then save your game at the !!SAVE STATION!!. Walk into the next room.
ITEM LIST
[ ] Power Node
Pick up the --GOLD SEMICONDUCTOR--. Pick up the item fast since a tentacle
will grab Isaac in a few seconds and drag him to a hole at the other end of the
room.
Use the Pulse Rifle to blast the yellow portion of the tentacle to
destroy it. Enter the next hallway at the other end of the current hall once
the tentacle is destroyed. Collect the --TEMPLE'S SEARCH-- database file from
the floor then enter the Refrigeration East room through the next door.
ITEM LIST
[ ] Gold Semiconductor
[ ] --"Temple's Search" database file--
Open the --ITEM CHEST-- up ahead then use the stasis recharger if needed. Walk
out into the zero gravity portion of the room then leap through the hole in the
ceiling.
ITEM LIST
[ ] Item Chest
[ ] Item Chest
Look up and you'll see a wall with a spinning electric generator on it. Jump
to the portion of the wall that is not electrified. Face the electric
generator then shoot it with stasis to stop it. Quickly jump to the wall up
ahead that was previously electrified then turn to the right and jump through
the opening in the wall. Two Lurkers will attack in this next area, so take
out the Flamethrower and find them then roast them with secondary fire.
Jump to the wall that is closest to the opening that you just jumped through
then turn off the generator by using the controls next to the opening. Jump to
the overhead ceiling then leap through the nearby opening. Two Lurkers will
attack while a pod contaminates the air in this room. Defeat the final POD
(8/8)
inside and the --PODS DESTROYED-- database file will play shortly
afterwards.
ITEM LIST
[ ] --"Pods Destroyed" database file--
Objective Added:
[ ] Recycle the Atmosphere
Once the poison pods are all destroyed, I can return to Atmosphere Control
and recycle the air. That will unlock Food Storage, where the Leviathan is
holed up.
Return to the beginning of this area and exit the room.
Step back through the hallway - Isaac has to walk because of the organic
substance on the floor. Step back into the East Grow Chamber.
Take the lift down then exit back into the outside hallway (the big door).
Three very irritated Slashers will rush Isaac from the opposite side of the
outside catwalk, so take out a weapon and prepare to shoot them as they run
toward him. If they start to get too close then use the Line Gun - these WILL
follow Isaac back into the East Grow Chamber, so don't try to run away when
they get close to the door, unless the door seals off.
Take the elevator down then step through the door at the bottom. The --A
MESSAGE-- database file will play in the small corridor before reaching the
Atmosphere Control room.
ITEM LIST
[ ] --"A Message" database file--
Since all the pods have now been destroyed, walk over to the now active
controls in the middle of the room and give the command to activate the
recycling system.
Objective Complete:
[X] Recycle the Atmosphere
The door to Food Storage is now open in the back of this room,
so save your
game then step into the Food Storage Hallway outside.
Take the --CROSS REPORT 4-- database file from the middle of the catwalk up
ahead then stomp the two --ITEM BOXES-- up ahead and enter the next portion of
the hall.
ITEM LIST
[ ] --"Cross Report 4" database file--
[ ] Item Box
[ ] Item Box
Take the --MEDIUM MED PACK-- from the catwalk up ahead. Roots are covering the
door to food storage, so simply interact with the food filter to the left to
place the poison capsule inside of it to poison the Leviathan. The --KILL THE
LEVIATHAN-- database file will play afterwards.
ITEM LIST
[ ] Medium Med Pack
[ ] --"Kill the Leviathan" database file--
Objective Added:
[ ] Kill the Leviathan
The poison dissolved some of the corruption, enough to allow me inside Food
Storage. But the Leviathan is still alive.
Now you'll have to step into Food Storage and finish the job yourself!
If you stand in front of the entrance and look around the room then you can use
kinesis to grapple a few --RANDOM AMMO-- pickups and a --LARGE MEDPACK-- right
off the bat. Other random items will appear during the actual boss fight in
this room. The ammo pickups will differ depending on the weapons that you
currently have, much like other pickups. Items will appear randomly hroughout
this room during the boss fight, so grab them whenever Isaac passes by one.
You might want to run and press X just in case you move by any pickups during
the battle - kind of like some of us used to do in the old survival horror days
when items were near invisible in the prerendered backgrounds.
ITEM LIST
[ ] Random Ammo
[ ] Random Ammo
[ ] Large Med Pack
Boss: Leviathan
Recommended Weapons:
Plasma Cutter
Pulse Rifle
Contact Beam
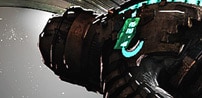
Leviathan looks rather intimidating at first glance since he basically comprises the entire back portion of the wall but he shall feel Isaac's wrath
just like all his other necromorph squad. This boss fight takes place in zero
gravity and the room is circular so there is no limit to where Isaac can move
when he moves sideways.
The Leviathan has three tentacles that it will stretch out and attack with. It
only has one attack with the tentacle and it will always give off a sign before
it attacks. Whenever the bottom tentacle faces pward and begins to shake,
this is a sign that he is about to perform a ground smash. Simply run to
either side whenever you see the tentacle shake and this will be avoided - it's
best to already be running before the tentacle prepares to attack or you might
get hit sometimes. Make sure to keep running until the tentacle retracts or it
can hit Isaac while it rises. You can also perform a zero-g jump to any
section of the area as the tentacle shakes to get away from the attack as well,
but running is much easier. It is best to completely circle the room by
running sideways throughout this battle except for when you have to attack of
course.
When the tentacle retracts from attacking, a glowing yellow section of the
tentacle will appear. Wait for the tentacle to move back toward the wall and
it will stick in place to where the yellow portion can be easily shot. Shoot
the yellow portion of the tentacle with either the Plasma Cutter, Pulse Rifle
or Contact Beam to cut off the tentacle. The Leviathan will begin to attack
with its other tentacles after the first one is cut off. It will use the same
attack with each tentacle once again so dodge the ground smash then shoot off
the rest of the tentacles. The attacking tentacle will always move to the
bottom middle portion of the wall.
Once all tentacles have been removed the Leviathan will open up its middle
mouth and begin to fire out acid pods. The pods will explode upon contact and
knock Isaac down. Wait for each pod to shoot from his mouth then aim at the
pod and grapple it with kinesis then wait for the next pod to fire and fire the
current pod back at the Leviathan to destroy the next pod. It will fire out a
total of five pods per projectile attack, so if you can grapple the first and
third pod then shoot them back then you can grapple the fifth pod and fire it
back at the Leviathan's weak spot.
The Leviathan will reveal its weak spot showcased as a yellow section in the
back of its mouth right after shooting the fifth pod, so hold the fifth pod in
place and aim for the Leviathan's weak spot inside of its mouth then fire the
pod at it. If you miss with the pod then quickly shoot the yellow portion of
its mouth with weapon fire - you only have a brief second to do so. Manage to
hit it with a charged Contact Beam primary fire and this will severely hurt the
Leviathan.
It will play a game of "catch the acid pod" with Isaac a few times, depending
on how you damage it, then it will regrow its tentacles. Once the tentacles
have regrown, it will go back to the same basic tentacle attacks, but it will
sometimes shoot a set of acid pods instead. Watch for either a tentacle to
shake or the mouth to open to know which attack it is about to perform. This
part can get slightly tense at times but watch the Leviathan carefully and
you'll be able to react to its attacks. Shoot off the tentacles like you
normally would after each of its tentacle attacks and this will cause it to
eventually shoot pods again.
The main hard part about this fight is sustaining enough ammo to fight off the
tentacles and damage the Leviathan. Try not to waste ammo. If you are a good
shot with the Contact Beam or shooting its pods back at it's weak spot then
that by itself will help out tons since both methods are so damaging. There
are explosive canisters floating around this room that can help out for the
tentacles (grapple with kinesis then toss) but these don't help that much with
shooting the mouth, unless you're really quick. The acid pods can easily get
the best of Isaac once one of them hits him since the Leviathan will continue
to shoot them even while Isaac is getting up. Remember that you can shoot the
pods and run to the side to avoid them. It's always best to grapple them if
possible however.
TIP: You don't actually have to shoot the tentacles off of the Leviathan when
it reforms them. You could dodge the tentacles and wait for the Leviathan to
shoot acid pods. The only bad part about doing this is that the acid pods
might accidentally explode on the Leviathan's tentacles and mess up your
kinesis grapple timing.
Objective Complete:
[X] Kill the Leviathan
The --VICTORY AGAINST THE LEVIATHAN-- database file will play after the
Leviathan is defeated.
ITEM LIST
[ ] --"Victory Against the Leviathan" database file--
Objective Added:
[ ] Go to the Mining Deck
Finally, the ship seems stable. I've bought us some time, hopefully enough
to find the SOS Beacon. But even if we send out a distress signal, is
anyone close enough to this system to hear it...?
Well, we certainly got to the ROOT of that problem as Mr. Redfield might say.
Yuck, yuck, yuck! Now, let us exit the room and get back to the tram. Before
you leave the Food Storage, be sure to look it over for any remaining items -
look for a flashing light to signify the items then simply grapple them with
kinesis and collect them.
Reenter the Atmosphere Control.
Be sure to stop by the Store and put some of your extra items in the safe.
Isaac most likely has a full load. It's not good to be a packrat with your
main inventory. Reenter the Sapling Room.
Run to the end and take the elevator back down to the Tram Station.
Board the tram then take it to the next area to end this chapter.
|