WALKTHROUGH - Chapter
4: The Dark Half Awakens
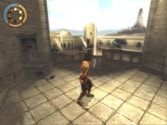
Save your game at the save fountain to the left side.
Jump to the first pole. Swing on the pole then jump
to the next series of poles until you reach the other
side. Walk down the stream up ahead then jump and grab
onto the pole. Climb along pole to reach the other side.
Walk up the stairs on the other side and jump and grab
the pole at the end.  Swing to the crevice above and shimmy over to the
gap. Release your grapple to fall into the gap. Slide
down to the very bottom of the gap and drop.
Swing to the crevice above and shimmy over to the
gap. Release your grapple to fall into the gap. Slide
down to the very bottom of the gap and drop.
Sand creatures will attack once you drop. Stay in the
lit area (middle of the
area) while fighting them and they will be weaker because
of the light. Grab
one of their weapons and run straight ahead when the
battle is finished. Wall
run directly up to the plate and stab it with the dagger.
Slide down the gap
that opens below and jump to the pole in the distance.
Drop down each of the
three poles and fall into the stream below. Take a drink
from the water if you
are low in life because apparently sewage water is tasty!
Walk to the back where sunlight is pouring in and switch
to landscape view to
see two plates up above. Wall run and stab the first
plate then jump and stab
the second. Jump from the second plate to get on the
ledge across from it. Go
around the right corner and jump to the column. The
column will sink down and
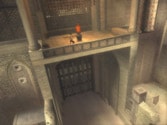
a door will open below. Slide down the column and walk
through the doorway.
Walk out onto the beam and a camera angle will show
a gap to the Prince's
right. Jump to the gap and slide down below then drop.
In the area ahead use landscape view to see some ledges
to the left. Jump to the first ledge then to the next.
Jump to the crevice from the second ledge and leap to
the column in the back. The column will slide down a
bit. Jump to the pole across from the column and swing
from it and stab the plate on the moving wall when it
extends outward. Wait for the wall to move outward once
again then wall run to the left to get to the wooden
platform. From the wooden platform look to the left
to see a gap in the distance.
Wall run to the gap and slide down it then drop
to the floor below. Walk to the back of the room for
a cutscene.
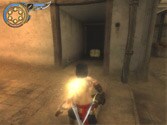
After the cutscene you will be in control of Dark Prince.
Dark Prince requires sand to stay alive so you must
constantly defeat an enemy or collect some sand from
a breakable object in order to stay alive while in control
of him. Sand creatures will instantly attack as the
change to Dark Prince occurs. Dark Prince's secondary
attacks are some of his most powerful moves. Use combos
with his secondary attack to dispose of the sand creatures
quickly. Jump over one and use the primary attack button
for an almost instant kill if you need sand quickly.
It is not necessary to fight off all the sand creatures
in the areas that follow if you do not want to. After
you have decimated the sand creatures move toward the
white block with the face on it and use the secondary
attack button to pull it out of the wall.
Quickly run through the open door in the back that
opens up.
As Dark Prince you will be required to move quickly
since his life gauge will
continually drop. Use the sand from breakable objects
to replenish his life
and do not stall long on obstacles. Walk out onto the
beam ahead and jump to
the next beam. Pull yourself up and jump to the column
then slide down it. A
few more sand creatures will attack at the bottom. Run
through the doorway in
the back. Jump toward the poll ahead and press the secondary
attack button to
make the Dark Prince grapple onto the pole with his
whip and swing to the other
side. Break the pots for some sand on the other side.
Jump to the next pole
and press the secondary attack button to swing from
the first pole then press
the button once again to grapple onto the second pole.
Slide down the gap you
land in and fall to the bottom. Sand creatures will
attack at the bottom.
Fight them off and use the sand from them and the sand
in the crates to sustain
life. Pull the white block with the face out of the
wall and go through the
doorway that opens up in the back (the camera will show
the door when it
opens).
Collect some sand from the pots and wall run up the
wooden wall. Climb across the top wooden plank and pull
yourself up when you travel to the left. When you reach
the area above, rotate the camera and look in the back
to see a ladder. Jump to the ladder and climb to the
top. Run to the back plate and wall run then stab the
dagger into it to make the wall extend outward.
Quickly jump to the pole behind you and swing to
the next one. On the second pole, wait for the wall
spikes to rotate inward then jump to the wall and wall
jump all the way to the top to reach the wooden floor
above. Run down the rock hall ahead and step out onto
the beam. Jump to the gap, slide down it, then drop
to the water below.

|
|
Walk up to the wooden walls in the back and jump to
the ledge on the right side. From the first ledge, hop
up to the next two ledges across from you. Move to the
Prince's left and jump behind him as the wall comes
down and stab the dagger into the plate on the wall.
When the wall moves upward, wall run to the left. Run
down the lit up hall ahead to find some sand creatures.
Stay in the lit up areas and they should go down quickly.
In the third section of the hall wall run up to the
plate and stab it with the dagger to open the door in
the back.
Quickly roll through the door. The area below is
optional. You might want to reach the save fountain
on the other side of the saw blades and come back to
it.
Look to the left to see some curtains covering an entrance.
Go past the curtains and wall run on the right wall
(or jump) to reach the platform ahead. Walk around the
corner and jump to the next platform with the pots in
the back. Walk out onto the beam and jump to the next
three beams and walk to the next platform. Walk out
onto another broken beam, then jump to the next one.
Walk to the left on the last beam and jump to the area
ahead. Drink from the fountain to gain the first life
upgrade.
Roll through the small break in the saw blades as they
retreat into the wall.
Walk out onto the beam ahead and wait for the arrows
to shoot then quickly walk
across the beam and stop right before you get to the
next set of arrows. Wait
once again for the arrows to shoot then walk toward
the saw blades. Stand at
the edge of the beam and jump through the break in the
saw blades as they pass
by. On the final beam walk to the very end just before
you get to the holes on
the ground and jump ahead when the saw blade goes under
the floor.
Go all the way back to the curtain at the beginning.
When the first two saw blades retreat into the wall,
run through the open area
and run over the holes of the spike trap then stop right
before you reach the
next set of saw blades. Run through the next set to
reach a save fountain.
SAVE FOUNTAIN
Walk into the cave ahead and wall run then jump to
the area across from the
wall. Jump to the ladder and climb to the top. Leap
to the rock ledge across
from the ladder. Jump to the next ledge but do not pull
yourself up just yet.
Wait for the arrows to fire then pull yourself up and
jump and grab onto the
next ledge across from you quickly. Once again, don't
pull yourself up just
yet. Wait for the arrows to fire then pull yourself
up and jump once again to
grab onto the top portion of the floor above. Jump across
the pit in the
tunnel ahead. Fall along the side of the
second pit and wait for
the pacing archer to walk to the right then jump to
the archers' side, but do
not pull yourself up just yet. Wait for the pacing archer
to walk just a
little over midways to the right then jump up and speed
kill the first and
quickly make your way over to the second and speed kill
him.
For this speed kill and the rest of the speed kills
in the game, please
remember that you can use the Recall power to undo any
mistake you make in
either the timing of the stab animations or the moment
before the speed kill.
Run up the wall and grab the rock ledge up above. Jump
to the next ledge then jump to the crevice up above
and shimmy to the right. Drop down to the next rock
ledge once you reach it and quickly move to the right
and jump to the next crevice. The last rock ledge will
fall. From the crevice jump to the rock ledge across
from you. Move to the right and grab the crevice above
then move on down and drop to the next ledge. Quickly
walk to the right on the ledge as it crumbles and jump
to the ledge above. This ledge will
| |
 |
start to fall as well so quickly jump to the ledge
across from you. Move around the corner of the rock
wall and jump and grab the ledge above you. Move to
the area below the arrows then, when the arrows pause,
grab the side of the plank above and pull yourself up
before the arrows shoot out again. For the next set
of arrows walk to the far right while still below them
and wait for them to shoot, then jump and grab the plank
above them and move to the right then pull yourself
up. The next two ledges will extend outward for a brief
period then retreat back into the wall. Wait for them
to shoot outward then immediately climb up them and
grab onto the right side of the tower above. Use the
save fountain to the left to save your game.
SAVE FOUNTAIN
Slide down the gap next to the save fountain but do
not drop yet. For these
sand gates you must take out the sand gate guard (red
sand guard) or he will
summon guards through the sand gate. Also keep in mind
that the speed kills
become much more vicious when trying to time the button
press for the stab
animations starting with this little group of guards.
Be sure to use Recall if
you mess up on any stab animation. Wait
at the bottom of the gap
for the pacing guard to pass by you underneath the gap
then go for a speed kill
when the screen distorts. After killing him, move behind
the sand gate guard
and activate the speed kill for him.
Approach the sand gate
afterward for a cutscene and you will gain a new sand
tank. Be sure to take
the sand gate guard's sword since it will regenerate
sand tanks over time.
Wall run on
the left wall when the spiked wall rotates inward then
jump to the first pole and stand on top (jump button).
When the archer paces toward you and turns his back,
hang on to the pole then swing the next and get on top.
Right when the archer paces toward you and stops start
swinging on the pole. The moment he paces away from
you and turns around from that pace, jump to the roof
he is on and speed kill him from behind. Jump to the chain up ahead. This
action will scare the birds below. Wait on the chain
until the guards get back to their normal rounds. Slide down the chain until the Prince hangs
upside-down, then wait for the pacing guard to walk
over to the standing guard. Don't do anything when the
screen distorts the first time. Wait for the standing
guard to turn his back (he must have his back to you
for this to work) then when the distortion starts the
second time go for the speed kill. This will be a double
speed kill. Quickly sneak around the building where
the archer went and speed kill him as he walks away.
If you took the sand gate guard's sword from earlier,
you will have more chances to use Recall for screwups.
Hop over the railing behind the building that the archer
from earlier was guarding and grab the 10 sand credits
from the chest in the back. Go back up the side of the
railing and, in the area where the guards were, climb
on top of the wooden platform and wall run up the first
plate and stab it with the dagger. Jump to the second
plate and stab, then wall run to the third plate and
stab. Wall run to
|
|
the first shutter in the distance then hop off of it
to the next shutter and do another hop to land on a
ledge. Drop down from the ledge. The weapon rack below
carries a Mace, but keep that sand gate guard's sword
if you still have it. Wall run up to the ledge across
from the one you were just on. Grab onto the railing
up above and pay attention to the movement of the guard
and the archer.
Wait for the guard to turn his back and walk away from
you, then climb up and get behind him for a speed kill.
Quickly run down the walkway and speed kill the archer
before he paces back your way. If he turns to stare
over the railing you can still get behind him without
being seen.
Rotate the lever
to start the rotating wall to the side. Walk over
to the wall and wall run to the platform on the other
side when the spikes move inward. A cutscene will occur
on the other side.
After the cutscene run along the wall and use your
whip to swing from the torch above while running (press
the secondary attack button while wall running). When
you land, jump toward the pole in front of you and use
your whip to grapple to the end of it and swing to the
platform above the archer. Fall down using the ledges on the platform
and sneak up behind the archer for a speed kill. For the Dark Prince's speed kill
you will have to tap the secondary attack button once
he grabs them from behind to finish the kill. Go back
to the top of the platform you just came from and wall
run to the torch and use your whip to swing from it
then do a jump the instant you line up with the chain
during the camera switch. Slide down the chain and speed kill the
guard below.
You don't need to tap the secondary attack button for
chain speed kills. Wait
until the guard in the back turns his left side toward
your way, then jump down and start to run toward the
archer, but do not fully approach him just yet. When
the guard in the back turns his back to you immediately
get behind the archer and perform a speed kill to him.
Quickly run to the guard in the distance and get behind
him to kill him with a speed kill. You have to be extremely
quick to catch the guard. Guards will charge through the gate in
the back and from the side to attack after the other
enemies are defeated. There is no need to fight any
of these guards because they will keep coming until
you do the required task to open the gate. Climb to
the top of the column in the middle of the area and
swing along the poles to the side until you reach the
end then stab your dagger into the plate after you jump
from the third pole. This will open the gate in the
back. Run through the gate and step into the water for
a cutscene.
After the cutscene approach the chariot in the distance.
For the chariot level don't forget that the Recall
power can be used to undo any mistake you make.
If you run directly into a wall with your chariot,
the chariot will automatically be destroyed. When the
enemy appears beside you make sure to stay right against
his chariot to keep from hitting the wall. When you
reach the tunnel, line yourself up with the tunnel and
ram the enemy chariot to the side to get rid of him.
When the path splits make sure to take the right path.
Tap the primary attack button when the guards jump on
your chariot to knock them off. Turn left when the path
splits for the second time. For the third path split
you can go either way, but the left path is much easier.
If you take the right path you will have to deal with
jumps that can easily mess up your steering. A few more
guards will attack your chariot along the way. Soon
another enemy in a chariot will appear beside you, but
the cutscene will take him out.
After the cutscene walk through the doorway to the
left. Use landscape view to
see up into the top portion of the room ahead. Wall
run up to the ledge above
the door and jump to the next ledge up above that one.
Move to the left and
jump onto the ledge across from you then pull yourself
up to the area above.
Climb up the first portion of the ladder then jump to
the ledge across from it.
Jump and grab onto the side of the wall above then jump
to the second portion
of the ladder to continue your climb. Walk through the
doorway to the right
and hang off the left side of the railing up ahead.
Jump to the ladder across
from the railing and climb it. Leap to the ledge across
from the ladder and
walk around the corner to jump to another ladder across
from you. Jump to the
railing across from the top of the ladder and pull yourself
up. Run through
the doorway to find a save fountain.
SAVE FOUNTAIN
Approach the broken railing ahead and walk out onto
the beam. Jump to the next beam then walk to the side
pointing to a ledge. Jump to the ledge and walk around
the corner of the building while on the ledge. Drop
to the crevice below and then the ledge below the crevice.
Hang from the ledge as you move to the other side of
the window to keep the guard from seeing you. Walk out
onto the beam and jump to the next beam. Walk toward
the building.
Wall run on the wall to left side, as you get off the
beam, and perform a speed kill on the guard the moment
when you hit the shutter on the wall. Sneak up behind
the guard in the back of the curtains and speed kill
him as well.
Go back through the curtains and use landscape view
to see a plate below. Hang off the side of the building
and fall to the plate and then stab it with the dagger.
Start the speed
kill on the guard below as soon as the distortion starts
when he passes underneath you. Quickly run through the
doorway and speed kill the next guard before he turns
around. Walk
out on the beam extending from the broken railing and
jump to the pole in front of it then the gap. Slide
down the gap.
The instant the pacing guard turns around, the distortion
for a double speed kill will activate. Wait until the guard turns all the way
around and go for the double speed kill on the first
two guards. Immediately after the double speed kill
sneak up behind the sand gate guard and speed kill him.
Throw away
whatever secondary weapon you have and grab the sand
gate guard's sword. Walk up to the sand gate to get
100 sand credits.
Go through the doorway below the gap you just jumped
from. Walk into the area, then head back into the doorway
segment and hide behind the wall when the Prince draws
his weapons. You have to walk far enough into the area
in order to get the guards to walk out from behind the
back wall. Two
guards will enter the area to the left. Wait for the
guard on the left to turn his back to you, then rush
toward him and perform a speed kill. Walk over to the
other guard while he has his back turned and speed kill
him as well.
Climb on top of the debris covered with a cloth in the
back and wall run to the plate above and stab it. Wall
run to the right and pull yourself up to the hole in
the wall. Hang off the side of the wall on the other
side and fall to the
| |
 |
wooden crate below. Sand dogs will come down the hall
to the side and attack. They look vicious, but they
have one major weakness. The moment they try to steal
a sand from you (they will open their mouth) stab them
with the dagger for an instant kill. After defeating
them, walk to the hall they came from and look to the
right for a chest with 10 sand credits.
Run down the path across from the area where the
sand dogs came from. Use the right wall to wall run
across the large hole in the ground. Walk up the ramp
to the left and jump toward the door across from you.
Wall run up to the railing above the door and pull yourself
up. Go to the broken railing and jump to the building.
A cutscene will activate inside.
After the cutscene, fight off the sand dogs and grab
a sand tank from a breakable object then walk to the
doorway up ahead. Jump through the doorway and use your
whip to swing from the pole overhead. When you land
you must run quickly across the floor and run up the
left wall or jump to the pole. Stand on top of the pole
(jump button) and jump to the floor above. Use a speed kill from behind to strangle
the archer.
Walk to the hole in the brick wall and wall run then
use your whip to swing from the torch. As you land quickly
run across the crumbling floor and jump toward the pole
at the end and use your whip to swing to the ladder
in the distance. Climb all the way up the ladder and
walk into the water for another cutscene.
Walk down the steps in front of the water to find a
save fountain.
SAVE FOUNTAIN
|