WALKTHROUGH - Chapter
6: Obsessed With Vengeance
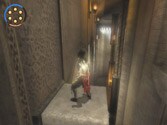
Wall run up to the tall plate and stab the dagger into
it to open the door.
Run all the way down the stairs and walk up to the railing
to activate a
cutscene.
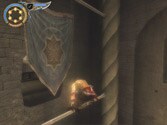
Hang along the side of the railing in front of you.
Jump to the small ledge in the back and grab on. Drop
to the beam below the ledge and pull yourself up. Jump
to the next beam.
While hanging on the side of the beam, wait for the
guard below you to cross by and the distortion for a
speed kill will start. Go for the speed kill the moment
the screen distorts.
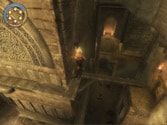
A sand dog will attack afterwards. Wall run to the small
platform with the door in the back. Wall run on the
left wall then jump off the wall when the camera changes
and grapple to the two poles in the distance to carry
you to the area with the door in the back. Wall run
on the right wall and jump to the beam across from it.
Jump to the next two beams. On the top of either of the last two beams,
the speed kill for the guard below can be activated.
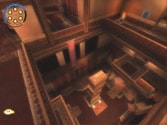
Two sand
dogs will attack after the guard. Use the Dark Prince's
whip to pull the white block with the face out of the
wall to the side. Jump on top of the block and wall
run directly up the wall to the right as you land then
jump to the platform up above.
| |
 |
Walk through the doorway and hang along the side of
the floor in the next room. Shimmy to the right and
use the Dark Prince's whip to pull the white block with
the face out of the wall. After jumping to the block
turn toward the set of torches up above you to the right.
 Wall run toward the torches and grapple to each
of them with your whip to keep you wall running. Eventually
you will wall run across a shutter. Jump from the shutter
to another shutter on a column. Jump from the shutter
on the column to hit a wall and land between two guards.
Speed kill one
of the guards and fight off the sand dog. You can only
speed kill one guard, since the sand dogs will notice
you after the first speed kill has been initiated on
either guard.
Through the doorway, wall run on the right wall and
grapple to the first torch then jump to the pole across
from the wall. Grapple to the pole and swing to the
wooden platform up ahead. Wall run on the wall behind
the large statue and you will land in a gap between
the statue and the wall. Don't slide down the gap. Jump
to the pole in front of you and grapple to it to get
to the gap behind the next statue. Slide all the way
down the gap and jump to the platform with the door
in front of you. Look across from the door and wall
run on the right wall to reach the next platform. Wall
run up the wall next to the door and jump to area with
the two guards above. Speed kill both guards while their back is turned.
Wall run
on the small curved wall to the right as you walk through
the doorway. You will hit a curtain and start to slide
down it. When the camera view switches to show a pole
across from you, jump to the pole and grapple across
it to the next curtain. Slide down the second curtain
to reach the bottom.
Wall run toward the torches and grapple to each
of them with your whip to keep you wall running. Eventually
you will wall run across a shutter. Jump from the shutter
to another shutter on a column. Jump from the shutter
on the column to hit a wall and land between two guards.
Speed kill one
of the guards and fight off the sand dog. You can only
speed kill one guard, since the sand dogs will notice
you after the first speed kill has been initiated on
either guard.
Through the doorway, wall run on the right wall and
grapple to the first torch then jump to the pole across
from the wall. Grapple to the pole and swing to the
wooden platform up ahead. Wall run on the wall behind
the large statue and you will land in a gap between
the statue and the wall. Don't slide down the gap. Jump
to the pole in front of you and grapple to it to get
to the gap behind the next statue. Slide all the way
down the gap and jump to the platform with the door
in front of you. Look across from the door and wall
run on the right wall to reach the next platform. Wall
run up the wall next to the door and jump to area with
the two guards above. Speed kill both guards while their back is turned.
Wall run
on the small curved wall to the right as you walk through
the doorway. You will hit a curtain and start to slide
down it. When the camera view switches to show a pole
across from you, jump to the pole and grapple across
it to the next curtain. Slide down the second curtain
to reach the bottom.
Sand creatures will attack at the bottom. Stay in the
patch of sunlight in the
middle of the area to easily defeat all of them. After
the battle break the
chest behind the set of two columns to the side for
10 sand credits. Step on
the floor next to the tall stones and quickly use Eye
of the Storm to keep the
door from closing too quickly. Dash through the door.
There is a door up
above the stairs in front of you that will only stay
open while the traps are
activated. Step on the switch in front of you to activate
the traps up the
stairs. Run up the stairs quickly while you roll through
the rotating blades
and climb on top of or run by the two crushers. Step
into the room and a
cutscene will activate.
Rotate the lever off to the side to drain the water
in the middle of the room.
Sand wraiths will attack you afterwards. Use Eye of
the Storm to slow down
time and defeat them quickly. Pick up one of their daggers
after defeating
them. Face the area with the lever and look to the right.
Wall run up the
right wall next to the area with the lever and jump
to the column above. Climb
up the column and jump to the next column. On the second
column rotate the
camera to see a platform with a door behind you. Jump
to the platform and jump
to the pole across from the platform. Wall run on the
wall to the left of the
door and jump to the pole that will be across from the
wall as you near the end
of the wall run. Stand on top of the pole and jump to
the next pole. Swing
toward the next set of poles. You will land on the bottom
pole and will have a
choice of where to go next.
|
|
From the bottom pole, line up with the entrance
behind the flag and swing on the pole then jump inside.
Wall run on the left wall and slide down the curtain.
When you near the bottom of the curtains jump to the
next curtain across from you and fall to the floor below.
Break the pots to the side for some sands if you need
them because you definitely will in a few minutes. Across
from the pots is the area to exit this room after you
get the life upgrade. Run down the hall and drink from
the fountain.
To start this portion, wall run on the right wall and
jump from shutter to
shutter until you reach the column at the end. Don't
worry about the spike
pillars that pop up while jumping from shutter to shutter
since they cannot hit
you and are only there to distract your timing. There
are a total of nine
shutters. Tapping the jump button while jumping from
shutter to shutter seems
to work rather well, but be sure to stop tapping it
when you reach the column
at the end. From the column at the end, jump to the
next pillar when the saw
blade goes into the floor. Do the same thing for the
next saw blade. The
columns will fall so you must not stop long. The final
two columns seem to
give you more time to jump because of the increase in
saw blade speed. On the
other side, walk toward the light to gain the life upgrade.
Go back the way
you came after getting the upgrade. You will need to
go all the way back up to
the set of poles from earlier.
Stand on top of the bottom pole and jump to the next
pole up above you. Turn around to face the other way
and swing to the pole up above. From the next pole,
swing to the floor above. Pull yourself up and walk
through the door. Rotate the lever inside the room to
close off the doorway you just came through and open
the other door. Walk through the open door.
Hang off the railing to the left and jump to the
curtain. When you near the bottom of the curtain jump
to the curtain across from it to slide down to the floor
below. Walk through the doorway at the bottom then jump
and stab the tall plate to open the door to the side.
Quickly drop down and roll through it before it closes.
Walk to the side of the floor to the left and wall run
on the right wall to reach the area across from you.
Climb up the ladder to find a save fountain at the top.
SAVE FOUNTAIN
Walk outside to activate a cutscene. Leave Farah and
walk to the other end of the walkway. Wall run on the
left wall and jump to the wooden windows with a ledge
around it. Walk around the right corner and jump to
the gap behind the grating, which will be in the back
of you. Slide down the gap, but do not drop just yet.
Turn around and
jump to the beam in front of you. Jump to the next beam
across from that one. There are two guards below you.
Wait for the guards below to move together (while they
both face you) then activate a double speed kill on
both of them.
Run to the back and grab the block next to the burning
rubble. Move the block on top of the switch on the floor
to open the door in the back.
Run through the door and go down the corner of the
hall inside. Wall run up the door at the end to reach
the wall above it. Pull yourself up the wall and walk
to the end of the beam. Jump to the next two columns across from you
and stay on the second column. Jump to the top plate
above the standing warrior (the one without the armor).
Face the burning rubble in the back and this will be
the set of plates to the right. You don't need to fall
to the second plate to activate the speed kill. Wait
until the pacing guard starts to walk away from the
warrior then activate the speed kill for the warrior.
Please note that the warrior has much more stab animations
than the single guard.
After speed killing the warrior, quickly wall run
back up to the plates you just jumped off of and stab
the first before the pacing guard turns around. Jump
to the top plate and stab it then jump back to the middle
column. Now jump and stab the first plate above the
standing guard. Wait until the pacing guard walks over
to the standing guard and activate the double speed
kill. Break
the objects next to the crate by the burning wagon and
pull the crate to the closed doorways across from it.
Jump to the top of the wall above the doors. Walk out onto the beam and jump and stab
the plate across from it. Wall run and leap off the
first shutter then leap off the second shutter and stab
the plate that the second shutter will bounce you to.
Wait for the pacing guard to walk over to the standing
guard then activate the double speed kill. Wall run up to the top plate in the
back and stab it to activate a cutscene. After the cutscene,
grab the crate and move it over one of the switches
on the floor and stand on the other switch. Run through
the door before it closes. Climb up the ladder in the
next room then wall run and stab the plate on the wall
ahead. Jump to the crevice above the plate and shimmy
over to the ledge on the left. Jump to the floor above.
Wall run on left wall and jump off the shutter then
stab the plate that you
bounce to. Wall run to the right and you will hit the
wall and fall to the
ledge below. Walk to the right and move around the corner
of the ledge and
jump and stab the plate behind you. Wall run to the
left and leap to the beam
across from the wall in the middle of the wall run.
From the beam, leap to the
beam below you. Jump to the plate and stab it then wall
run to the left and
leap off the next two shutters and stab the next plate
after leaping from the
second shutter. Wall run to the beam on the left then
jump and stab the plate
on the wall ahead. Wall run to the left and pull yourself
up to the hallway up
above. Walk around the corner to find a save fountain.
SAVE FOUNTAIN
|
|
Fall down to the right of the walkway outside. Approach
the portion where the railing is broken and wall run
on the right wall and leap off the wall to the ledge
across from it near the end of the wall run. Hang off
the ledge and shimmy to the right. Drop and stab the
plate below. Wall run to the right and stab the next
plate. Jump to the ledge above the second plate and
shimmy to the right for a cutscene. Shimmy some more
to the right and pull yourself up onto the ledge.
Walk out onto the beam and jump to the gap across
from it. Slide down to the bottom of the gap. Wait until the pacing guard below walks
away from the warrior, then speed kill the warrior.
After the speed kill, quickly climb up the ladder. Jump
to the crevice on the other side of the platform and
shimmy to the left. Drop to the beam below you. When
the pacing guard walks up to the standing guard activate
the double speed kill to take them both out. Break the objects in the middle
of the area below the tall plate.
Wall run up to the tall plate and stab it to open
the door the guard was standing next to. Activate Eye
of the Storm and fall off the plate then roll under
the door before it closes.
Make sure your sand tanks are full and wall run up
the closed gate at the end to reach the wall up above.
Walk out onto
the beam and jump to the next beam across from it. Look
across from the beam to see three plates with a ramp
below each plate - these plates will help you speed
kill all of these guards. Make sure to perform this
first speed kill on the left side of the beam and not
in the middle. If you do the speed kill in the middle,
the Prince will destroy a pot after the final stab alerting
all the other guards. Wait on the beam until the three
guards up ahead turn all of their backs, then jump down
and speed kill the guard below the beam. Run to the
first ramp below the first plate then wall run and stab
the plate. Wall run to the second plate and stab it.
Stay on the second plate for this next speed kill. This
guard below you is the main troublemaker of the bunch
since he turns often. Wait for the other two guards
to turn and walk the other way then quickly speed kill
him and wall run back up to the plate you were just
on. Two guards left! Wall run back to the first plate
and stab it then jump back to the beam across from the
plate where you started the first speed kill. Stand
in the middle of the beam and wait for both guards to
turn their backs then quickly jump toward the sand gate
guard and speed kill him. Run to the second plate ramp
and wall run to the plate above then stab it immediately!
For the final guard, wall run to the third plate and
wait for the distortion to start then speed kill him.
This set of speed kills is extremely hard to pull off,
but it can be done!
Walk to the sand gate to claim 150 sand credits. Be
sure to grab the sand gate guard's sword as well.
Walk to the crates in the back where the sand gate
guard was patrolling and pull the bottom crate out of
the stack for a cutscene.
Move the crate over to the tall plate across from
the stack of crates. Get up on the crate and wall run
up to the tall plate then stab it to open a door in
the back. Activate Eye of the Storm while on the plate
than run to the open doorway and dash through. Run down
the hall to the right and climb the ladder across form
the boarded doorway. Run around the left corner up ahead.
Wall run on the right wall then jump from shutter to
shutter to get to the next side and activate a cutscene.
After the cutscene there will be a save fountain in
the distance.
SAVE FOUNTAIN
Wall run on the left wall up ahead then jump to the
ledge across from the wall. Jump to the crevice and
shimmy to the left.
Wait for the archer above to turn his back then pull
yourself up and speed kill him. Hang off the railing on the other
side and jump to the beam across from the railing. Jump
to the crevice on the wall beside the beam and shimmy
over to the wooden floor. Walk to the railing and a
cutscene will activate.
Hang off the railing and jump toward the pole up above
and use it to grapple to the ledge ahead. The ledge
will automatically crumble and the Dark Prince will
fall and grab onto the ledge below. Drop to the floor
below and sand wraiths will attack. After fighting the
sand wraiths break the chest around the corner beside
a door for 10 sand credits.
Wall run up the wall across from the chest to grab
onto a ledge. Jump to the next ledge and pull yourself
up. The camera angle will show you a pole in the distance.
Jump and grapple onto the pole and let it carry you
to a beam. Jump to the railing beside the beam and pull
yourself up the side of the building. Run into the red
room to the right.
| |
 |
For this room and the rooms ahead, make sure to destroy
the pillows on the beds to the side if you need some
extra sand. Wall run up to the switch on the wall next
to bed then immediately use Eye of the Storm and roll
under the door to the side before it closes. Hang off
the railing up ahead and drop to the curtain below the
railing.
A new enemy will attack at the bottom. These females
sand creatures can put up quite a fight. You are supposed
to hit them when they stop attacking, but with Dark
Prince it doesn't really matter when you hit them. Sand
wraiths will burst up from the floor after the females
are disposed of. Climb up the column across from the
pattern with the circle in the middle on the wall. From
the top of the column, jump to the crevice on the middle
wall. Shimmy to the left and pull yourself up, then
jump to the next ledge above. Pull yourself up and jump
to the railing on the area with the archer.Shimmy to the right along the railing
and approach the archer from behind for a speed kill.
Use the right wall and wall run to the area the archer
was staring at. Two female sand creatures will attack.
Run ahead, but don't cross the wall just yet to the
area in the back.
Stay against the wall and wait for the archer to go
through the doorway then quickly wall run on the right
wall to reach the area where he is and sneak up behind
him for a speed kill. In the room that the archer went into,
look for a gate that seals off the door inside. Wall
run up either wall on the side of the doorway and wall
jump to the top railing. Pull yourself up and go through
the doorway. The archer in the area across from you
will automatically see you and start to fire arrows.
Run to the lever on the right and rotate it to make
a pole fall down from the ceiling. Wall run on the left
wall then jump and grapple to the pole. Run to the left
and be sure to wreak your vengeance on that archer.
Go through the doorway beside the archer and hop through
the window inside.
Wade through the water and climb into the next room
up ahead. Wait for the open space to appear in the middle
area in between the little saw blades and roll through
it. For the next set, follow one strip of saw blades
as it moves away from you then quickly dash to the other
side when it comes back toward you and keep moving to
make sure the other set doesn't hit you. Run up the
torn brick wall ahead and stab the plate. Jump to the
tiny piece of wall forming a ledge up above you and
pull yourself up to it. Jump to the next ledge up above
and you should see two archers. Jump to the wooden railing and wait for
them to turn their back and speed kill the first as
he walks away then speed kill the second before he turns.
It's a little tricky since they will start to move at
different times, but try to wait until they both walk
away at the same time. Walk down the area ahead for a cutscene.
After the cutscene, fall back down the railing to the
area you just came from and break the weapon rack to
get an axe - you need some sort of secondary weapon
for what's coming. Wall run back up to the next area,
then wall run up to the next wall ahead to find a save
fountain.
SAVE FOUNTAIN
If you need some sand, break the pots off to the side.
Walk toward the railing
in the back and fall down the first two floors.
Boss - Female Sand Warrior
The first part of this battle is pretty tough. The
boss has some very long combos and a kick that will
send you flying off the platform if you have your back
to the edge of the platform. Use Recall if she ever
knocks you off. Block often and try to counter her combos
when you block them (keep pressing the primary attack
button when blocking). While hitting her, if she starts
to guard she will most likely retaliate with a combo
after you get finished with your attack so be ready
to block. Eye of the Storm will work on her and will
get you a few free hits, but she will still block your
attacks at times during this move. If she knocks you
to the ground, block while on the ground or she will
continue to hit you. When the screen zooms in and you
clash weapons with her, tap the primary attack button
to knock her back. Take 25% of her life to start the
second sword clash - fight her once again by pressing
the primary attack button and a cutscene will begin.
After the cutscene the battle will change in your favor.
She will run from you now and you must chase after her.
You will have a
|
|
choice of which way to go from here. She will always
jump two platforms away from you. When you get to the
middle platform a sand wraith will appear. Defeat the
sand wraith in order to get some of your life back.
When you eventually get to the boss, immediately activate
Eye of the Storm and hit her as she tries to escape
to the platform on the other side. She will eventually
escape when Eye of the Storm wears off. Repeat the same
pattern of working your way to her and defeating the
sand wraith. Immediately activate Eye of the Storm when
you get to the platform that she is on once again and
hack away at her before she can escape. There are many
ways to go about chasing her so the obstacles you go
through to reach her will vary. Some areas only require
a single wall run or pole swing to get the next platform.
Be sure to scope out a platform with a sand wraith while
moving toward her. Sometimes a sand wraith will not
appear on both platforms.
Here's a list of all the ways to get to her while she
is on another platform if
you are having trouble reaching her at any time:
A: Jump to the pole and make sure to move to the right
end to avoid hitting the
section of the building above when leaping to the platform.
Swing and leap to
the platform with the sand wraith. Wall run toward the
platform with the boss
then jump to the beam across from the wall. Walk across
the beam and pull
yourself up to the boss' platform.
B: Wall run on the right wall over to the platform
with the sand wraith. Jump
to the beam ahead then jump to the platform with the
boss and pull yourself up.
C: Jump to the pole and make sure to move to the right
end to avoid hitting the
section of the building above when leaping to the platform.
Wall run on the
left wall and fall to the roof of the small balcony
below the platform with the
boss.
D: Wall run on the right wall over to the platform
with the sand wraith. Walk
out onto the beam and jump to the roof of the small
balcony below the platform
with the boss. Jump and pull yourself up to the boss.
Keep this pattern up and you should be able to take
her down after about four or five Eye of the Storms.
When you hit her for the final time you will initiate
another sword clash. Tap the primary attack button until
a cutscene activates.
|