WALKTHROUGH - Chapter
5: A Friend from the Past
|
|
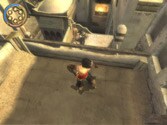
Don't stand on the edge of roof or the archer in the
back will notice you. Stand next to the fountain
and wait until he turns to walk to the left then leap
to his roof and speed kill him from behind. Walk to
the left side of the railing on the left and wait for
the archer below to walk to the right. Hop over the
railing and land beside him then speed kill him. Be
careful since he turns around quick.Wall
run on the wall next to the broken railing and leap
off the shutter, then immediately leap off the next
shutter for a cutscene. Jump to the area below the building
to the left. Wall run and grab onto the side of the
building. Wait for the archer to walk to the
left then pull yourself up and speed kill him from the
back. Stay
behind the shrubbery and railing and do not get too
close to the broken piece of the railing just yet or
the archers ahead might see you. Wait for the archer on the left
to walk to the right side, then as he turns to face
the other way jump toward the building they are on and
the Prince will automatically grab onto the side. This
action will scare off some birds perched near the area
and the archers will investigate. When they get back
to their normal positions move over to the far left
while still hanging on. Wait for the archer on the left
to walk toward you, then, as he passes by you, pull
yourself up and speed kill him. Immediately following
the first speed kill you will need to speed kill the
other archer.
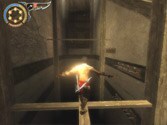
Jump to the top of the building for a cutscene. Move
to the broken side of the railing that leads to the
building below and jump to the building. Wall run to
the shutter on the side of building and leap off of
it to the chain in the distance. Slide all the way down
the chain to cause a distortion for a speed kill. Watch the two archers and wait until the
archer in the back faces the right side then initiate
the first speed kill on the pacing archer. Move behind
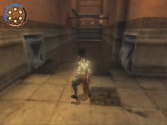
the other archer and speed kill him as well. Walk through the doorway and jump
to the ledge past the wooden floor. Drop to the second
ledge below and it will fall causing you to land on
the third ledge. Fall down to the floor below and walk
through the doorway. To the left you will see a plate
above you on the left wall.  Wall run and stab the plate then jump to the ledge
across from the plate. Make your way up the ledges and
climb to the building above. Wall run on the right wall
and stab the plate near the end. Drop and stab the next
plate below the current one. Fall to the floor below
and run to the left then run up the wall and stab the
plate. Jump and stab the next plate then wall run and
stab the tall plate to open two doors. The doorway behind
you leads to an optional life upgrade and the one to
the right will lead you toward your destination.
Wall run and stab the plate then jump to the ledge
across from the plate. Make your way up the ledges and
climb to the building above. Wall run on the right wall
and stab the plate near the end. Drop and stab the next
plate below the current one. Fall to the floor below
and run to the left then run up the wall and stab the
plate. Jump and stab the next plate then wall run and
stab the tall plate to open two doors. The doorway behind
you leads to an optional life upgrade and the one to
the right will lead you toward your destination.
Run to the door across from the tall plate and roll
underneath it before it closes. Hang off the side of
the wall and fall to each ledge below until you reach
the third ledge. Move to the right side and jump to
the small ledge across from you. Drop down each of the
wooden floors and go down the path ahead. Break open
the chest for 10 sand credits along the way.
Run around the corner and run up each of the caged
walls. Drink from the fountain at the top.
| |
 |
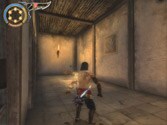
Run through the traps when the spikes go under the
floor and walk out onto the beam. Wait for the arrows
to shoot out to the right of the beam below and jump
to it. Walk to the very center of the beam and the arrows
will not be able to hit you. When the arrows in front
of you shoot out walk to the tip of the beam as they
reload.
Quickly jump to the next beam and pull yourself
up. Walk to the end of beam you're currently on and
wait for the bottom ledge to pop out then jump to it.
Immediately hop up each of the next two ledges and get
to the top. Tap that jump button fast! Walk toward the
light. After gaining the life upgrade, return to the
very beginning of the first area and stab your dagger
into the tall plate to get out.
After stabbing the plate, go through the door on the
right to find a save
fountain.
SAVE FOUNTAIN
Walk through the doorway for a cutscene.
Boss - Giant Sand Warrior
Don't even think of running next to him and trying
to hit him just yet. There are quite a few things you
need to do to weaken him before you can hurt him.
Run to either the Prince's left or right to find some
obstacles to climb on in
order to reach the boss' head. The screen should zoom
in as you approach each
one. Keep in mind that you will need to dodge the boss'
attacks the whole time
you are trying to make it to a set of obstacles or while
you are climbing the
obstacles. He will try to sword slice you or pound the
ground with his left
fist as you run to the obstacles. Roll right before
he does the attacks to
avoid them while on the ground. Don't get too close
to the boss or he will
automatically grab you and throw you into the wall.
He will usually try to hit
you with his fist as you climb the obstacles on the
side.
If you run to the Prince's right: Wall run and stab
the first plate, then wall
run to the right and stab the next plate. The boss will
always hit the wall
when you stab the second plate. Wall run to the right
and grab onto the side
of the platform on the right side then pull yourself
up. Run up the wooden
ramp and wall run directly up to the next plate and
stab it. Wall run to the
left to grab the side of the top platform. Pull yourself
up and walk across
the beam toward the boss to activate a screen distortion.
Press the secondary
attack button to initiate the Speed Kill 1 animation
on the boss.
If you run to the Prince's left: Run up the small ramp
then wall run to the
right to grab onto a beam. The boss will always hit
the wall beside you as you
pull yourself up to the beam. While on the beam, jump
to the right. Run to the
ramp on the right side of the platform you land on and
look for the plate
above. Wall run up to the plate and stab it then wall
run to the left to reach
the top platform. Walk out onto the beam and press the
secondary attack button
to initiate the Speed Kill 2 animation on the boss.
Please note that the boss will destroy the first part
of each obstacle after
each speed kill so you will have to choose the other
set for the next speed
kill. After stabbing both eyes, get behind the boss
and hack away with your
dagger. Roll after every few attacks to make sure the
boss doesn't hit you.
Whenever he stumbles backwards make sure you stand behind
him. When you get
his life all the way down he will stand on one foot.
Attack the other foot
when he stands on one foot to make him fall to his knees
and Speed Kill 3 will
automatically start.
Speed Kill 1: The Prince will leap toward the boss
and him in the left
shoulder then run to his right arm. The boss will try
to grab the Prince with his left hand but the Prince
will the boss' left
hand with the dagger. The Prince will jump on the back
of the boss' head and him
in the left eye with the dagger then the Prince will
slide down the boss' chest and leap off his gut as the
boss screams in agony.
Speed Kill 2: The Prince will leap toward the boss
and him in the right
shoulder anchoring himself to the boss' right arm. The
boss will grab the Prince with his left hand but the
Prince will surprise the boss with a directly into the side of the boss' hand. The
boss will throw the Prince up in the air and the Prince
will fall and grab onto the side of the boss' face and
him in the right eye.
The Prince will fall off of him and run toward the screen
as the boss screams in agony.
Speed Kill 3: The Prince will start at the boss' left
leg and begin to run up his back. The Prince will
him directly in the center of the back. The boss will
yell out and try to grab the Prince from his back using
his left hand but the Prince will jump into the air
and him directly
in his right shoulder plate. The boss will flail in
pain and the Prince will move up his back and
the boss directly in the back of his head and slide
his knife down the boss' backside as the Prince falls
to the ground below.
You will need to run through this first part fast!
Wall run across the spike pit using either wall. Wall
run up to the ledge directly in front of you and move
to the left. Use the extending ledge up above to jump
to the pole overhead. Grapple onto the pole with your
whip while jumping and you will land on a ledge across
from it. Pull yourself up to the floor above and run
around the corner to the
|
|
left but stop before you get to the hole ahead. The
metal sides of the wall in front of the hole will try
to crush you so you must run by them quickly and grapple
onto the pole with your whip.
You will land on the bottom ledge ahead. Pull yourself
up to each ledge above but make sure to avoid the crusher
above the second ledge. On the third ledge move over
to the left side and jump to the beam above. From the
beam, jump to the area above and pull yourself up as
the crushers go into the wall. Quickly break a pot in
the back for some sand since you will surely need it
by now. Climb down the ladder ahead until you reach
a white block with a face on it. Use the secondary attack
button to pull the block out of the wall. This will
cause the door on the floor across from you to open.
Hop on top of the block and use it to reach the floor
above. Quickly run to the closing door in the back and
roll underneath it just before it closes.
Run along the right wall and grapple to the torch to
continue wall running to the ledge across from you.
Move over to the left and grab the next ledge then move
to the left again.
Jump toward the pole and grapple it with the whip
to swing to the ledge across from you. Pull yourself
up to the next ledge then hop across the next two beams
to reach the area across from you. Run through the door
at the end and step down into the water for a cutscene.
Destroy the weapon rack to the left for an axe and
go through the doorway for a
cutscene. There is a save fountain to your left through
the door.
SAVE FOUNTAIN
Watch the enemies in the back. Right when the archer turns his back, wall
run on the right wall and start a speed kill on him
the moment you hit the shutter on the wall.
Run over to the guard afterward and speed kill him
while his back is turned. Step up on the raised platform to the side
and activate landscape view. Wait until the archer in the back walks
toward you and turns left then wall run on the left
wall and start a speed kill on him the moment you hit
the shutter on the wall ahead. He will be facing you,
but the speed kill distortion will still activate. Hang off the side of the railing
next to the tall railing and leap to the area across
from you. Pull
yourself up to the area with the guard and sneak up
behind him for a speed kill.
Hop over the plank the guard was facing. Pick up the
Mace from the weapon rack if you need it. Wall run up
to the plate above the weapon rack and stab it. Wall
run to the next two plates on the left and stab them.
While on the third plate the camera will show you a
chain in the distance. Wall run to the left and jump
to the chain when you line up with it. Slide all the way down the chain and speed
kill the guard below whenever you're ready. Walk out onto the beam the guard
was staring at and jump to the chain in the distance.
Slide down to
the bottom of the chain and wait for both guards to
walk toward each other and stand still while they are
directly below you, then go for a double speed kill.
After that
the Prince should be in the posture for another speed
kill. Don't jump
off the railing. Head to the right and go around the
corner until you hit a dead end. Stand above the open
area that overlooks the pacing sand gate guard and wait
for him to walk your way. When he stops, hang off the
side of the building above him and the screen will distort
allowing you to activate a speed kill on him Be sure to grab his sword after defeating
him. Walk to the sand gate to get the Eye of the Storm
power. This power will allow you to slow down time with
the tap of the Recall button.
| |
 |
Go back to the area you were just at that that overlooked
the sand gate guard (wall run up to the railing on any
side). Two archers and two guards will ambush you along
the way. Use the Eye of the Storm power to make the
battle much easier. Hit the switch on the right wall
with a wall run and use Eye of the Storm to slow down
time then quickly get to the door below before it closes.
Drop down through the open area overlooking the
sand gate and roll through the door just before it closes.
Roll under the boards ahead and use the save fountain
to the left.
SAVE FOUNTAIN
Walk over to the area with the fallen lattice and break
the weapon racks on both sides. The weapon rack on the
right will hold a Mace. Wall run up either wall then
wall jump to the plate at the very top and stab it.
Wall run to the right from the plate to drop to the
floor beside you. Walk through the doorway and walk
up to the ladder then climb it to the top.
Walk to the very end of the wooden bridge then hop
off. Some birds will scatter and catch the attention
of the archers below. This is a hard speed kill to get.
Do not stand too close to the railing or the archer
below will notice you.
Wait for the second archer on the building across from
you to pace to the left, then hop over the railing next
to the first archer so that his back is facing you then
speed kill him. Step behind the rock railing that is
beside the open area leading to the building with the
second archer. When the second archer walks to the left,
jump to the other side and speed kill him from behind.
Wall run
on the wall to make it up the side of the building and
view a cutscene.
After the cutscene, wait behind the baskets and the
hanging clothes to the left
for the Prince to crouch and get ready for a speed kill.
Make sure to wait for
the Prince to crouch or the guard ahead will see you.
Walk to the railing up
ahead and you will see a guard behind it.
Wait for the guard to
turn his back then hop over the railing and speed kill
him.
Look for a dagger plate on the left wall and jump and
stab it. Wall run to the
dagger plate on the left and stab it as well. A guard
and an archer will
notice you when you stab the second dagger plate. Wall
run to the left and
fight them on the building. Jump to the next building
and you will have to
battle some more guards. A cutscene will play after
you beat the final guard.
Go through the newly opened door after the cutscene.
|
|
Walk out onto the piece of the building pointing to
a gap and jump to the gap.
Slide down the gap. The camera view will show you
a plate that you can jump and stab. Wall run to the
right from the plate and slide down the curtain. Walk
through the doorway and head left. Wall run up to the
top of the building on the right. Wall run on the right
wall to the curtain then jump off the curtain when you
slide near the bottom to jump to the area across from
it. Walk through the doorway in the back and head to
the left. Go to the area where the walls are close together
and run up either wall and wall jump to the ledge above.
Make sure to use the outer area of the wall when you
wall jump. Walk all the way around the ledge and step
out onto the beam. Jump to the balcony across from you.
Use the left wall to wall run over the gap inside. Climb
up the next two ladders and go through the doorway to
find a save fountain on the left side of the next area.
The area with the save fountain is very dark so make
sure you look for it.
SAVE FOUNTAIN
Walk to the wooden balcony to trigger a cutscene.
After the cutscene, drop off the balcony via the
broken railing. A group of transparent sand creatures
will attack once you drop below. As they move around
they become a bit more visible. They're basically just
like the sand creatures from earlier in the Sewers.
Walk over to the area where the Vizier was and, near
the door where he entered the area during the cutscene,
break the chest for 10 sand credits.
Directly in front of the balcony you fell from,
go around the corner to the right then make another
right and look at the right wall to see a plate up above.
Run up the wall and stab the plate. Jump after stabbing
the plate to grab onto the crevice above then shimmy
to the other side until the camera shows you a column
across from you. Jump to the column and climb to the
very top. Jump and stab the plate across from it then
wall run to the right and leap off the shutter for a
cutscene. Hop down to the platform below with the bell.
A transparent sand creature will attack upon landing
to the area. Use the grab/block button to slide the
bell over to the hole in the wall up above you. Get
on top of the bell and wall run up to the hole in the
wall and grab the side. Pull yourself up and wall run
up to the tall plate and stab it with the dagger. A
cutscene will play. Quickly jump back on top of the
bell and wall run toward the open door. The door is
to the Prince's right when facing away from the tall
plate. You will grab onto the side of the floor next
to the door after the wall run. Pull yourself up and
get through the door before it closes. If the door closes
jump back down and use your dagger on the plate again.
Jump to the ledge below the torch and move to the right.
The camera angle will
show you a plate across from you. Jump and stab the
dagger into the plate.
Wall run to the left to reach a ledge. Quickly move
left across the ledge as
it crumbles and jump to the plate across from you and
stab it. Wall run to the
ledge on the right. Move to the right across the ledge
and jump and stab the
dagger into the plate above the ledge at the end. Jump
to the tall plate
across from the current one and stab it. This will cause
two ledges to extend
from the wall. One of ledges is below you and one is
across from the left side
of the ledge below. Drop to the ledge below and quickly
move to the right
across it. Pull yourself up and jump to the ledge across
from you. Move all
the way to the right and grab the next ledge before
the current one goes back
into the wall and pull yourself up again. Get off the
current ledge before it
falls by jumping to the crevice up above it. Shimmy
all the way to the right
end of the crevice and fall to the ledge below it. Move
to the right and jump
and stab the plate across from you. Wall run to the
left and jump off the wall
to reach an area with a door. Wall run up the wall beside
the door to reach a
ledge. Jump to the next floor across from the ledge.
As soon as you climb up to the floor above, some sand
dogs will attack.
Wait for them to steal a sand then stab them with
the dagger. Climb on top of the stone piece to the side
of the first tower to the right and face the pole that
is above you. Wall run on the left wall and jump to
the pole when you are across from it. The camera angle
will change as you run. Swing from the pole to the tall
plate on the side of the tower and stab it. This will
raise a platform in the back next to the second tower.
Drop off the plate and run to the platform. Don't worry,
it won't sink. Once on top of the platform wall run
into the tower and you will land on a wooden platform
in between the tower. Look up to see an open area in
the wall. Wall run against the next tower wall and jump
to the pole up above the tower. The camera angle will
show you the pole during the middle of the wall run.
Turn around on the pole and swing to the top of the
tower wall. Pull yourself up the tower wall and jump
to the small strip of the platform across from the wall.
Move to the right then wall run up to the plate and
stab it. From the plate, wall run to the left and jump
to the pole across from the wall. Swing from the pole
and land on the small beam ahead. Wait for the guard
behind the window to turn his back to you then jump
to the floor up above on the left.
Hang on the side of the railing next to
the beam. Jump to the
beam then jump and stab the plate across from the beam.
The screen will
distort many times while moving around above but don't
speed kill just yet.
Wall run to the left and jump off the shutter then stab
the plate it will send
you to. Wall run to the next plate to the right and
stab it. This is the area
where you should start the speed kills. Wait for the
two normal guards to
stand together with both of their backs toward you -
activate a double speed
kill on both of them at that instant. After killing
both of them, sneak behind
the sand gate guard and speed kill him.
Walk up to the sand
gate to gain a new sand tank. Be sure to grab the sand
gate guard's sword.
Drag the bell over to the area with two plates in the
wall. You will need to
break some of the pots in the way. Wall run up to the
first plate and stab,
then jump to the second plate and stab. Jump to the
floor above and pull
yourself up for a cutscene.
After the cutscene, hang over the railing across from
the lever in the distance and drop to the floor below.
Wall run up to the railing in front of you and rotate
the lever. Drop back down to where you were. Stand on
the raised area below the first plate and wall run up
to it and stab it. Wall run to the next two plates and
stab them. When you reach the third plate jump on top
of the broken tower wall. Drop to the other side and
rotate the lever to the left. Rotate the next lever
across from you after that. A cutscene will occur. Go
back and rotate the other lever across from you again.
Another cutscene will occur. Rotate the lever you just
got finished with
| |
 |
one more time. A cutscene will start and sand dogs
will attack you afterwards. The sand dogs should be
no threat at all if you took the sand gate guard's sword
from earlier. Get back inside the tower (wall run up
to the side) and go back to the very first lever you
rotated in this area. You can hop off of the side of
the wall to the inside of the tower without taking damage.
Another cutscene will occur after you rotate the
last lever. Hop to the floor below after the cutscene
and push the bell to the area below the tall plate.
Wall run and sink the dagger into the tall plate for
a cutscene. After the cutscene you will need to reactivate
the switch in the plate to open the door right beside
you. Wall run up the railing and get through the door
before it closes.
(Please note that if you move the levers out of order
the cutscenes will not
activate sometimes, ever if the bridge is laid out in
front of Farah.)
Move along the small strip of floor against the left
wall. When you reach the
end jump and stab the plate across from you. Wall run
to the left to reach the
area ahead. Wall run to the plate above and stab it.
Jump to the ledge above
you and move to the right. Jump to the next ledge and
move to the right once
again. Line yourself up with the ledge across from you
and jump to it. Pull
yourself up to the ledge and jump and stab the plate
across from the ledge.
Wall run to the left to reach the floor above. Walk
up the steps to find a
save fountain.
SAVE FOUNTAIN
|