|
Alright...that was a decent sized cut scene...easily
one of my favorites. So, you are now on the Ark...wait...what
did I just say? I thought the Ark was on Earth? Ha...wrong...that
big thingy on Earth was actually just a portal TO the
Ark and you needed that Ship that Truth had to activate
the portal.
Installation 00
So, you should know what the Ark is...if not...watch
the last cut scene from Halo 2. Installation 00 refers
to itself being the control room for the other seven
installations, or the other seven rings throughout the
Milky Way.
Objective: Eliminate Hostile Anti-Air Units
Yay, another mission. As soon as you leave the Pelican,
head to the first area and eliminate the Covies. After
everything is dead head to the second area. Here you
can see a large AA Cannon like the one at the end of
the fourth level. There are three Jackals with Carbines
up there too, so watch out for them.
Once everything is dead, a Hunter pair will show up
and try to give you tea...I mean try to kill you.
So kill them and work your way up the slope, eliminate
the Grunts and Brute at the top. Enter your first room
then leave your first room.
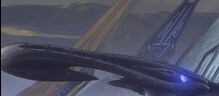
Soon, you'll see a Long sword Fighter soar close by
with flames coming out of it, ouch, you'll see it's
wreckage soon enough. Down below are Covie troops and
once all dead, some Brutes in their leet Prowlers will
show up and try to kill you. My advice is to use the
gun on the back of the Warthog or use the rockets found
underneath the crashed Pelican there.
(You really can't miss it, it's that big plane-like-thing
sitting in the middle of the area)
My favorite thing for the next areas ahead is to give
a Marine the rockets and drive the Mongoose he gets
on. The next areas holds a lot of Brutes, Grunts, etc
for you to kill...or at least for you to drive next
to while your Marine buddy kills.
Now the next area holds a structure to the right and
two Brute Choppers should jump down. Work your way up
and around and once all are dead Johnson will tell you
to follow his Pelican to the next rally point.
So, along the way are more Covies who want your death
but they won't get it...will they precious? Nooooooo.....kill
them...kill them we must. The next large area holds
a Wraith to the right, a floating tower to the left
with Brutes and Grunts with Plasma Turrets, more Covies
in the rocks in the back and behind that, your objective,
two AA Wraiths. I hope you don't need me to tell you
how to kill them.
Forward Unto Dawn
Objective: Lead friendly armor through the wall
So, yet another time to backtrack. 343 Guilty Spark
joins your party at this time. Now take a Scorpion MBT
and take lead. Along the way will be a Hunter pair and
a Phantom on the other side that you can easily destroy.
Once you reach the wall (the first large area) there
will be two Wraiths on the other side along with a soon-to-come
Wraith which will be let off near the door at the top.
If you are able to, try to take out the Wraith and the
Phantom.
Now, you have to go through the door at the top (which
343 will open), connect the light bridge on the inside
and work your way outside.
Once you get outside, a Scarab will walk overhead and
a Marine in a Gauss Hog is running away from two Ghosts
to your right. Kick the Marine out and have him take
the gunner seat. Work your way downhill to meet the
tanks and...well...work that needs to be done. *Wink*
Once you reach the bottom, the Scarab tank will return
which you can see entering from the top right. Now I
know you know what to do, so get it done.
After the Scarab is down, head to the building to your
right while eliminating all hostiles. Once you reach
the top, you'll regroup with the Arbiter.
Real Men Don't Read Maps
Objective: Find the Cartographer
Inside are many rooms and hallways filled with Covies.
Very direct, quite easy. You'll soon reach an open room
with the controls for the Cartographer dead ahead.
Yay, queue cut scene.
Objective: Head Downstairs for Evac
Alright, we activated the Cartographer and I bet that
Master Chief is ready to head home pretty soon, get
some well-needed R&R, right? Well, wait...just what
the hell is this? We're not even inside our own galaxy?
Seriously WTF? *Sigh* Guess we might as well save the
galaxy then...
So, once all is done, the Arbiter will backstab you
by ditching you and going to help Johnson...meh.
Head back and continue downstairs, don't go upstairs
and you'll soon get to a room with a Brute Chieftain
below who then runs away to the lower levels where you
are supposed to get evac. Oh well...I've killed a few
Chieftains before...no big deal.
But, once you head downstairs, you'll see a bunch of
Brutes in a semi-circle around their leader? OH NOES!
I hope you brought some weapons. Ha...I could've warned
you earlier...unless you're reading ahead...you sneak...<_<
Kill kill kill, dead dead dead, yay that's it evac
time level complete.
|