|
Alright, as you may already know, Lord Hood wants to
strike the Covenant forces, hard and fast. However,
there are some AA Wraiths and a large AA Gun that you
must neutralize before the strike
can happen.
Ghost Town
Objective: Eliminate all Anti-Air Wraiths.
The AA Wraiths are spread into two parts of this level,
three total. So, start the level by enjoying the nice
ride, take in the scenery and everything before you
get killing on your mind. As soon as you open the first
door there will be Covenant in the next room. Whatever
way you want to enter is up to you, but you can go up
top and open the door for the Warthog to come in and
provide covering fire.
Once the area is clear, head on through and eliminate
the Covenant in the hallway.
I would now recommend to take the driver seat of the
Warthog, the next area is the first outside area of
this level and holds the first AA Wraith, along with
other threats and sorts.
If you stay to your left as soon as you go outside
and hug the wall, you'll soon see a building to your
right where Covenant forces were dropped off.
On the roof of that building is a Missile Pod and a
Sniper Rifle. Once the AA Wraith and regular Wraith
is down, head through the next-door and identical rooms.
Eliminate the Covenant in this room and take the Machine
Gun Turret above the door because soon to come, is a
swarm of Drones from above, so yeah...you might want
to use the turret.
Once the Drones are all dead (some will flee) you will
see some Rocket Launchers and Battle Rifle ammo nearby.
Through the hallway ahead, you should see a line of
Mongooses and Marines with Rocket Launchers on the back
of each. My recommendation is to drive one of the Mongooses
with a Marine equipped with a Rocket Launcher on the
back for the battle ahead.
As soon as you head outside, it looks easy enough.
There will be a number of Ghosts, some AA Wraiths to
deal with, Banshees in the sky and perhaps some Brute
Choppers. Easy, right? Wrong.
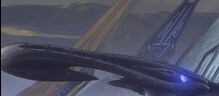
Judgment
Objective: Eliminate the Scarab Tank
Once the Covenant forces in the area have been eliminated,
a gigantic Scarab Tank will come for you to destroy.
The trick is to stay underneath it while you have the
Marines shoot at the legs. If you stray too far away,
the Scarab will be able to fire at you with it's main
gun.
Eventually, after enough shooting, the legs will not
be able to support the weight of the Scarab and you
will be able to climb aboard from the back. Take the
turret that is mounted there and work your way up and
around to the backside. Once there, start shooting at
that big glowy thing until it turns red and starts shooting
out sparks or whatever.
A Marine will say to get off the Scarab and get away
because it's going to blow. Yes. Yes it will blow so
yes, you must get away. Kaboom.
Objective: Neutralize the Anti-Air Cannon
 |
|
| Dont EVER let this happen to you! |
|
Yippee, now it's time to take out the big gun. Once
the Scarab is done for, head into the structure and
to the right. You might want to take a Rocket Launcher
with you. It's rumored that there are Hunters in the
next area who are hungry. Inside will not only be a
lot of Marines, but many weapons too. Work your way
through the hallways until you encounter
some Brutes.
Keep killing the Brutes and the Hunters and the Brute
with the Gravity Hammer, more Brutes, more Grunts *yawn*
oh? What's this. I think I see a big gun. That must
be the Anti-Air Cannon. Here is gets slightly tricky
if you don't know what you're doing.
Underneath the large cannon are many Covenant forces.
As soon as you see the cannon, however, to the left
will be a Sniper Rifle. Grab that and start taking care
of some of the Covies. Work your way up while doing
your thing. Once everyone is dead there will be a Fuel
Rod Gun behind the rocks in the back, take that and
aim at the vent underneath the cannon. When the vent
opens, fire until the level ends. Good job.
*Commence cut scene*
|