By far, one of the most difficult levels in the entire singleplayer mode, this is the mission in which you will get to
confront Nikolai Diavolo for once and for all. Unfortunately though, you do not start off at the Launch Area, which is the
place you need to be to fight Nikolai, so you will have to battle your way through groups of enemies before you can
pull the trigger at the boss. This can be a very tiedious progress for people trying to play this level on 00 Agent. Body
Armour is scarce in parts of the level, so gain access into the Vault Room at the start of the level to get all sorts of
pickups. Of course, you need to open the Vault Door from Mission 26, so if you have not yet done that, it is best that
you replay that level and open the Red Vault Door as you play the level. Whenever you play this level on 00 Agent, you will
need to take it slow and easy at some parts to avoid getting damaged too much. Although the wall hug technique is suitable
for most parts of the level, I personally suggest not to use this technique when you are battling it out in the Warehouse
as there is just far too many enemies that come from pretty much any direction that you can walk from and to. Try to also
kill every single enemy in each room. You do not want to skip into an area, pass a few enemies and realize that you are near
the end part of the level, only to have an enemy from before to sneak up behind you and kill you - it can happen.
When the level has commenced, pull out the SIG 552 and run towards the metal shutter ahead, targeting each of the first three
enemies standing at the doorway that are ready to run out. While you shoot each enemy, make sure you run towards the metal
shutter and stop before you enter inside it - you do not want to go into the next room just yet. Straight after killing the third
enemy, kill the fourth enemy hiding behind the crates to the left, then make your way into the second room. Once you enter the
second room, hide behind the two crates at the middle and kill the first enemy standing next to it. Stand up for a short amount
of time and kill the enemy standing inside the Vault Room to the left which is currently locked. Look ahead again and kill the
two enemies running across the metal walkway before they manage to hide behind the red crates to the left side. Kill another
enemy hiding behind the red crate to the direct right and shoot the last one or two enemies hiding behind the numerous red crates
at the far side of the room. Once you have killed everyone in the first two rooms, you can head into the next room through the
metal shutter to the far right corner of the room. However, if you want to earn the first two Bond Moments in the level, make the
way back into the first large room you started in.
When you have made it back to the first room, move next to the small crates stacked to the right - the crates which the fourth
enemy was hiding behind earlier on. Deploy the Q Spider nearby and make it move through the small gap behind the stacked crates.
After passing the first passage, turn right into the open area and head left near the big red metal container further ahead. There
is still enough space on the ledge for the Q Spider to pass, but watch out for the big gap at the middle as the Q Spider can fall
into here. Passing the red container, merge right so you go underneath the metal platform and head straight, through the numerous
wooden crates until you reach the other side. When you have exited from below the metal platform, make a U-Turn to the right and go
up the stairs. Follow the platform until you reach the end of it, in which you move the Q Spider through the gaps of the platform
railing. Moving on top of the containers, head towards the first metal beam to the left corner and carefully move across it. Do the
same for the second downwards beam to the right, but you might need to adjust the camera to see the metal beam. Once you are at the
bottom of the second beam, turn left through the open window into the Vault Room. Drop down the crates to the floor and turn
right, heading towards the door at the front. Move next to the metal door and detonate the Q Spider to destroy the metal beam holding
the doors shut and therefore earning you the First Bond Moment in the level. Walk into the Large Vault Room - that you should of
opened back at Mission 26 - to earn the Second Bond Moment and to obtain the numerous armour, battery and weapon pickups. This will
be essential for some of the things you will be doing later on, so replay Mission 26 if you have not got the Red Vault Door opened.
Once you are done, head into the third room. One last note about the Q Spider - try to only use one Q Spider to unlock the Entry Door
to the Vault as you will probably be using more Q Spiders a bit later on to kill groups of enemies at once.
Follow the corridor into the third room, which is coincidentally darkened. Activate the Thermovision Goggles and hide against the
wall at the end of the corridor. Shoot the three enemies that eventually run around ahead them pull out a weapon like the SIG 552
or Desert Eagle and move towards the two crates ahead. From here, look above to the far left corner of the room and quickly shoot
the sniper. Luckily, he usually misses on the first few shots, so you can shoot him while he gets ready to fire again. Once he is
down, go around the shelf at the middle and move towards the hallway at the other side, but do not go into yet. If there is an
enemy there, shoot him and stand near the entry of the hallway. From here, deploy a Q Spider and move it through the hallway
into the fourth room to the right. Inside here, there are about eight enemies all grouped up, except for one of them who is
standing behind a crate further away - so do not worry about that enemy for now. If you wish to use the Cloak for the Q Spider, you
can, but the best thing to do is once you have turned right into the room, move as fast as you can next to the group of enemies
and detonate it to kill most of them at one go. There is a chance that all of the patrolling enemies will not die from the first
Q Spider, but you can deploy a second one to finish off the other majority of the enemies. Do not worry about any of the enemies
running towards you as they still are unaware of your presence as you use the Q Spiders at this part. Once you are done killing
the group of enemies, move into the fourth room and finish off any remaining enemies, including the one hiding behind the crates
to the left of the next door that leads into the Warehouse area. When you are done, head through the double doors to go into the
Warehouse area.
Once the door is open, look above to the right and there is a Rocket Launcher Soldier standing on top of the stacked containers.
Shoot him down and a few of his rockets will destroy some objects around the roof, causing them to fall and blocking off some
direct routes through the Warehouse. If you are finding it hard to find the way around this area, you can always use the map
included as a general reference. The first group of enemies consists of about 15 enemies running around the different containers
which ultimately makes it harder to find or even chase after them. There is an additional one or two enemies that move along the
red metal pylon above, causing some problems when you are trying to find cover from the ground troops, as the enemies above have much
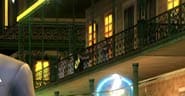
greater view area than the others below. There is also one sniper that stands at the opposite side of the warehouse, on one of
the balconies - this is the target you might want to eliminate after shooting some of the soldiers on the ground level. You will
need to move closer to the Sniper in order to target him, but the SIG 552 can make short work of this. Alternatively, you can also
use the Dragunov from the first sniper you killed earlier on the level to kill this sniper. Whenever you encounter any of the
ground troops, kill them quickly as they group together pretty fast and hold weapons like the SIG 552 and the Shotgun - making them
very deadly. When you have the perfect chance to kill any enemies moving on the pylon above, target and shoot them for best results.
You can actually use the Thermovision Goggles throughout the Warehouse Area to see the enemies more clearly. Occassionally, there is
the odd enemy that can cloak, so this could be a good thing to use if you are having trouble looking for any remaining enemies. As
mentioned before, it is best to kill all the enemies in the area before you move on to the next section so no one can create any
surprise attacks. Kill the last enemy standing on the containers near the start of the second area before moving on.
The second area starts when you move towards the stack of containers in which one of the enemies on the highest container
pushes the container door open. Kill him and turn right, using the wall hug technique and looking to the left, were there is
one container hanging at the roof above. Use the Bond Sense to target the supporting wire for the container, but wait until
some enemies to the left move underneath it before shooting it. If it collapses on top of an enemy, you will earn the third
Bond Moment in the level. Kill the next group of about 13 to 15 enemies, all of which are ground soldiers - with a few of them
being able to cloak, before proceeding around the area to the final section of the Warehouse. You can use the wall hug technique
after getting the third Bond Moment to kill about half of the enemies that run into the area. After leaving the second
area - moving along the narrow section of the Warehouse, towards the other side, there is a one enemy hiding behind a container
and a Shotgun Trooper that kicks the container door open further ahead. Kill both of them and continue to move straight, having
the SIG 552 pulled out. Target the sniper standing on the top of the structure first. Do the same thing to kill Rocket Soldier
standing on the Red Metal Pylon above, to the left. After killing both of them, move in-between the containers to the left in
which there is one more Rocket Soldier and the last group of enemies. There is about another 10 to 12 enemies here, so move
towards the building at the side for cover. Kill the first bunch of enemies before moving forward towards the exit. Use
the small crates to cover yourself from the gunfire as you shoot the enemies through the windows.
If you find yourself stuck with low armour and you do not want to walk all the way back to find some, you can alternatively use
the Nano Suit before moving into the third area. It is a bit risky, but if you activate it at an area first where there is no
enemies nearby, there is a less chance that they will be able to see you. With the Nano Suit activated, run across to the far
left corner of the Warehouse to find the exit. You may occassionally pass the few enemies that fire their weapons randomly in
hope they will hit you, but as long as you weave through the numerous containers and continue to run, you will be able to
survive. Run through the exit door and quickly continue from there.
If your energy is too low to use the Nano Suit or you still have low health, you can use the pillar to the far left of where
the exit door is located. From here, you can target any enemies running out of the exit door into the Warehouse by using
the SIG 552. When all the enemies have been pretty much blasted away, you can use the Rappel on the Rappel Point just above
the Exit Door. This will lead you to the top of the building, but there is not much to collect and find over here, except
being able to drop into the exit room by going down the gap, landing on a raised platform with some body armour. Activate
the Thermovision Goggles and enter the second room of the Exit Area, killing the remaining enemies hiding behind the object at
the middle of the room. They may cloak, so kill them fast. After passing through the first two exit rooms, go through the small
double doors into the next corridor. Wait here until an enemy comes from the corner to the right. Kill him and use the wall
hug technique against the wall facing towards the last few enemies further down the next corridor. Your main priority is
to kill the Rocket Soldier standing at the middle, before he manages to take chunks of health away from you. He can prove really
annoying, but use the SIG 552 once again to make this an easier job. Once you have killed him and another two soldiers, move down
the corridor and turn left towards the Red Door. Walk towards it, wait until it opens and enter inside the next room to end
the first part of the level.
Once the next part has loaded, move ahead towards the second door and move into the next room. Collect the Rocket Launcher ammo
to the left side of the room if you need it. Go to the middle of the room and head down the ramp towards the third red door
to proceed into the final area. This is the part in which you encounter Diavolo. It is pretty easy actually. The only thing
you have to worry about is the rockets being launched from his Defence Turret. The firing rate of the rockets is quite slow, but
avoid receiving direct hits from the rockets as these can prove deadly. After the cutscene, make sure the Rocket Launcher is
the weapon you are using and immediately target the Chamber. You will need to fire about five rockets to actually
destroy it, but along the way, you can easily dodge his rockets by using the side barrel rolls while the chamber is still
targeted by your Rocket Launcher. Wait until the rocket is launched from the turret before you roll, because once it is fired, the
rocket only moves towards the area it was originally aimed at. By using the side barrel rolls after they are launched, you can
dodge the rockets without receiving much, or any damage at all. Once you have hit the Chamber with about five rockets, that is
the end of Diavolo, but he has managed to activate the Launch Sequence of the last Missile using his last ounce of effort.
You will now need to destroy the Missile. Turn right and move straight, carefully avoiding the flames that rise out of the
small Exhaust Ports to avoid instant death. Move ahead a bit more until you reach the small opening leading towards
the entry of the Turret to the right.
Once you have entered the black area of the passage, you are given automatic control of the Turret. This is the only thing that
can be used to destroy the Missile at the moment. It starts to launch at a slow speed, so you can perhaps hit it with two
rockets before it gets higher. At this point, aim a bit more carefully and hit it with a third rocket to destroy the Missile. If it gets higher, you will need to fire the rockets ahead of it more and more as it goes further up, so be quick. If you do fail
the mission, you start again from the point before you verse Diavolo, so there is not much catching up to do to get to this very
last part of the level.
Once the Missile is destroyed, you have successfully stopped Diavolo's conquest for World Domination and once again, saved the world.
|
|