This is a level that is not hard to pass on 00 Agent difficulty. The only main obstacle is the Security Lasers that
you will encounter while rappelling down the elevator shaft. The first set of Lasers prove to be the most tricky to
avoid, with several beams moving from different directions and speeds. The best way to overcome from getting hit by
these Lasers is to stop them from moving using the Q Spider at the start of the level to destroy the Laser Control
Unit. There is also a second set of Lasers that appear as you get towards the bottom of the shaft, but these can be
easily avoided.
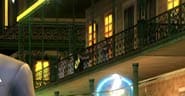
Once the level begins, turn around 180 degrees so you are facing towards the other side of the open area.
Deploy a Q Spider and make it move underneath the railing in front of you. Move it over the numerous containers
and maneuver it through two metal planks leading towards an open window at the other side. Go through the
window into the room and wait until the door slightly opens. When it opens, move the Q Spider through the gap
and slowly follow the guard walking towards the console, to the right of the Red Vault Door. Once he has opened
it, move the Q Spider next to the guard and detonate it to earn the first Bond Moment. You cannot use the pickups
in the Vault during this level, but it will be helpful towards the last mission once you have access to the room.
Move down the stairs towards the stacks of wooden crates ahead while you are moving, shoot the two crates with the
Rocket Launcher symbol imprinted on them to obtain the Rocket Launcher. One of the crates is located to the left
of the stairs, and the other near the stack of crates. Stand near the stack of crates and shoot the wooden crate
next to the large red container, nearby the ledge of the elevator shaft. After this, move to the end of the crates
and deploy the Q Spider, making it move through the small gap behind the wooden crate to the left. Move the Q Spider
around the red container, being careful not to make it fall off the ledge and get it to the other side where you then
direct it towards the room at the right corner of the open area. There is a small shaft here that leads into a small
room controlling the movement of the first Laser Grid. Detonate the Q Spider next to the flashing unit to stop the Lasers
moving and earning you the second Bond Moment.
Now move towards the large elevator shaft and jump off it so you are rappelling against the wall. When you get close to
the first grid of Lasers, pull out the Rocket Launcher and destroy the first Defence Turret that deploys at the centre
below. You need to fire about three or four rockets to destroy it. Pass the first set of Lasers and continue moving
down until two more Defence Turrets are deployed at the sides. You can avoid the rockets they shoot by constantly
moving down without stopping, but take care when you try to pass the second Laser Grid that appears soon after. The
second grid is easier to pass as there are not many Lasers, but they are moving and there is no way to stop them.
Passing the second grid, drop down onto the elevator platform that slowly ascends, eventually coming to a halt at the
Maintenance Area. You will need to re-activate the lift again.
Shoot the two crates that have the Rocket Launcher symbols on them and collect the ammunition. You might want to use
the Rocket Launcher a bit later, so hold onto it for now. Pull out an alternate weapom and kill the first two enemies
that come from the two entries ahead. Once they have been eliminated, go into the entry to the right side which is
closest to you. Follow the corridor until you reach the console to the left, next to the window, pressing the action
button on it to partially reactivate the lift. You will need to activate one more console. Move straight from the
console and go around the first corner, killing the enemy standing ahead. Hide behind the pipes at the other side
and deploy the Q Spider, moving it into the small shaft underneath the pipe. Make it walk through the narrow shaft
until it reaches the opposite end, in which you can exit through another shaft and make it move towards the three
enemies standing behind the crates. Detonate the Q Spider here to earn a Bond Moment. Returning to Bond, move to the
far end of the corridor and turn left, killing any remaining enemies. Move closer towards the metal shutter at the
end of the area, which opens eventually - revealing more enemies. Kill them and then activate the next console. Once you are done, make your way back towards the lift. While you move down the corridor again, there is a Rocket Soldier
further down, so shoot him before you progress. Once you make it on the lift, a cutscene begins.
After the cutscene, avoid the rockets fired from the soldiers ahead and ignore firing your weapons at them. This
puts a potential risk of you getting hit by any of the several rockets fired at one time . Aim towards the brakes
mounted around each of the metal pillars around the four corners of the lift you are standing on. Once you have
shot all four of them, the lift starts to descend.
The last part consists of versing Jaws - who is armed with a deadly Flamethrower. Hide behind the metal crate
to the right as he releases the first attack consisting of the flames. Remain crouched behind the crate until
he stops firing the flame. At this point, he looks back and his Flamethrower is now vulnerable. Shoot the backpack
part of the Flamethrower to damage it - using the SIG 552 for best results. You will be able to take about a
third of his health each time you constantly fire at his suit. You can also hurt him while he is firing at
you, but this damages him less and you will also have to avoid the gunfire. After getting him the first time, he
will start to launch flame rockets towards you. Hiding behind the crates now is useless as the splash damage
will hit you often, so move left and right behind the two crates using the side barrel roll technique to damage
him during the process. When he turns his back for the second time, repeat the same process until he loses more
health. If you take a while to defeat him, he will start to launch triple flame rockets which are a little
harder to dodge, but as long as you do the barrel rolls, you should be fine. After shooting at his backpack
three 'proper' times, he will start to get distracted by the flames burning him, so quickly make your way towards
the Jet at the left corner to finish the level. You have to do this part quick as the lift eventually crashes.
Also, you do have a certain limit while versing Jaws. By looking at the big numbers painted on the wall as you
continuously descend, you will know how many floors there are left before the lift slams onto the floor.
|
|