WALKTHROUGH - Chapter
7: A Dark Secret Revealed

|
|
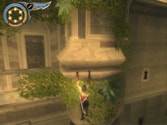
Look for the only open doorway up on the highest platform
and make your way over to it. Jump to the curtain and
slide down it, but jump off right before you reach the
bottom of the curtain to land on the ledge across from
it and keep from plummeting to the spikes below. Walk
to the right on the ledge and jump to the room across
from it. Walk around the corner and jump to the ledge
across the hole. Jump to the ledge up above the first
and walk to the right. Jump toward the pole and grapple
it with your whip to reach the beam across from it.
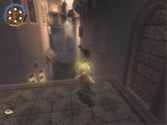
 Jump to the floor below you from the beam. Use the
right wall and run to the first shutter and leap from
that shutter to another shutter then leap again to catch
onto a ledge. Move to the right and drop to the ledge
below that one. Move to the right some more then run
down the hall. Wall run on the left wall and grapple
the torch up above along the way to keep you running.
On the other side run to the left and some warriors
will attack you once you go through the doorway. Sand
creatures will follow after the warriors are defeated.
Stay in the sunlight as usual to weaken the sand creatures.
Jump to the floor below you from the beam. Use the
right wall and run to the first shutter and leap from
that shutter to another shutter then leap again to catch
onto a ledge. Move to the right and drop to the ledge
below that one. Move to the right some more then run
down the hall. Wall run on the left wall and grapple
the torch up above along the way to keep you running.
On the other side run to the left and some warriors
will attack you once you go through the doorway. Sand
creatures will follow after the warriors are defeated.
Stay in the sunlight as usual to weaken the sand creatures.
This next part is a little tricky in finding out
what to do next. Go back toward the doorway you used
to enter this area and look to the left. There is a
pole extending out of the wall beside the column on
the left that you need to grapple to. Run to the brick
wall behind the column (near the corner) and wall run
up it then jump off at the peak of the wall run and
grapple onto the pole above. This will carry you to
a beam. Walk across the beam to the floor ahead. Rotate
the camera so that you are looking out over the area
and wall run on the right wall. Grapple onto the torch
above while running and jump off the next two shutters
you will land on. The Prince will be sent to the top
of a column. Shimmy to the right until the camera shows
you the wooden floor above. Jump to the wooden floor
across from you and hop through the window. Go around
the corner to the left. Wall run on the right wall then
jump and grapple to the pole above you. This will send
you flying toward a crevice. Shimmy to the right along
the crevice and line yourself up with the pole across
from the right side. Jump to the pole and grapple to
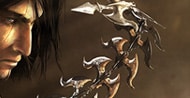
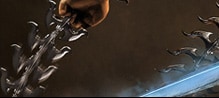
it. The grapple will send you flying to a chain. Slide down the chain and perform a speed
kill on the guard below. Wait for the pacing guard in
the back to turn his back to you then drop down and
sneak behind him for another speed kill.Wall run up to the switch on
the wall to press it. The first time you press it two
sand creatures will attack you. Wall run and press it
again to make a door open to the right. Use Eye of the
Storm to get through the door before it closes.
Once you go
through the door, step into the gap in the wall to the
left and wait for the guard in the back to walk down
the area ahead and come through the doorway. He will
turn around and start to walk back through the doorway.
Rush behind him and speed kill him as he walks away.
Break the
objects in front of the wooden structure past the doorway
and roll under the wooden structure. Keep running down
the path and step through the window at the end.
Wade through the water to find a save fountain on the
right side of the room.
SAVE FOUNTAIN
| |
 |
Walk over to the wooden structure on the side of the
room.
Pull yourself up on top of the first part (not the
beam) and move the camera to the wooden platform above
the save fountain. Wall run on the left wall and jump
to the railing of the walkway. Rotate the lever on top.
Jump back down to the floor below and move the wooden
structure all the way to the water pool until you cannot
move it anymore. Climb to the beam on top of the wooden
structure and leap to the wooden wall that closed when
you rotated the lever. Leap toward the wall and wall
jump off the wall to reach a beam above the wooden structure.
Pull yourself up and walk to the center of the beam.
The center will point toward a gap. Jump to the gap.
There is a pacing guard up above you that will see you
if he has his back turned and if you are on the same
level as him while climbing the gap. Make sure that
he has his back to you then climb all the way to the
top of the gap.
Jump to the set of beams up above the guards. Walk to
the center of the beams and wait for both of the guards
to stand together with their backs turned. Use a speed
kill on the first guard, then walk up behind the second
guard for another speed kill. Rotate the lever to open the door
across from you. There is a pacing guard patrolling
around that doorway. Jump to the crevice up above the
door that just opened. Make sure the guard inside is pacing away from
the doorway, then drop to grab onto the floor of the
room above. Wait until the guard paces away once again
then pull yourself up and speed kill him.
Walk through the next doorway in the room. Wall run
on the right wall up to the first shutter then leap
off of the shutter and jump to the next two shutters
and you will land on the area in the distance.
Go through the doorway on the other side for a cutscene.
Wall run on the left wall then jump to the beam across
from the wall. From the beam, jump to the chain and
climb down it then drop to floor below. Sand creatures
will attack at the bottom. Lead them into the sunlight
to quickly get rid of them. Break the chest to the left
of the hole they came through for 10 sand credits.
Wall run up to the switch on the wall to open the
door in this area. Through the door there will be a
guard that will stare to the right. Go through the doorway on the left side
to keep him from seeing you. Quickly sneak up behind
him as he starts to walk to the right and speed kill
him. Walk down the path he was going to but stop before
you step out from behind the right wall. There are two
guards in the distance. Wait for the guard furthest
away from you to turn his back then run and speed kill
the first guard closest to you. Kill the next guard
after that before he turns his back again. Climb up the ladder in the area
the guards were both staring at. Jump to the wall behind
the ladder and wall jump to the railing up above the
ladder. Wall run directly up the wall to the left of
the lantern and jump to the beam across from the wall.
Walk along the beam and pull yourself up to the floor
above.
Wall run on the left wall to reach the beam further
ahead on the wall. Jump to the wooden platform beside
the beam. Walk along the small ledge on the side and
drop down the to the third ledge below then walk to
the platform on the left. Wall run on the right wall
then leap off the two shutters to land on a ledge up
above the pacing guard in the distance. Move over to the side of the ledge closest
to the guard and wait for him to stop pacing below.
Activate a speed kill when the screen distorts.
The guards
below will not be able to see you on this platform.
Wall run on the left wall then leap off the shutter
to the platform up ahead. When you land on the platform from the
shutter you will scare some birds away. Do not move
until the guards get back to their normal patrol.
They will not be able to see you on this platform
when they get back to their normal patrols. Wall run
on the left wall and jump to the beam across from the
wall. Stand on the beam and get ready for some speed
killing. When the pacing guard walks over to the normal
guard, wait for the sand gate guard to turn his back
and walk away. During that instant, hang off the side
of the beam and activate the double speed kill for the
two guards below. Quickly run over to the sand gate
guard and speed kill him. Go by the right side of the
sand gate when you sneak up to him. Walk up to the sand gate to get The
Winds of Sand. As always, pick up the sand gate guard's
sword. Wall run up to the switch on the wall across
from the sand gate then run through the door that opens.
Walk up the stairs and hop over the railing at the
top. The baskets and pots
up ahead are hiding a crate. Break through all the objects
and pull the crate
out of the area behind the objects. Pull the crate to
the left and move it in
front of the sealed doorway ahead of you. Climb on top
of the crate and wall
run up the wall. Hop to the other side and walk down
the hall. In the area
with the moss on the walls, jump to the top of the block
sticking out of the
wall. Wall run and stab the plate on the wall up above.
While on the plate,
wall run to the left and leap from the wall to the plate
across from you and
stab it. Jump to the crevice above the plate you leap
to and shimmy to the top
of the floor above you to find a save fountain.
SAVE FOUNTAIN
|
|
Walk through the doorway and jump to the pole extending
out of the left wall. Swing from the pole to the plate
up ahead and stab it. Wall run to the right and stab
the next plate. Drop to the ledge below the plate and
walk around the corner. Jump to the next ledge above.
There's no reason to pull yourself up - shimmy along
the crevice on the side of the building and drop to
the beam it will lead you to.
Walk to the end of the beam and hop across to the
next beam. Jump to the ledge up above the beam then
pull yourself up and move to the right. Jump to the
beam across from the ledge then jump and stab the plate
above the beam. Wall run to the next plate to the right
and stab it.
Wait until the guard on the side walkway paces away
from you. Wall run to the small platform below the guard.
Some birds will fly off and alert the guard above. Grab
onto the side of the walkway and wait for the guard
to turn his back, then pull yourself up and go for a
speed kill on him. Go to the other side of the walkway and hang
off the railing. Jump to the pole and swing to the other
walkway across from you. Walk to the other end when
you're on the walkway across from the pole and hang
off the side. Shimmy to the crevice on the side of the
building and drop to the ledge below. Jump to the ledge
on the large column to the side.
Hang onto the side of the ledge and move to the right
side of the large column then pull yourself up. Jump
to the tree behind you. Slide down the tree just enough to jump to the
tree on the side. Hop to the next tree then hop to the
tree after that. Look on the wall to the side and you
should see a piece of dark brown wood forming a ledge.
Jump to that ledge. From the ledge, jump to the statue
and the Prince will grab onto the side. This is the
area where the speed kills begin! Stay hanging on the
statue and face the camera so that it is looking down
at the Prince's back and you see three guards. One guard
will pace below you, one guard will stand still with
his back to you, and one guard will pace toward you
and away from you in the distance next to the trees.
Wait for the pacing guard by the columns to turn his
back and walk away and wait until the guard below you
walks behind the stone wall holding up the statue (he
will move to the Prince's left). Activate a speed kill
on him the moment he walks behind the statue and stand
behind the standing guard while still concealed behind
the statue from the pacing guard's view. This is the
hardest part since the pacing guard by the trees will
notice you if he sees you while you are not concealed
behind the stone wall. Go for a speed kill on the standing
guard right next to you when the pacing guard walks
away from you then get back behind the stone holding
up the statue. When the pacing guard walks toward you
and stands across from the stone holding the statue,
rush behind him and speed kill him. The standing guard
in the back will not notice. Get behind the last standing
guard by going around the stone with the statue and
speed kill him from behind.
Wall run up the stone holding the statue and sink the
dagger into the tall
plate to make two beams rotate on the two big columns
in the back of you.
Climb up the small tree closest to the big column and
leap to the taller tree
beside it. From the tall tree leap to the ledge on the
side of column and hang
from it. Move to the left side of the big column and
drop to the beam below
it. Hop across to the beam on the next big column. Jump
to the ledge above
the beam and move around the side of big column while
hanging. On the other
side, leap to the ledge on the crevice across from you.
Drop to the plate
below and stab it. Drop from the plate to the floor
below. Walk out onto the
beam ahead and jump to the beam to your right. Look
through the grating
(rotate the camera) and make sure the guard behind it
is not looking your way
then jump to the ledge on the wall beside the grating.
Move to the right on
the ledge and jump to the pole across from you. Turn
around and face the wall
on the pole. Swing to the wall and wall jump to the
pole above you. Turn
around once again on the next pole. Swing to the top
of the wall and pull
yourself up.
Walk out onto the beam and jump to the tree up ahead.
Slide down the tree just enough to where you can jump
to the ledge about midways down. From the ledge, jump to the plate and stab
it. Wall run to the right and stab the next plate. Wall
run to the beam on the right. You are now positioned
to make the perfect speed kill on the sand gate guard.
Hang off to start the distortion for the speed kill.
Wait for the pacing guard to turn his back to you then
hang off and start to speed kill the sand gate guard.
Immediately after the kill, hang off the side of the
wall overlooking the river. Shimmy toward the side with
the standing guard but
| |
 |
stay behind the stone up above. If you shimmy to the
left and the standing guard or the pacing guard is looking
your way, they will see you. Stay behind the stone until
the pacing guard turns his back to you then quickly
shimmy to the left and pull yourself up then speed kill
the standing guard. Hang along the side once again and
make sure to stay behind the stone. When the pacing
guard turns his back to you once again shimmy over to
the left, pull yourself up, get behind him, and speed
kill him.
Walk to the sand gate to get a new sand tank.
Grab the sand gate guard's sword if don't still
have the one from earlier. Look toward the stone holding
up the statue. There is a tall plate on the stone. Wall
run up the stone and stab your dagger into the tall
plate to rotate a beam and open a window outside this
area.
Climb back up the tree and jump back to the beam where
you entered this area. Walk onto the top of the wall
and jump to the wooden portion of the open window. Jump
to the ledge on the side of the big column against the
building up ahead. Move to the left on the ledge and
drop to the beam below. Hop to the other beam on the
big column across from you. Jump to the ledge above
and move to the right. Hop to the ledge across from
you and drop to the next ledge. When the pacing guard below you walks to
the left and turns his back to you activate a double
speed kill on both of them. Wall run on the left wall to the
pole extending from the wall. Swing from the pole to
the ledge in front of you. Walk around the right side
of the ledge.
Wait for the pacing guard below you to walk your way
then turn around. When he turns his back to you activate
a double speed kill on both guards. The camera will
sometimes zoom out during this speed kill making it
a bit hard to time.
Go down the walkway and break the chest behind the sixth
waterfall for 10 sand credits.
Drop down below to activate a cutscene.
Boss - Sand Creature Juggernaut
This boss is extremely easy. All you have to do is
get behind him and hack away at the back of his legs
until he drops. The Prince should automatically climb
on his back and activate a speed kill.
Speed Kill - The Prince will hop up the boss' back
and to stab him
in the back of the head but the boss will shake around
causing the Prince to nearly lose his balance. The Prince
will continue to hang on to the boss' neck and eventually
stab him in the back of the head.
Now you will ride the boss through the rest of the
garden area. Here is a list of the ways you will have
to turn while riding on his back:
Charge through the door.
Right
Left to break through another door.
Left
Right
Right
Left
Right
Left
Right
Right
Left
Left
Right
Right
Left
After the cutscene, climb up the ladder to the right
to find a save point.
SAVE FOUNTAIN
There is a life upgrade through the little hole to
the right of the save fountain.
Roll through the hole by the baskets to the right of
the save fountain. Move
to the left on the first ledge then drop down to the
second ledge below and
continue moving left. Walk to the very end of the next
ledge further down and
hop onto the ladder across from it. Slide all the way
down the ladder and jump
to the floor below. Drink from the fountain to start
the life upgrade trial.
This one if much easier than the last one.
Walk to the left. For the first set of traps, run through
them on the right
side when the first spike pillar starts to move to the
left. Be sure to roll
just as the second spike pillar comes downward. Use
Eye of the Storm and wall
run on the left wall to get past the saw blades easily.
If you don't have any
sands then run the moment right before the first saw
blade goes into the wall.
For next set of spike pillars, run through the right
side when the first spike
pillar touches the left wall. When you reach the lone
saw blade, stand on the
right side and study the movements then roll through
the second you see an open
spot. Walk toward the light to claim the life upgrade.
Leave the area
afterwards and roll back through the hole.
Climb on top of the stone block in the distance. Wall
run up the wall on the
left and wall jump to the area above. Walk to the left
when you reach the
floor above. Wall run on the right wall to reach the
ledge across from you.
Walk to the left on the ledge and line yourself up with
the ladder across from
you. Jump to the ladder and slide to the bottom. Jump
to the ledge across
from you at the very bottom and move to the right. Jump
to the pole across
from you and swing to the area across from the pole.
There is a save fountain
to the left up ahead.
Walk through the doorway ahead and stand behind the
wooden structure made out of planks. A warrior will walk back and forth from
behind the building in the background. When he steps
around the side of the building, get on top of the wooden
structure and jump to the pole up above. Swing to the
smaller pole up ahead and stand on top of it. Wait for
the distortion to start for the speed kill when the
warrior below turns his back to you then speed kill
him. Move
the crate to the side over to the railing of the pool
of water. Make sure it is to the left of the big door.
Get up on top of the crate and wall run on the right
wall over to the small stream of water coming out of
the drain in the back. Right before you reach the wall
(or drain), jump to the other wall across from you and
wall jump all the way up to the side of the area above.
Wait on the side
of the floor until the warrior turns his back to you
then speed kill him from the back. Wall run up to the switch on the
wall to close the drain on the wall to the right. Immediately
wall run on the wall to the right and jump from the
shutter to land on a ledge in the corner. Move to the
right on the ledge and pull yourself up to the next
ledge. Jump to the wall across from you on the wooden
structure extending from the building and use it to
wall jump all the way to the top of the wooden structure.
Wall run on the right wall and jump off the shutter
to the next shutter. Jump off the second shutter to
land on the railing of the walkway in the back. Pull
yourself up and walk through the doorway for a cutscene.
Run to the doorway on the side and jump to the chain.
Slide down the chain.
Wait for the warrior, on the other side of the doorway
to walk beneath the chain then speed kill him from the
chain. Sand
dogs will enter the room and attack you. Drop from the
chain and fight them off then go through the doorway.
As you exit the doorway there is a plate on the left
wall. Stab the plate to lower the covering of the windows
on the wall to the side. Wall run on the right wall
and grapple the torch. You will hit a curtain while
running. When you near the bottom of the curtain, jump
to the pole in the back and grapple to it. The pole
will carry you to an area with sand dogs and female
sand creatures. Fight off the enemies then wall run
up to the plate in the back and stab it to lower the
covering of the windows on the next wall.
|
|
Wall run on the right wall up ahead and grapple to
the torch. Continue wall running and leap off the first
shutter to another shutter. Jump from the second shutter
to hit a third shutter.
Jump from the third shutter to a platform with a
warrior. Defeat the warrior then wall run on the wall
behind him. Jump off three shutters then grapple to
the pole after leaping from the third shutter to land
in an area with sand dogs and warriors. Wall run on
the next wall to reach the platform on the left. If
you land on the beam drop down - you will use that beam
in a moment. Wall run up to the plate and stab it to
open the coverings of the windows in the areas you just
came from. Get on top of the beam and jump to the first
window covering. Jump back to the platform where you
fought the sand dogs and warriors. Looking at the second
window covering above, wall run directly up the wall
to the left and jump to the covering at the peak of
the wall run. On top of the covering, wall run on the
left wall, jump off the wall, and grapple to the next
two poles across from it. On the platform you land to,
hang off the side up ahead and shimmy along the crevice
to the right. Use your whip to pull the white block
with the face out of the wall across from you.
Jump on top of the white block. Wall run on the
left wall to reach a ladder. Slide down the ladder and
pull the white block with the face out of the wall.
The white block will be across from you at the bottom
of the ladder. Jump on top of the block and wall run
on the right wall (while facing the railing) and jump
to the floor across from the wall to land in a pool
of water.
Jump to the ledge to the right of the drain and grab
onto the top of the railing above. Pull yourself up
to the walkway above. Hang off the railing ahead on
the left side and jump to the two poles across from
you. From the second pole jump to the beam up ahead
then walk to the edge. Jump to the chain in front of
the beam and slide all the way down it. Hang on to the end of the chain and wait
for the sand gate guard in the back to face away from
you. The moment he faces away activate a speed kill
on the warrior below the chain (he should be below you
by then). Immediately head to the wall in the middle
of the area and wall run directly to the top and pull
yourself up. If you are not all the way at the top when
the sand gate guard turns, he will see you. Walk toward
the wooden wall and jump onto the beam across from you.
Surprisingly, the guard behind the wooden wall will
not be able to see you on either of the beams to the
side. Jump to the next beam across from you and then
jump to the chain. Slide all the way
| |
 |
down the chain. When the sand gate guard turns his
side to you, activate the speed kill for the warrior
below the chain. Wall run back up the middle wall in
the area and jump back to the first beam on the wooden
wall. From this beam, you can easily activate the speed
kill for the sand gate guard. After killing him you
still cannot claim your prize from the sand gate because
the guard behind the wooden wall is actually another
sand gate guard. Wall run up the wall behind the wooden
wall and grab onto the side of the floor. Wait for the
second sand gate guard to turn his back then pull yourself
up and speed kill him. Break the chest to the side for 10 extra
sand credits.
Go back down and claim your reward of 200 sand
credits from the sand gate.
Walk through the doorway below the first chain. Walk
down the halls until you
reach some crushers. The best way to do this part is
to actually run across
the top of the crushers as they go back into the wall.
Use Eye of the Storm to
slow down time and make this part a bit easier. Stand
on the far left and wait
for the first set of two crushers to dash out of the
wall then get on top of
the first one and run to the second. Do a roll to the
next set as it dashes
out of the wall. Then move to the single crusher ahead.
Keep moving along the
crushers (rolling and jumping) but do not get too close
to the wall or the saw
blades will hit you. Use Recall to help you out if you
mess up at the
beginning. If you have the sand gate guard sword then
that will help out a
bunch. Run to the left and go through the doorway for
a save fountain.
SAVE FOUNTAIN
Wall run and stab the tall plate to the side to open
the door up ahead and start a cutscene. After the cutscene
run to the statue in the back.
Climb the bottom of the staff that the statue is
holding. Turn your back away from the statue and jump
to the wooden platform on the side. When you land, wall
run up the wall directly in front of you and leap to
the pole across from the wall at the peak of the wall
run. Move along the pole and move across to the wooden
platform on the side then pull yourself up to it. Jump
and hang onto the crevice on the wall in the back. Shimmy
to the left on the crevice until you go all the way
around the other side. Jump to the crevice on the wall
across from you and shimmy to the left again until you
reach a wooden platform. Run toward the lever on the
side up ahead.
This lever will help you to solve the puzzle in this
room. The objective for
this puzzle is to ram the statue into the side of the
building at the end using
the rolling platform in the middle of the floor. The
lever you are currently
at will switch the statue between moving either clockwise
or counterclockwise.
The tall plate to the side will move the lever in the
actual direction. Look
above the tall plate to see what the statue is currently
set to. It should be
set to clockwise for the moment. If you move the lever
the picture will
revolve and the symbol for counterclockwise will appear.
The lever across from
you will move the statue forward and backward. To reach
that lever, climb up
the ladder and move across the platform to the other
side. The same directions
apply to the lever on the other side only it will move
the statue forward and
backward. The lever is currently set to forward.
Below is the correct sequence you will have to move
the levers in:
1. Forward
2. Clockwise
3. Clockwise
4. Forward
5. Forward
6. Clockwise
7. Backward
8. Clockwise
9. Forward
10. Clockwise
11. Forward
12. Counterclockwise
13. Forward
You will only need to mess with the lever on the side
for the Backward and
Counterclockwise movements. Rotate the lever once before
you stab the plate
and move the lever once again after you stab the plate.
After you move the statue forward for the last time,
a cutscene will activate.

|
|
Sadly, if you had the sand gate guard sword from earlier
it will be taken away from you at the start of this
part.
Fight off the sand guards from your chariot and
zigzag down the walls of the path in front of you. When
you reach the ramp you will leap into a cave. When the
sand guard in the chariot comes up from the right side,
keep moving him further to the right and he should plow
into a wall further ahead. When the path splits you
can take either path. Right after the split you will
have to stay in the middle since there will be a pitfall
on both sides. Right after going over the middle portion
of the pitfall you will have to move to either the right
or left to avoid the rock in the middle area up ahead.
Right after you exit the cave do not move to the far
right because there will be some rubble off to the side
that will cause you to crash. Along the twisting streets
ahead you will come upon two ramps and fly to the path
on the other side. The first entrance will be on the
left and the second will be just about all the way to
the right. Make sure to line up with the entrance properly
before jumping. A cutscene will play eventually and
a sand guard on a chariot will appear to the right of
you. You will see the sand guard crash later from taking
the wrong path. Right after he crashes, you will be
forced to veer to the left when you see the waterfall
ahead or fall off into a hole. You will be forced to
dodge many barricades on the paths ahead. Be sure to
tap that primary attack button to force the sand guards
off your chariot. When the next sand guard on a chariot
appear to the left of you a cutscene will begin that
will end the chariot riding.
Boss - Sword and Axe Sand Demons
This battle seems near impossible if you don't know
how to approach it. The
sword demon cannot be damaged at any time during this
battle with an attack
from the Prince. The only boss that can be damaged is
the axe demon, but there
is a catch involved in how to damage him. When the battle
starts rush over to
the sword demon and hit him three times. After a few
blocked hits on the sword
demon, the camera will switch to a frontal view of the
Prince and will show the
axe demon in the background right before he strikes.
During this moment dodge
to the side and the axe demon will get his axe stuck
in the ground. This is
your moment to strike the axe demon. The sword demon
will try to attack you
this entire time so it is best to move to one side of
the axe demon and attack
him while the sword demon is on the opposite side. Use
the jump button to hop
over the axe demon if the sword demon gets next to you.
The sword demon will
usually start an attack after you hit the axe demon
the first time. The axe
demon will eventually recover so you will have to hit
the sword demon once
again to make the axe demon take a swing at you. Try
to split them apart -
don't hit the sword demon when they are both together.
If you back off they
will eventually split apart again like they were at
the start of this battle.
The sword demon will usually try to jump toward you
and strike you with his
sword. Block that hit and attack him. After you have
taken 50% of the axe
demon's life bar a distortion for a speed kill will
start. The moment that
distortion starts be sure to take the speed kill!
Speed Kill 1: The Prince will jump on top of the axe
demon's axe andhim
in the back of the head then leap to the sword demon.
When the Prince hits the ground he will the sword demon in the chest right before
the sword demon strikes.
Do the same thing for the rest of the battle and eventually
another distortion
for the final speed kill will activate.
Speed Kill 2: The Prince will dodge both the sword
and axe demon's strike then jump to the axe demon and
him in the head knocking
him down. The Prince will then jump to the sword demon,
get behind him, and
him in the back of the head and throw him toward him
toward his friend. Burn!
Please note that the button taps for the second speed
kill stab animations have
to be pressed very quickly (the instant) during the
slow down or the demons
will throw you off. If you lose a bunch, don't get frustrated
because this
battle is quite hard and takes practice. After the final
stab of the second
speed kill a cutscene will start.
After all the cutscenes you will be in control of Dark
Prince and will have to face a whole armada of warriors
and female sand creatures. After the first wave of enemies
another wave of warriors will attack. Go through the
door after fighting the warriors and break the baskets
in the shrubbery to the left, below the railing in front
of you.
Wall run up the left side of the wall to reach the
railing overhead. Shimmy over to the right side of the
railing to pull yourself up to the floor above. Step
through the curtain and step into the pool of the room
ahead.
Wall run up the wall with the engraving in front of
the pool to catch onto the
railing up above. Pull yourself to the floor above to
find a save fountain.
SAVE FOUNTAIN
|