WALKTHROUGH - Chapter
9: A Turning Point
Alright, for this area you will have to stay on the
move the entire time! You cannot afford to listen to
the Prince's arguments while standing still or you will
die from lack of sand. To start things out, walk to
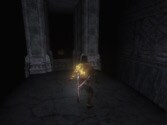
the open area up ahead. Wall run on the right wall and
grapple to the torch to make it to the small section
of floor ahead. Wall run on the right wall on that section
of floor and grapple to the torch overhead to land on
a beam. Walk to the edge of the beam and rotate the
camera toward the pole in the distance. Jump toward
the pole and grapple onto it to swing to the chain across
from it.  Slide all the way down the chain and drop to the
beam below it. You will have to quickly walk toward
the center of the beam before the front portion falls.
Jump to the platform off to the side. Wall run on the
left wall and grapple to the torch and it will carry
you to another platform. Quickly go inside the room
and collect some sand from the pots.
Slide all the way down the chain and drop to the
beam below it. You will have to quickly walk toward
the center of the beam before the front portion falls.
Jump to the platform off to the side. Wall run on the
left wall and grapple to the torch and it will carry
you to another platform. Quickly go inside the room
and collect some sand from the pots.
Walk back through the doorway and jump to the beam
off to the left. The front portion of the beam will
fall off. Drop to the beam below then drop to the platform.
Wall run on the right wall and grapple to the next two
torches overhead to land on another platform. Wall run
on the right wall and grapple to the torch above to
land on the next platform in the distance. Wall run
on the right wall to reach the ledge ahead of you. Drop
down the ledge to the platform below and go through
the doorway to battle some sand creatures and a sand
wraith.
Walk back out through the doorway and wall run on
the right wall to the small platform below. There is
a gap to the left of the platform all the way against
the wall.
Drop to the gap and slide down then drop to the
room below to fight some more sand creatures. After
fighting them, run to the entrance and jump to the pole
in the back and grapple to the next two poles. You will
land on a platform. The front of the platform will start
to fall so move toward the wall after landing. Wall
run on the right wall and grapple along both torches
along the way. You will land on a beam. Drop down to
the beam below the current one then drop to the platform
below.
Wall run on the left wall and grapple all four torches
to make it to a cave- like entrance. Break the pots
off to the side because you will surely need the sand
by now. Jump and grapple to the pole up ahead to land
on the platform across from you. In the area up ahead,
sand creatures will attack you. It almost looks like
there is a hole between you and them, but there isn't.
Run to the next open spot in the wall and move down
the ledge on the side. When you make it to the bottom,
drop to the platform below. Wall run on the right wall
to reach the next platform.
Run down the stairs and wall run to the next platform.
Wall run to yet another platform then finally the big
platform below. Walk to the center to fight a few sand
wraiths.
Walk out onto the beam and jump to the gap after
the fight. Slide down the gap and drop to the floor
below.
|
|
Run into the entrance to the area ahead. Break the
pots along the way for some sand. Use Eye of the Storm
and slow down the saw blades on the wall so you can
wall run on the left wall and reach the ledge across
from you. When you jump to the ledge it will start to
shake and will fall in some sections. Hang along the
side of the ledge and move to the right along the crevice
in the wall. Before you drop to the next ledge move
to the left as much as you can! Drop to the ledge below
you and pull yourself up, then quickly move to the left
and jump to the crevice across from you before the current
ledge falls. Move to the right and wait for the right
moment (when the saw blade moves right) then drop to
the crevice below the saw blade. Move to the right along
the crevice to make it to the floor beside you. Pull
yourself up and use Eye of the Storm to get past the
saw blades up ahead.
You will have to roll through the saw blades diagonally
left because of the odd break in the saw blades. Break
the pots on the other side for some sand.
Jump toward the pole up ahead and use it to grapple
to the other side. The floor will start to fall on the
other side so you will need to quickly wall run up the
right wall and grab onto the crevice up above. Move
to the right and jump to the next crevice across from
you. Drop to the next crevice below you then drop down
to another crevice, and then one more. After you reach
the final crevice drop to the ledge below you and move
to the right. Run up to the saw blades and use Eye of
the Storm to slow down time so you can move through
them easily. There are some pots to the side if you
need sand. Wait for the spiked floors to rotate inward
and for the arrows to reload then wall run to the shutter
in the back.
If you miss, use Recall then go back and collect
some more sand and try again. The shutter will send
you flying toward a ledge on the right wall. Jump to
the next ledge above then jump to the crevice across
from that ledge. Move along the crevice and activate
Eye of the Storm for the saw blades below. Drop down
when it is safe then run to the back saw blade and wall
run directly up to the crevice above it when the saw
blade goes into the wall. Move to the right along the
crevice and use your whip to pull the white block with
the face out of the wall across from you.
Jump to the block then jump to the crevice to the
left of the block. Move to the right along the crevice
and drop to the area with the three saw blades blocking
the switch to the door in the back. Use Eye of the Storm
to slow down time and roll through the saw blades when
you see an open spot. Run over the switch and get through
that door fast! A cutscene will play once you reach
the middle of the dark room inside.
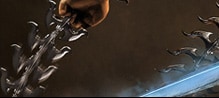
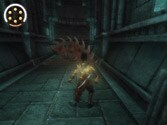
After the cutscene, sand creatures will attack you.
Use the secondary attack
button and laugh uncontrollably as you decimate them
with one single strike
each. For the remainder of the game, this sword will
be your secondary weapon.
This sword is capable of killing any normal enemy with
one hit. Find the
cracked wall in this area and hold down the secondary
attack button near it to
destroy the wall. There is a save fountain on the other
side of the broken
wall.
| |
 |
Walk into the dark room ahead and wall run on the left
wall to the area across from you when you reach the
split in the floor. A transparent sand creature will
attack you on the other side. Run to the end of this
section of the floor and jump across to the other side
when you see it in the distance. Two more transparent
sand creatures will attack on the other side. Off to
the left as you land, is a strip of floor with a chest
full of 10 sand credits - jump to get to it.
Go down the right side of where you landed on the
third strip and make another right. When you arrive
at what seems like nothing, wall run on the left wall
to reach the next strip of floor in the darkness ahead.
Jump across to the next strip further ahead and
fight the transparent sand creature. Keep running ahead
and you will find an area with two walls that are close
together. The camera angle will change to show them
to you. Wall run up either wall and wall jump to the
top.
Another transparent sand creature will attack at the
top. Make a left and jump to the next side. Turn right
and wall run on the left wall to the next strip. From
that strip, turn right and jump to the strip of floor
in the distance with two big columns in front. Jump
to yet another strip after that, and then jump to the
left to reach another strip. You should see a save fountain
in the distance, but don't even think about wall running
toward it. Turn to the left and jump to the strip beside
you. Jump to the small strip further ahead then turn
right and jump again to fight a transparent sand creature.
Turn left and walk to the back wall. Turn to the darkness
and wall run on the left wall to reach another strip
then jump to the strip with the save fountain.
SAVE FOUNTAIN
Press the switch on the ground and run through the
doorway up ahead. Walk down the hall until you run into
a big hole in the floor. Wall run up to the ledge on
the right and move to the left across it. Drop down
to the next ledge and move left some more. Jump to the
ledge across from you and move right then drop down
to the third ledge below you and move around the corner
to the floor above. Use the ledge above to pull yourself
up to the next floor. Run across the switch and go through
the door. Jump and swing on the pole ahead and jump
to the next pole. Move left on the second pole and jump
to the top pole across from you. Drop down two poles
and move to the right across the long bottom pole. Swing
to the pole above you then jump to the area ahead. Pull
yourself up and wall run up to the ledge directly in
front of you. Keep jumping until you run out of ledges,
then on the third ledge, jump to the pole across from
you.
Line yourself up with the two plates in the distance
then jump to the bottom plate and stab it. Jump to the
plate above and stab it then wall run to the left plate
and stab it as well. Jump to the pole across from you
then jump to the next plate and stab it. Wall run to
the plate on the left and stab. Jump to the pole across
from you and swing to the area above. Use your sword
(hold secondary attack button) to remove the rubble
covering the doorway.
Sand creatures will attack on the other side. Jump
across the hole to get to the save fountain in the back.
SAVE FOUNTAIN
|
|
Move around the side of the big column that the save
fountain is connected to in order to find a chest with
10 sand credits.
Facing the save fountain, turn to the right and
leap across to the opening blocked by rubble. Use your
sword to break through the rubble. Stay to the left
and wait for the spiked pillar to move toward the middle
then jump to the middle platform and quickly jump to
the next platform. On the other side, wall run up the
right wall and jump to the crevice above. Shimmy to
the right along the crevice and pull yourself up to
the floor above. Break through the rubble to the left
using your sword and humor the sand creatures behind
it with a battle. Wall run on the left wall to reach
a gap. Climb up the gap to grab onto the platform above.
Leap to the plate in the back and stab it. Drop to the
pole below and swing to the ledge across from you. Pull
yourself up to the ledge then jump to the next ledge.
Jump to the wall across from the second ledge and wall
jump to the top platform with the tall plate. Wall run
up to the tall plate and sink your dagger into it to
make some blocks move out of the wall to the left of
you. I would very much recommend using Eye of the Storm
to slow down the blocks before attempting any of the
following. Wall run on the right wall and jump to the
first moving block. Hop across to the next moving block
then jump to the platform with the sand creatures and
sand dogs.
It might be a good idea to kill a few sand creatures
with the dagger to help replenish your sands. Wall run
up to the tall plate on the wall and stab it with your
dagger. This will rotate some of the blocks on the big
column across from you. Walk out on the beam in front
of the column and jump to the ledge across from you.
Move to the left across the ledge and drop down to the
ledge below. Drop down one more ledge and move to the
left. Jump to the platform across from you and break
through the rubble in the back with your sword. Two
sand creatures will attack you on the other side. Wall
run up to the set of plates in the back and stab the
lowest plate. Jump to the next plate and stab it then
wall run to the left and stab the other plate. Leap
to the plate across from you and stab it, then wall
run to the next set of plates and stab the top one.
Drop to the plate below and stab it then hop across
to yet another plate and stab it. A sand dog will notice
you when you stab the final plate. Wall run to the left
and fight off the sand dogs and sand creatures. Break
through the rubble with your sword then walk through
the doorway and toward the right wall. Wall run directly
up the wall and jump to the platform across from the
wall. Climb up on the next platform then wall run on
the left wall all the way to the pole in the distance
(you'll barely make it). Jump to the next pole then
leap into the gap ahead.
Slide all the way down the gap and drop.
Sand creatures will jump down from the little waterfall
above and attack. Turn to where the stream is falling
off the side and you should see a plate in the back.
Jump and stab the plate then jump to the ledge above.
Move to the left along the ledge and jump and stab the
next plate. Jump to the plate above the first then jump
to the crevice and shimmy to the right to reach the
platform above. Walk out onto the beam and jump to the
column in front of the beam. Leap to the next column
beside the first column then jump to the area below
and fight off the sand creatures and sand dogs. Go into
the cave where the sand creatures came from and destroy
the rubble on the right. Wall run on the right wall
all the way to the plate in the back and stab it. Wall
run to the left and jump to the ledge across from the
wall. You will have to jump a bit earlier than usual
to reach the ledge. Move to the right across the ledge
and
| |
 |
jump to the smaller ledge around the corner. Jump up
to the next small ledge then jump to the lower beam
across from you. Jump to the next beam above. Leap to
the gap with the waterfall that the beam is pointing
to. Climb all the way up the gap. Move to the area where
the sidewalls are close together. Run up either wall
and jump to the wall across from it then wall jump to
the top.
Rotating spike pillars will stand in your path
ahead. Use Eye of the Storm and wait for the middle
pillar to move upward then run and roll under the other
two. For the next trap, wait for the crusher to come
out of the wall then run past the first set of saw blades
and climb up on top of the crusher and leap across the
next set of saw blades. Walk up the stairs ahead and
wall run up to the set of gold plates and stab each
of them then wall run to the right to make it to the
next floor. Walk up the stairs to find a save fountain.
SAVE FOUNTAIN
Wall run up to the tall plate on the side to open the
path to the kitchen. Rush inside before the wall closes.
Sand wraiths and female sand creatures will attack you
inside. A wave of warriors will drop down from above
after the rest of the enemies are defeated. Use the
new sword to make quick work of them all. Go back to
where you entered the room and look to the back right.
You will see two plates on the wall to the left of the
closed door.
Wall run and stab the first plate then jump to the
next and stab it. Wall run to the left and jump to the
beam across from the wall. Walk across the beam and
jump and stab the plate to the right. Wall run on the
left wall to reach a pole. Swing to the second floor
from the pole. Walk out onto the beam on the left side
of the second floor and jump to the plate on the right
wall. Wall run to the left and jump to the beam across
from the wall. Walk directly ahead and jump to the plate
across from you and stab it. Wall run to the switch
on the left then fall down and quickly run through the
open door. No need to use Eye of the Storm. Walk up
both sets of stairs to reach a save fountain.
SAVE FOUNTAIN
Walk up the stairs and go through the doorway at the
top. Leap to the pole
then swing to the next pole. Swing to the three ledges
and climb them to get
up to the floor up above you. The second ledge will
extend and retreat back
into the wall constantly so you will need to climb and
jump from it quickly.
After pulling yourself up to the floor above, wall run
up to the next railing
off to the left. Run down the hall to run into yet another
save fountain.
SAVE FOUNTAIN
|
|
Through the doorway, turn left and climb the wooden
platform.
Wall run on the left wall to reach a pole up ahead.
Swing from the pole to the next wooden walkway ahead.
A transparent sand creature will attack you as you pull
yourself up on the platform. Fight him off and wall
run directly up to the ledge overhead on the left wall.
Jump to the second ledge then move right and grab onto
the third ledge. Pull yourself up to the fourth ledge
and move to the wooden platform on the left. Wall run
on the right wall to reach the pole in the distance.
Move to the left on the pole and swing into the gap.
Slide down the gap and drop to the floor below. Walk
out onto the beam and jump to the pole on the right.
Stay on the far
right of the pole and let the warrior in the back walk
away from you. When he walks away, swing to the area
where he is then walk around the side of the wall and
sneak up behind him for a speed kill. Rotate the lever off to the side
to move the lift between the boards up. Walk to the
boards of the lift shaft that are facing outward and
you should see a ledge on top. Wall run directly up
to the ledge and pull yourself up. The camera should
show you a beam in the back of you. Jump to the beam
and jump to the next beam that the current one points
to. Walk to the platform and defeat the two transparent
sand creatures. Walk out onto the next beam then jump
to the beam on the left. Jump to the next beam across
from you and walk to the lever. Fight off the transparent
sand creature and rotate the lever. This will make the
lift go up to the other side across from you.
Jump to the beam with the birds on it then jump to
the next beam on the side over the top of the lever.
Walk midways down the middle part of the beam and
leap to the other side next to entrance to the lift.
Drop down to the other side and pull the block out of
the lift and position it below the plate on the wall
beside the lift. Climb on top of the block then wall
run up to the plate and stab it. Wall run to the right
and stab the next plate. There is a hanging column in
the distance that you need to jump to. Wall run to the
right and jump to the column when you line up with it
(it will be near the end of the wall run). Jump to the
plate on the wall across from the column and stab it.
Wall run to the right and stab the next plate. Wall
run to the right and grab onto the pole then swing to
the next pole. On the second pole, turn around and swing
to the pole overhead then swing to the wooden walkway
above. Run all the way down the walkway and jump to
the pole at the end. Turn around on the pole and swing
to the wooden walkway above the one you were just on.
Pull yourself up and run down the walkway and go inside
the entrance to the left at the end.
Collect some sand from the pots inside if you need
some.
Time your run carefully and try to wall run on the
left wall when the saw blade moves downward and the
spiked rotator is about to go into the wall. Hop off
the shutter in the back and leap off the next shutter
to be sent to the next area. For the next trap, stand
a little ways back from the danger zone and then time
a wall run on the left wall to when the spiked rotator
on the left swings its spiked edge outward - this precise
timing should get you through without a scratch. For
the final trap, wait for the spiked rotators on the
floor to move inward then roll through the middle of
both of them. You cannot stand in the middle area without
getting hit so Eye of the Storm would be a good idea
for this part. Jump to the plate on the right wall and
stab it. Wall run to the left and jump off the next
two shutters then stab the plate the second shutter
will send you to. Jump to the next two plates above
then wall run on the left wall to reach a save fountain.
SAVE FOUNTAIN
Wall run up to the tall plate across from the closed
door and stab it to open the door. Female sand creatures
will attack on the other side. Wall run up to the set
of plates and stab the first. Jump to the second plate
and stab it then wall run to the right and get on the
small portion above the door you just came out of. Look
up on the wall to see some more plates. Wall run up
to them and stab the bottom one. Stab the next plate
overhead then wall run to the left and stab the plate
across from you. Wall run to the left and leap off the
shutter to be sent toward the hanging column in the
background. Leap all the way down to the wooden walkway
below you. Walk around the side and rotate the lever
- this will send the lift up one floor. There are some
beams that are hanging on the left
| |
 |
side that will help you get to the second floor of
the walkway. Jump up to the second floor with the help
of the beams. Walk to the back of the walkway, past
the lever, and pull the block out of the lift. Move
the block into the other lift on the opposite side.
Rotate the lever on the side after moving the block.
Hang off the railing of the walkway closest to the poles
on the side and leap up the poles.
It's mainly luck involved in speed kills on the
three warriors up above, but I will tell you that they
cannot see you until you get up on the third pole, but
swinging from the third pole to the third floor will
almost instantly get you noticed making this speed kill
more trouble than it's worth. Swing to the third floor
and fight off the warriors. Pull the crate out of the
lift it is currently on and move it into the lift on
the opposite side. This will weight the lift in the
distance downward. Transparent sand creatures will attack
you as you move the block.
After moving the block to the small lift, look to the
left to see a small
wooden platform on the wall. Wall run up to the ledge
next to it and walk over
to the wooden platform. Wall run on the left wall all
the way to the lift
across from the wall up ahead then jump across to it
when you line up with.
Hang off the side of the lift closest to the wooden
platform in the distance
then leap to the beam in front of it. Walk across the
beam to the platform and
walk to the two close walls in the back. Run up either
wall and wall jump to
the ledge above. Walk out onto the center ledge and
jump to the beam across
from you. Walk to the end of the beam and jump to the
platform across from the
beam. You'll scare off some birds. Wall run up the wall
to the right and stab
the plate up above. Wall run over to the pole on the
left then swing to the
next pole and then the wooden platform. Use the landscape
view camera to see
an area below you. This will lead you to the final life
upgrade.
Leap to the stone platform and continue to hang off.
Drop to the beam below
then drop to the next beam. On the second beam jump
to the wooden beam leading
to the hole in the wall. Walk to the back of the room
and fall down to the
floor below then fall down another floor. Run to the
back and climb the stone
block then wall run up to the small ledge on the wall
in front of you. Jump to
the ledge across from you and pull yourself up along
the next few ledges above.
Jump to the floor across from you on the top ledge and
drink from the fountain.
Stand on the right and wait until the rotating floor
spikes are about to move
inward then roll under the rotating blades and run over
the rotator (which
should be turned by now). You can stand on the area
after the rotator without
getting hit. Wait until the saw blade is fully out and
the back wall rotators
are about to go inward then wall run on the left wall
and jump to the platform
wall across from the wall then wall jump up the rotators
to land on the
platform. For the next trap, wait until the first saw
blade is halfway out
(going inward) then wall run on the left wall and jump
to the beam across from
the wall all the way at the end. The beam is pretty
difficult to make it to.
You must time your jump and jump over to it at the extreme
end of the wall run.
You have to jump much later then you think you do. Jump
to the set of beams
and drop down to the bottom beam, then jump to the next
trap. For this one,
stand on the right and wait for the first rotator to
go into the floor then
wall run on the right wall to pass over all the traps.
Head to the light to
claim the life upgrade. Return back to where you were
before. Go up the
wooden beams and jump to the wooden platform to make
it back to the stone
platform.
Jump to the stone platform across from you. Break the
baskets for some sands
if you just went through the life upgrade trial. Go
through the doorway. You
will definitely need Eye of the Storm here to make it
past the first two wall
rotators. Wait for the rotators to move inward then
wall run to the back
shutter and leap then stab onto the plate you are thrown
to. Jump to the next
plate and stab it. Wait until the saw blade is about
to move downward then
wall run to the shutter. You will have to leap off another
shutter then stab a
plate. For the next two saw blades wait until the first
saw blade is about to
move downward then wall run above them. Break the pots
to the side for some
sands. Use Eye of the Storm to navigate through the
three saw blades in the
distance. If you don't want to use Eye of the Storm,
wait until the first saw
blade is about to move downward then wall run on the
right wall and leap off
the shutter. You will have to leap off two more shutters
after the first and
stab your dagger into a plate after the third shutter.
Leap to the area across
from you. Wait until the spiked floor rotator is about
turn, then roll under
the blade rotator and cross over the spiked rotator
then jump to the bottom
plate on the center wall ahead. Jump and stab the next
three plates and hang
onto the side of the platform up above.
Wait until the
warrior outside turns his back to you and walks to the
left then pull yourself up and get behind him for a
speed kill. The
other warrior will notice you, but at least we got one.
Fight off the warrior then move to the poles up ahead.
Wall run on the right wall to reach the first pole.
Swing to the second pole then swing to the ledge across
from you. Move to the left on the ledge and go through
the doorway. Wall run on the left wall to reach the
next platform. Jump to the side of the wall and pull
yourself up to the next side. Drop down to the wooden
platform to battle a female sand demon. Walk along the
walkway and jump to the middle platform. Move the block
into the lift on the middle platform. Hang off the side
closest to the green platform and leap to it. You will
scare off some birds when you hit it. Jump to the platform
with the three enemies. The female sand creature will
screw up any chance for a speed kill on this platform
so pull yourself up fight them without worrying about
speed kills. Jump to the pole across from the middle
platform and swing to it.
|
|
Push the lever at the top of the middle platform to
move the lift below you to the third floor.
Move along the beam to the side and jump to the
wooden platform across from it. Wall run up to the railing
and pull yourself up. Fight off the sand demons then
run to the left and go across the wooden planks. There
are some warriors up above you on the third floor of
the middle platform, but they will surely notice you
when you get on the beam up above. Jump to the beam
and walk toward the middle platform the warriors are
on and jump across. Pull yourself up and defeat them.
Move the block inside the lift to the other lift.
This will bring up the second lift across from you.
Hang off the railing of the lift right next to you so
that you have your back to the second lift that just
rose up. Jump to the second lift. On the second lift
hang off the right side as you pull yourself up and
wait for the female sand creatures across from you to
step away from the middle portion without any railing
that you need to jump to. If they are next to the middle
portion they can easily knock you down. This part is
pretty cheap since they are constantly swinging. Try
to move to one side of the lift so they will walk away
from the center then quickly hop across.
Look to the right side and you will see a beam. Jump
to the beam then jump to the ledge in the back of the
beam (below a window). Jump and grab onto the crevice
above the ledge and move to the left. A column will
eventually come into view. Jump to the column across
from the ledge and climb all the way to the top. Turn
your back to the wooden platform across from you and
jump to it. Wall run up to the plate above the platform
and stab it. Wall run to the left and jump off the shutter.
Stab the plate while flying from the shutter then wall
run to the left and stab the next plate. Drop down and
stab the next plate and drop to the ledge below. The
warriors inside the room will notice you very easily
so drop down and fight them off once you get off the
ledge. Go out the doorway to the left and wall run up
the wall next to the vases and stab the plate. Jump
and stab the next plate then wall run and stab the next
| |
 |
two plates. Drop down to the beam after stabbing the
final plate. Jump to the next beam across from you.
Walk along the beam and drop down to the wooden platform
below. You will scare a few birds. Walk out onto the
beam then drop to the beam below that one. Walk to the
end of the beam you just dropped to and jump to the
next beam connected to the next platform. Drop to the
next platform then jump across to the wooden platform
below some plates.
Wall run up to the plates and stab each one as you
jump up the wall. When you hit the third plate wall
run to the left and jump off the shutter to land on
a column. Face your back to the ledge across from the
column and jump to the ledge. Move to the right along
the ledge and pull yourself up to the floor above. Go
through the doorway to find a save fountain.
SAVE FOUNTAIN
Wall run on the right wall and stab the plate on the
wall ahead. Wall run to
the left from the plate to get to the ledge on the left.
Move to the left
across the ledge. Jump to the wall across from you and
wall jump up to the
ledge above you. Move to the left across the ledge and
jump to the set of
plates across from you and use them to work your way
up to the next floor.
Walk out onto the beam and jump to the first pole in
the back. Swing to the
next pole then move to the right of that pole. Leap
to the ledge above and
move to the left across the extending ledge when it
comes out of the wall.
Jump to the next extending ledge and quickly jump to
the ledge above it before
it goes back into the wall. Jump to the floor above
and go through the
doorway. Wall run up to the extending ledge when it
comes out of the wall and
jump across the pole. Swing to the next pole then jump
to the railing in the
back. Pull yourself up to the floor above then climb
the stairs. Go through
the doorway. Lo and behold, two save fountains on each
side of the stairs. I
think they should have moved one of those to the center
of The Middle Tower,
don't you?
SAVE FOUNTAIN
|