|
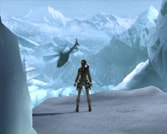
WALKTHROUGH - NEPAL
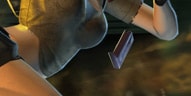
"The key to restoring Excalibur is also the relic
my mother prized most, innocently given to her by my father
in Ghana to replace the pendant she lost there. Once again
I am compelled to go into my own past"
| |
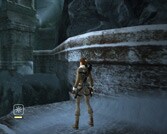 |
Jump to grab the ledge up above  and move to the left. As you move toward the middle, the ledge
will start to crumble so hurry to the left as fast as you
can. Pull yourself up then jump to the stone piece up ahead.
Slide down the ramp and jump as you near the end to grab on
to the side of the next stone piece. Jump to the ledge with
the two rocks up ahead then fall to the ledge below it and
shimmy to the left until you move around the side of the ledge.
Jump to the ledge directly across from you and move to the
right - the left piece will crumble and fall. Pull yourself
up then jump up to the next stone piece.
Run up the stone ramp to the left as it crumbles and quickly
jump to the pole. The pole will fall so you need to quickly
swing to the ledge below the stone piece across from the pole.
Jump up to the stone piece up above the ledge and pull yourself
up.
and move to the left. As you move toward the middle, the ledge
will start to crumble so hurry to the left as fast as you
can. Pull yourself up then jump to the stone piece up ahead.
Slide down the ramp and jump as you near the end to grab on
to the side of the next stone piece. Jump to the ledge with
the two rocks up ahead then fall to the ledge below it and
shimmy to the left until you move around the side of the ledge.
Jump to the ledge directly across from you and move to the
right - the left piece will crumble and fall. Pull yourself
up then jump up to the next stone piece.
Run up the stone ramp to the left as it crumbles and quickly
jump to the pole. The pole will fall so you need to quickly
swing to the ledge below the stone piece across from the pole.
Jump up to the stone piece up above the ledge and pull yourself
up.
-- CHECKPOINT --
Hang from the opposite side of the block and fall down to
the ledge below to find a on the side of the stone piece. Pull yourself
back up to the top. Look directly up toward the side where
the pole used to be to see a shiny bell up above you. Jump
and grapple to the bell then swing across to the large icicle
up ahead. As you jump and grab on to the icicle, it will start
to crumble and fall, so jump to the next two icicles quickly
and jump to the ledge across from them. Shimmy to the right
on the ledge then jump to the next ledge overhead.
Move to the right some more then jump and grab the side of
the area above. Don't pull yourself up just yet. Shimmy to
the right around the side of the mountain to find a around the side. Move back to the area
you were just at and pull yourself up. Look to the right and
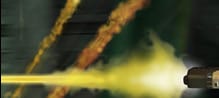
shoot the middle
of the icy wall to make it crumble. Walk through
the icy corridor to find an intriguing view on the other side.
-- CHECKPOINT --
|
|
Look directly down to see the plane that you need to get
to.
Turn to the right then jump and grab the stone piece and pull
yourself up. Slide down the ramp then jump to the next ramp
and slide some more. At the end of the second ramp, jump to
the stone piece across from it. Turn to the left side then
jump on the stone piece ahead.
This stone piece is very unstable, so jump quickly to the
pole in the distance. Swing from the pole and grapple the
shiny piece of metal on the plane up above. After landing
on the stone platform on the other side, take out your binoculars
and look slightly to the right of the pole you just jumped
from while in RAD mode to see a piece of the wall that you
can shoot at. Shoot at the wall to reveal a . Jump across to it and grab the side then
pull yourself up to snatch it. Jump back across and continue
down the side of the mountain. You'll see a helicopter fly
by
in the distance. Jump toward the plane wing to the right and
Lara will grab on to a metal bar on the wing. Fall down to
the next metal bar, then jump to the ledge across from you.
Fall down to the next ledge then fall down to the ground below.
-- CHECKPOINT --
Move around the side of the wing, next to the propeller to
find a . You'll
need to grapple the reward and pull on it to retrieve it.
Turn around and fall down the next two rock platforms to the
right to land near the front of the plane. A snow leopard
will pop out from the behind the side of the mountain and
attack as you fall. Shoot him
while jumping to the side.
These things are much more aggressive than the leopards on
the first stage. Look directly across from the platform you
just leaped off of to see another snow covered platform ahead.
Jump and grab the side then pull yourself up. Grapple the
plane debris ahead and pull it into the gap in front of you.
Jump to the other side to find a . Go back to the front of the plane and
grapple the shiny engine piece to the side and pull it toward
the inside of the front of the plane. Don't move to far back
or the front of the plane will fall off the ledge without
the engine piece to balance the weight. Pull the engine piece
into the back part of the plane
then you will be free to move to the front when the checkpoint
icon appears. Move to the front for a cutscene.
As Lara moves toward the front she sees the pendant then
the plane piece starts to topple, but she quickly [ACTION]
grabs the pendant as the plane starts to lean forward then
she [LEFT ANALOG UP] turns around and runs toward the back
of the plane and [CROUCH] ducks and rolls under a chair that
comes flying toward her then dashes to the end of the plane.
She [JUMP] jumps just as the plane leaves the side of the
mountain and starts to plunge toward the ground below.
-- CHECKPOINT --
This next part is a total rush of danger and split second
decisions, so get ready for a wild ride. Jump to the snow-covered
ramp in front of you
to start things off. As Lara slides down the ramp, jump to
grab the pole then quickly swing to the next ramp as the pole
starts to break. Slide down the ramp and jump to the next
ramp across from the current one. Slide down the second ramp,
then jump to a third ramp. As you land on the third ramp use
the action button to shoot the ice wall in front of you and
then jump to a forth ramp. While sliding down the fourth ramp
jump near the end to land on a pole that will start to fall,
so quickly swing to the platform up ahead.
Turn directly around from where you land and look through
the doorway of the structure across from you to see . Grapple it and pull it toward you. Walk
into the cave ahead.
-- CHECKPOINT --
Jump and grab the large icy ledge ahead of you then jump
and grab the pole to the side. Swing from the pole and grab
the small ledge up ahead. Shimmy to the left
then jump to the next ledge on the left. Quickly shimmy to
the left on the second ledge as it starts to crumble then
fall or wait for the ledge to crumble while on the far left
end. Jump to the pole across from the ledge. Line yourself
up with the large icicle in the back and swing to it. Jump
to the next icicle from the current one and rotate the camera
to find a in
an alcove on the sidewall of the cave. You can't grab it just
yet. Jump to the rock platform to the side of the second icicle
and quickly jump to grab the ledge across from it before the
platform topples over. Move to the right along the ledge [508]
and pull yourself up on the right side. Now, about that reward
from earlier, stand next to the right wall and as you turn
around you will be able to barely see it in distance as you
work the camera. Grapple it and tug on it to retrieve it.
Move to the other side of the icy platform that you are on
and grab on to that side. Move to the left to start moving
along a crevice. Fall and grab the next crevice below on the
left side. Shimmy to the left some more then drop to the next
crevice and drop one more time to grab on to a small ledge.
Move to the left across the small ledge to find the . Go back the way you came by jumping back
up the crevices.
When you get back to the icy platform that you were on before,
jump and grab the small ledge on the left wall.
Shimmy to the right then jump and grab the top ledge on the
right. Fall down and grab the bottom ledge and the camera
will show a pole across from you. Jump to grab the pole across
from the ledge and climb upward. Jump to the ledge on the
right (Lara will move upward a bit while jumping) then jump
and grab the ledge on the right wall. Move quickly across
the ledge as it crumbles then jump to the floor of the tunnel
up above. Pull yourself up and walk into the tunnel. You'll
hear a helicopter off in the distance and see some dark silhouettes
ahead.
|
|
Dash into the next area and start shooting
the gas canisters around the area to take out most of the
mercenaries on your level. Be sure to keep moving since there
is a mercenary with a grenade launcher up above you. Try to
find the mercenary with the white shirt and shoot him to get
rid of the constant grenades.
Grab a shotgun from the mercenaries to help you out later.
After the battle stand on the circular ice platform that is
standing by itself and while facing the entrance you just
came from, use your binoculars while in RAD mode and look
at the right wall a little ways above you to see that it is
weak. Shoot the weak spot in the wall to reveal a . Jump and grab on to the side from the
current platform to retrieve it. Fall down from that area
and move to the left, past the icy water, to find a
around the side of the mountain wall. If you fall in the icy
water your health will slowly go down, so stay away from it.
Jump on top of the middle icy platform then to the closest
platform across from it. Jump to the next icy platform to
the right to find another near the edge. Turn toward the rock platform
up ahead then look up to see a shiny bell that you can grapple
from. Jump toward the rock platform then grapple to the pole
and swing over to the rock platform. Climb to the top of the
rock platform then jump and grab the overhead cable
and slide to the icy snow covered platform that it leads to.
Slide down the ramp into the cave below.
-- CHECKPOINT --
Look off to the left side as you walk into the cave to see
an opening with columns around it to find a
in the back. Walk deeper into the cave to find some icy water
along with three floating ice platforms. Jump to the first
platform then jump to the second. Zip will mention that you
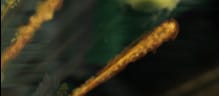
can't make it across, but we'll show him. Hold down the lock
on button then shoot
the top part of the cave
to send a piece of ice down toward the lake, which will make
another platform for Lara to jump to. Jump to the fourth and
then finally jump to the rock ledge ahead and pull yourself
up.
Fall to the other side. There is some more icy water ahead
and there are plenty of icy platforms this time, but all the
platforms will be moving to the right. You have to go to the
left.
Wait for a group of platforms to move your way then quickly
jump from platform to platform. If you fall in the water,
quickly grab on to a platform to avoid taking much damage.
Sometimes the platforms are spaced so far apart that you have
no choice but to jump into the water. On the left, near the
end, you can hop over to the side and retrieve a .
Jump to the side across from the reward and walk through the
entrance up ahead.
-- CHECKPOINT --
Walk up the stairs directly ahead to enter the temple.
As you walk past the stairs to your right, a snow leopard
will leap out from behind the railing and attack. Blast him
with a shotgun! Walk all the way to bottom of the right staircase
that the snow leopard was on. At the bottom, turn to your
right and turn most of the way around and look on the wall
to the side of the stairs. Take out your binoculars and enter
RAD mode then look at the cracked wall in the back
to see that it is weak. Shoot the cracked wall to reveal the
final .
Get back to the top by going back up the stairs. Stand in
the middle portion next to the broken railing and look up
to see three shiny bells suspended above you. Jump and grapple
then swing to each shiny bell to make it to the statue on
the other side. Try to land on top of the stone platform as
you fall since a snow leopard will be on the side with the
statue. If you land on the top, then shoot him from above
with your handguns. Use the shotgun if you have to face him
on the bottom.
|
|
If you go up the staircases on each side of the area you
will find a
and the final
on both sides. Stand on the scale closest to the two metal
blocks. Grapple the small block and pull it onto the scale
that you are on. Hop over to the other scale next to the gold
block and stand on the scale. Lara's weight will bring down
the scale. Grapple the gold block and pull it onto the empty
scale. Move back over to the other scale and stand on it.
Lara's weight will once again bring the scale down. Grapple
the big metal crate
and pull it onto the scale with the smaller metal crate and
step off. This will raise the scale with the gold block up
to the other side.
Grapple the gold metal block
and pull it over to the gold space to open the door below
once the gold block is exactly centered.
You can also grab the metal block and move it into place once
it is off the scale. Enter the door below.
-- CHECKPOINT --
Walk down the steps for a cutscene.
Now Lara can switch to Excalibur as her secondary weapon by
pressing D-pad down. Mercenaries beware! Move up either staircase
to the left or right and walk toward the cracked door
in the back.
-- CHECKPOINT --
Swing Excalibur to destroy the door then walk through it
for a cutscene.
After the cutscene, you will be in control of Lara while
standing on the crumbling floor around her. Jump to the stone
piece to the left then jump and grab on to the next stone
piece across from you. Jump to the stone piece on the right
and stand still as the stone piece moves downward and Lara
starts to slide then quickly jump to the next stone piece
and without even hesitating jump to the area ahead to start
a cutscene. If you hesitate, then you will die on the final
stone piece.
|