|
WALKTHROUGH - PERU
"Rutland implied a connection between the stone dais
and the ruin near Paraiso. I hope Anaya will meet me there
despite it all. We may not find anything besides a dozen corpses,
Amanda's among them, but I have to know for sure."
| |
 |
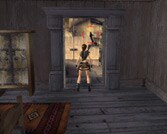
The training dummy in the back  will allow you to practice some of your combat moves,
and I would suggest that you take out some time to learn them
since this stage is much more combat heavy than the last stage.
From where you start, head off to the right and look for the
small extension that sticks out of the house. Climb on top
of the extension piece then climb up on the roof of the house.
Walk over to the end closest to the telephone pole. Look up
to notice the shiny overhead light pole. These are just like
the shiny discs that you could swing on from the last stage.
Jump then swing from the light over to the roofs of either
of the houses on the other side. Fall down in the area behind
them to find a
on the other side next to the smaller house. Push the crate
over to the fence and jump over the fence to get out. Walk
through the doorway up ahead.
will allow you to practice some of your combat moves,
and I would suggest that you take out some time to learn them
since this stage is much more combat heavy than the last stage.
From where you start, head off to the right and look for the
small extension that sticks out of the house. Climb on top
of the extension piece then climb up on the roof of the house.
Walk over to the end closest to the telephone pole. Look up
to notice the shiny overhead light pole. These are just like
the shiny discs that you could swing on from the last stage.
Jump then swing from the light over to the roofs of either
of the houses on the other side. Fall down in the area behind
them to find a
on the other side next to the smaller house. Push the crate
over to the fence and jump over the fence to get out. Walk
through the doorway up ahead.
-- CHECKPOINT --
Mercenaries will storm the area after the cutscene.
There are many shootable targets in this area that will help
you with this fight. Start off by shooting the gas tank of
the truck immediately to kill at least one mercenary before
he moves away from it. Move to the other side and shoot the
wagon to make it fall over and reveal an explosive barrel
inside. Shoot the explosive barrel then shoot the remaining
mercenaries. Some more mercenaries will storm through the
doors of a building. Try to pick up an assault rifle and use
it to fight off the rest. There is a gas tank near some crates
that you can shoot to help you kill the mercenary that hides
behind them. Soon a mercenary in a white shirt will shoot
through the door on the top floor and try to shoot you with
a shotgun. Shoot him from the floor below with an assault
rifle.
After the fight, look around the area and gather some ammo
and health packs from the bodies. Look for the stand to the
right of the truck. Climb on top of the stand then jump to
the roof of the building next to it. Swing along the poles
up ahead to find a
on top of the building across from you. Swing down the cable
to get back down. After swinging down the cable, walk around
the side of the building to your left to find a in the back. Climb the flagpole in front
of the building where you just found the bronze reward and
jump to the top of the building. Kick open the doors (action
button) at the top of the building to enter a room with a
. Use your grapple
to swing on the shiny light pole over to the next building.
-- CHECKPOINT --
|
|
In the room ahead a mercenary with a shotgun will be inside.
Shoot the mercenary and gather the grenades on the table.
Use the Grenade/Flare button to throw grenades. Lara can hold
a maximum of four grenades at a time. This next part will
be much harder since the mercenaries will have more powerful
guns. Kick open the door
and fire your assault rifle at the closest mercenary.
Whatever you do for this part, make sure to stay on the roofs.
Run over and jump on the pole then hold to the right and jump
then grapple to the shiny light pole to swing across to the
roof on the other side. Throw grenades at the mercenaries
below if you trouble shooting them. There are plenty of explosive
canisters lying around and I would suggest taking advantage
of them. Walk into the building ahead and prepare for another
onslaught of mercenaries as you exit. Shoot the one mercenary
outside. A truck will drive up in the background with a chain
gun attached to the back and a mercenary will start to fire
at you. Shoot the transformer on the back light pole as it
falls to kill him. Facing the truck below you, jump and grapple
to the light pole to Lara's left to reach the roof of the
building across from you. Take out the remaining mercenaries
behind the crates from that rooftop.
Jump off the roof and walk back toward the stand in this
area. Go down the alley to the right of the stand to find
a off to the
right. If you try to backtrack too much or use the chain gun
on the back of the truck then a few more mercenaries will
appear from behind the buildings. Don't walk up to the motorcycle
in the distance until you are completely ready to go on to
the next area. A cutscene will activate once you approach
the motorcycle.
-- CHECKPOINT --
Now Lara needs to save Anaya from the mercenaries that are
trying to catch up with her. The controls will be displayed
for a few brief seconds
before this chase sequence starts. All you basically have
to do is hold down the accelerate button the whole time and
fire at the enemies
when they appear and you will be fine. Use the Lock-on button
to switch targets
while shooting. If you stop too much then you will fail this
part. Try to hit each ramp that you come to if you notice
an obstacle up ahead. Watch out for rocks up ahead since they
will nearly kill you instantly if you hit one while speeding.
Shoot the explosive canisters with the Y button to remove
some obstacles or enemies. You will catch up with many mercenaries
on motorcycles soon. Hold down the fire button whenever you
run across a group, and keep your eye on the road. Be sure
to glance up at your health bar every now and then and use
a health pack when you get low. Health packs will be spread
throughout this area. Run over a health pack to collect it.
-- CHECKPOINT --
When you make it to the bridge,
dodge the holes next to the flames and make sure to move up
the ramps to jump
to the next area. Two health pack pickups will be lying in
your path directly after the bridge. Run in between them to
grab them both. Soon you will catch up to plenty of mercenaries
once again. Shoot at them while keeping your eyes on the road.
-- CHECKPOINT --
Veer off to the right to grab the health pack in the tunnel.
Eventually some trucks will appear in the distance. Stay to
the left side since the first truck will open its back end
and unleash its cargo at you. Accelerate past the first truck
to approach two more trucks. The left truck will unleash some
more cargo. Try to shoot the cargo with your handguns or decelerate
and stay to the right then shoot at the two mercenaries in
the back of the left truck. The last mercenary will fall against
the back gate and lower it some more to form a ramp. Accelerate
and go up the ramp of the left truck for a cutscene.
-- CHECKPOINT --
Walk up to the hole in the wall and dive or crouch up under
it using the crouch button. Press the Grenade/Flare button
to throw a flare
into the dark tunnel ahead. Don't worry, Lara has an infinite
supply of them. Jump and use the pole
to climb over the gap in the tunnel. Walk down the tunnel
until you see Amanda in the lit up tunnel ahead of you. Amanda
will be scared off by something in the distance as the cave
ceiling falls in the area in front of Lara separating her
from her friend. The debris cannot hit you. Turn around and
look to Lara's left to see a dark tunnel off to the side with
stalagmites and stalactites in front of it. Light a flare
and walk down the tunnel.
-- CHECKPOINT --
Crouch under the bars up ahead to find a dead body
in the next area. Step on the long pressure button ahead for
a slight scare as you spring a broken trap. One of the spears
that sticks out of the wall to the left is not broken and
will make a perfect pole-type object for Lara to swing on.
Move the crate
to the side over to the front of the spear then jump and grab
it to swing to the area above. Pull yourself up and look off
to the right to find a .
Look toward the stone engraving across from you and jump diagonally
toward the opening at the top of it. Shimmy across the ledge
then jump to Lara's left to reach the top area.
-- CHECKPOINT --
Walk through the broken wall and throw a flare below to discover
another body. One of Lara's companions, who she addresses
as Kent, is behind some bars up ahead.
Walk up to him to have Lara talk with him.
He will mention a hole above him. The spears are blocking
your way to the hole that he mentioned so grab the movable
ball to the side of the spears and roll it off the pressure
button. Climb up the platform to the side of the dead body
and jump to the dangling rope near the pressure button. Line
yourself up with the doorway on the second floor and swing
over to it. Walk through the doorway.
-- CHECKPOINT --
Drop to the area below for a cutscene,
but don't put the controller down just yet! When the blue
Lara icon shows up on the screen you will be back in control
of Lara. Quickly run into the cave ahead and jump over the
debris in front of Lara. Jump and grab the rope at the end
to end the chase. The rope will break but you will be fine.
You actually don't even have to grab the rope.
-- CHECKPOINT --
Use some flares to light the area up ahead. Climb the platform
to the left next to the ramp and roll the movable ball
down the ramp. The ball should roll and land on the pressure
button at the bottom. If it doesn't then fall back down and
roll it over to the pressure button. Jump on the platform
ahead to see Amanda behind the bars to the left of you. Amanda
will run to the side and a man will follow her right before
the beast from the other cutscenes catches up. Jump to the
spear up
ahead then swing to the rope. From the rope, swing to the
doorway
up ahead.
-- CHECKPOINT --
Turn to the right and grab the from the side of the barred doorway. Run
through the open doorway and down the tunnel up ahead. Hop
over the debris then jump and grab the pole
overlooking the spike trap and pull yourself across it to
get to the other side. Run into the area ahead for a cutscene.
-- CHECKPOINT --
Check behind the group of three crates
off to your left to find a
Run past the broken gas canister and look inside the wrecked
building up ahead to find another . Dive into the lake
(jump then quickly tap crouch) and swim toward the hole at
the bottom.
Dive directly down into the hole until you reach the bottom
then look for an opening on the wall and swim ahead. Surface
when you see the light to catch a quick breath. Dive back
down to the very bottom and swim through the broken bars.
Surface directly after going through the bars to get some
more air. Dive back down then continue through the opening
at the bottom. You'll come to another lit up area signaling
you to surface for air. Dive back down and continue swimming
straight ahead to enter a cavern.
-- CHECKPOINT --
Swim to the right upon entering and inside the first opening
to the right the final
will be waiting. You can also get this after solving the puzzle
in the room. Swim to the bottom and pull each of the blue
stones
out of the statue so that they light up. Take note that Lara's
oxygen gauge will not deplete while pulling on a stone. A
triggering sound will activate after you pull the first one,
letting you know that it will deactivate if the others are
not activated soon. You will have time to surface after pressing
the first two but go ahead and make your way toward the other
two while surfacing There is no need to rush madly and drown.
When all four of the blue stones have been activated all the
water will drain from the room. Jump through the broken space
in the door up ahead.
-- CHECKPOINT --
Approach the inscription on the wall for a cutscene. Walk
around the inscription stone and head up the steps. Turn to
Lara's left and jump to grab the ledge on the wall. Jump to
the ledge above the first then turn your back and jump to
the platform across from the ledge. Walk to the end of the
platform and look up to see a shiny stone that you can grapple
to. Jump and grapple
then swing to area up above the ramp. Jump and use the crevice
near the falling water to pull yourself up to the opening
above. Look past the falling water to see another shiny stone
off to the right. Jump and swing once again to land on the
steps leading to the room ahead. A sudden vibration will strike
the area.
-- CHECKPOINT --
Approach the stone tiles for a quick time event.
As the tiles fall below Lara, she will look to the pillar
beside her [LEFT ANALOG UP] and climb up it, then as the pillar
falls she will [JUMP] jump toward the other side and land
on a loose tile that will fall beneath her. She will grab
on to the side with her right hand. While struggling to hang
on with one hand [ACTION] she will grab on to the side of
the floor with her other hand and pull herself up.
-- CHECKPOINT --
| |
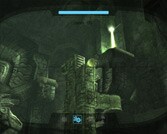 |
Walk into the big puzzle room ahead.
Notice that there are three pressure buttons on the ground
around the dog-like statue. To the left side of the statue
is a movable ball.
Look around the room with your binoculars in R.A.D. view
to find the others. One of them is on the structure to the
right of the statue all the way up high. The other is in the
back of the room where you climbed up just a few minutes ago.
Return to the back of the room and, while facing the statue's
backside, look up at the column to the left. Move in front
of it and look up at it to notice a shiny piece on the front.
Shoot your grappling hook at the shiny piece to latch on to
it, then pull the column down with the action button. Roll
each of the two movable balls over to the right and left pressure
buttons. Placing a ball on each one will make the structure
to the side of each ball fold open to reveal a statue head
that will shine down purple light
toward the opposite end of the room. The purple light will
not hurt Lara.
To get the final movable ball, climb one of the rock ladders
on the side of the right structure then jump from the ladder
over to the small ledge below the mouth of the statue head.
Move to the middle of the ledge, then jump and grab on to
the bottom of the statue's mouth.
Jump up one more time to grab the top of the statue's head.
From the statue's head, jump to either the right
or left rock ladder and climb to the top. Push the final
movable ball
off the top. To get off this section jump to the platform
on the middle structure
to the right then slide down the ramp. Walk to the end and
fall down one platform then climb down either ladder - walk
to the edge of the ladder and Lara will grab on. You can also
climb back down the ladder that you just came from, but make
sure to climb down the right ladder and swing back to the
statues head from the top of that ladder. Move the final movable
ball onto the last pressure button to fully solve the puzzle
and trigger a cutscene.
The middle statue will rise and the purple lights will reflect
off the statue's eyes and hit the statue on the front structure
then open up the entrance to the tomb ahead. Climb to the
top of either ladder in front of the statue to start another
cutscene.
-- CHECKPOINT --
The cutscene will end by showing you two small ledges off
to Lara's right side. Use the two ledges to climb
to the top of the right structure then jump and grab the ladder
up ahead. Climb up the ladder
then move to the other side. Jump to the top of the pillar
then jump and grab the ledge on the wall in the back of the
pillar. Shimmy and jump all the way over to the next pillar
that the ledge will lead you to. Fall down three ledges
to reach the pillar above the wide pit in the floor. Turn
around to notice a vine
in the middle of the pillars. Jump and grab the vine but do
not swing anywhere yet.
A message will flash across the screen and tell you that
you can use the action button to climb further up the vine.
This message is actually a hint to gaining the final reward.
Climb to the middle of the vine and turn to face the left
broken pillar. There is a small ledge up above the pillar
that you need to jump to. Swing to that ledge from the middle
of the vine. While on the ledge, jump and grab the crevice
above you. Move to the left along the crevice, then jump to
the left and grab the ledge across from you. Keep moving over
to the left until you come to an opening with some stairs.
Pull yourself up and run up the stairs. Run all the way up
the ramp inside and push the movable ball down the ramp. The
ball will hit the wall at the end and crash through it and
land on the floor below. Run down to the opening in the wall
and hang off the edge then drop to the column below. Jump
to the structure on the right and climb down it. At the bottom
roll the fourth movable ball over to the middle switch. The
middle statue will move up even further and the bottom will
slide away to reveal the .
Climb all the way back to the vine and swing to the column
to the right of the broken column. Some mercenaries will start
to talk below you. Jump to the next column
and they will most likely notice you. Target them and
throw a grenade down at them to get rid of both of them at
once then slide down the ramp hanging off the side of the
column.
-- CHECKPOINT --
Run into the area ahead and slide down the ramp then shoot
the mercenary. Run all the way back past the inscription stone.
-- CHECKPOINT --
When you reach the hole in the door a few mercenaries will
be talking in the room ahead. Throw a grenade into the room
then jump inside and finish off the remaining mercenaries.
Run to the rope in front of the waterfalls in the back of
the room and climb it. Line Lara up with the opening at the
top and swing to it.
-- CHECKPOINT --
Run all the way to the ladder at the end. Climb the ladder
then jump and grab the ledge on the left and hop up to the
area above. A mercenary will be waiting at the top. After
shooting him, jump up to the rope and climb it to the very
top. You'll start to hear some conversations as you get near
the top. Jump toward the broken building and get ready for
a big mercenary battle.
-- CHECKPOINT --
One of the mercenaries will eventually catch site of you.
Use your assault rifle and grenades to help you fight through
them all. Be sure to watch for their grenades since the grenades
are basically instant kills. Never stop moving once the battle
begins and watch your health closely! They will start to drop
from the hill above you as the battle goes on. Eventually
Lara will radio Zip and tell him to tell Anaya to get under
the jeep. A cutscene will play and a mercenary will start
to fire at the jeep. Shoot the mercenary firing at the jeep
for a cutscene
that will end the level.
|