CHAPTER 9 - WHEN ALIENS ATTACK
| Objectives: |
Talk to Jameson
at the Daily Bugle |
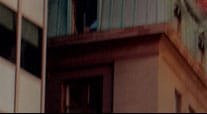
After the chapter starts, head toward the white destination
marker to find the Daily Bugle building, and enter through
the vent. Peter goes to the office automatically. After
the cutscene, return to the bathroom, change, and you’ll
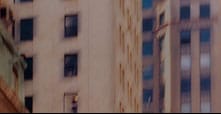
be on the roof. You now have 1:30 to get to the press
conference. Swing, Spidey, swing!
When you arrive, go inside, and climb the stairs (or
jump) to the balcony floor, and go inside the door.
 Once inside, you’ll see people being attacked
by robots,
, product of the strange Mysterio. After the cutscene,
you’ll have to rescue a reporter, and you get
one minute to do so. Charge your jump fully and hop
on over to the balcony, pick up the reporter, and swing
back onto the balcony where you started from, and put
him down.
Whatever you do, don’t fall on the floor, or you’ll
risk being killed, because it’s on fire. Once
the first reporter is safe, do it for the reporter on
the other balcony. You must use fully charged jumps
to get to the balconies safely. Once the two reports
are safe, you’ll have to rescue four more, but
you won’t be under any time limit. You’ll
also have to kill all the robots, but they are fairly
easy. After you save the three reporters from the balcony,
you’ll need to save the three on the stage.
Before saving these guys, go around and kill all the
robots, since you’re no longer under a time limit.
Once they are gone, concentrate on the three remaining
reporters, which is a bit harder. To do this, fully
charge your jump, and shoot a web so you can swing and
land onto one of the side balconies, then get to the
main balcony as normal. After the last reporter has
been rescued, Mysterio says he’s on his way to
attack the Statue of Liberty.
Once inside, you’ll see people being attacked
by robots,
, product of the strange Mysterio. After the cutscene,
you’ll have to rescue a reporter, and you get
one minute to do so. Charge your jump fully and hop
on over to the balcony, pick up the reporter, and swing
back onto the balcony where you started from, and put
him down.
Whatever you do, don’t fall on the floor, or you’ll
risk being killed, because it’s on fire. Once
the first reporter is safe, do it for the reporter on
the other balcony. You must use fully charged jumps
to get to the balconies safely. Once the two reports
are safe, you’ll have to rescue four more, but
you won’t be under any time limit. You’ll
also have to kill all the robots, but they are fairly
easy. After you save the three reporters from the balcony,
you’ll need to save the three on the stage.
Before saving these guys, go around and kill all the
robots, since you’re no longer under a time limit.
Once they are gone, concentrate on the three remaining
reporters, which is a bit harder. To do this, fully
charge your jump, and shoot a web so you can swing and
land onto one of the side balconies, then get to the
main balcony as normal. After the last reporter has
been rescued, Mysterio says he’s on his way to
attack the Statue of Liberty.
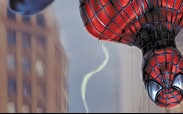
After the cutscene, you’ll be outside the building,
and a blue marker will be waiting for you. Swing toward
it and you’ll wind up at the Statue of Liberty.
To get to the statue, you need to swing along each of
Mysterio’s spinning robot things, until you get
to the actual island.
Once you get far enough that you see “Orbs Destroyed”
at the top, fall into the water, and Spidey will automatically
pull himself up onto the island. In order to destroy
all the orbs,
, you need to make your way to the top of the statue,
then grab one with your web and swing from orb to orb,
punching them until they’re destroyed, one by
one. In order to get up there, you need to shoot your
web onto one of the lower things, and let it carry you
up, then grab one of the orbs to continue your swinging.
Once the eight orbs are destroyed, you need to swing
onto the main platform, and attack the brain.
The brain is every easy to kill, but you need to avoid
the large blades. Once it’s destroyed, a cutscene
will take over, and Spider-Man will be back on land.
You also have a new blue marker, so head toward it.
Once on the building, you’ll need to crawl through
the open window into the apartment, then approach the
bookcase to find a secret elevator.
After the cutscene, you’ll have to fight a bouncy
thing. Hit it a few times, then back away so it’s
counter doesn’t nail you. After it falls, go through
the door into the horror house.
The first room flips upside down, and you have to fight
three more bouncy things. Kill them, then continue into
the small alcove on the upper level.
The next room is a room of mirrors, and you have distorted
Spider-Man’s fighting you. The best way to clear
this room is to go to a mirror so that you’re
being chased by three Spider-Man’s (three is the
maximum), then stay ahead of them. To clear this room,
you have to break all the mirrors, all of them. Once
all of them are destroyed, a special door will appear.
Go through it to learn the truth of Mysterio. After
the cutscene, exit through the door, and back through
the window to end the chapter.
|
|