WALKTHROUGH, CHECKPOINTS 17-24
Walk into the Feed Ward, and you’ll see a group
of men chatting.  Talk to Cuellas, the guy standing near the bench. Choose
“Agree to do what he asks”. Go into the
next door, also labeled Feed Ward. Head to the left,
and you’ll see an inmate looking inside a room,
where two guards are beating up someone, free from any
security cameras. Continue around, and you’ll
see a man standing in the middle of the hallway. Get
close to him, and he’ll attack you.
You killed his friend Harman (the Blueskin who you fought
in the ring). Feel free to fight him, because there
are no cameras here. Once he drops, pick up the Poison,
then continue into the ward.
Talk to Cuellas, the guy standing near the bench. Choose
“Agree to do what he asks”. Go into the
next door, also labeled Feed Ward. Head to the left,
and you’ll see an inmate looking inside a room,
where two guards are beating up someone, free from any
security cameras. Continue around, and you’ll
see a man standing in the middle of the hallway. Get
close to him, and he’ll attack you.
You killed his friend Harman (the Blueskin who you fought
in the ring). Feel free to fight him, because there
are no cameras here. Once he drops, pick up the Poison,
then continue into the ward.
 |
|
Head to the second picnic table on the left, where
there is an inmate named Sawtooth.
Get close to the food on the right, and press X to put
the poison into it. Continue into the next part, and
look to your right. At the first picnic table, you’ll
see two inmates eating.
Talk to the one on the left, Monster, and choose “Ask
him if he’s trading”. He’ll sell you
a few items. You should have a shiv, so you don’t
need to buy one. You don’t need the club, but
you should buy the vent tool (it’s only 15 UD).
On the right side of the area near Monster, where the
closed diner is, you’ll see “a loose panel”.
Press X to open it, and take the stuff inside, which
is an Injector, Red Tube, and some money. Leave the
way you came, but instead of going past the “no
surveillance” room again, hang a left, and talk
to Gomer.
He’ll sell you a pack of smokes. Leave the Feed
Ward, past the guy who gave you the snitch list side
mission, and back into the recreation area.
Run straight into Rec Area A, then take the door on
the left to B. There should be an inmate in here, sitting
on a bench on the far wall, named Pink. He’ll
sell you smokes. Buy ‘em if you want ‘em,
then go into Rec Area C. Talk to Gulag, who should be
wandering around, and you’ll give him the red
tube. As a reward, he’ll give you a pack of smokes.
While here, talk to The Nurse, who will give you another
cigarette pack for poisoning Bink. Continue into Rec
Area D, and talk to Twotongue, the guy who looks nervous.
Leave D, and go back to the main area. Take the door
on the right, next to the Feed Ward, which is marked
“Tower 17”.
When the area loads, hang a left, and head back to
the Centurion (the guy in the black hat). He’ll
start your fight. As soon as the fight stars, Baasim
will gun for you, so back away, and switch to the shiv
(yes, weapons are allowed). Block his attacks, and perform
the LEFT-RIGHT-LEFT-RIGHT-DOWN attack. If you can string
two and a half of these together, he’ll fall,
and you’ll win some money. After the battle, the
guards will drag off Baasim,
, and you’ll win some smokes, so talk to Centurion
again to find out about the next challenger, Sawtooth.
You remember him, right? Leave the rec area, take a
right, and go back into the Feed Ward. Return to the
picnic table where you poisoned Bink, and talk to the
tattooed guy, who is Sawtooth. Leave the Feed Ward.
Before heading to the ring, go back to Rec Area D and
talk with Twotongue. Since you killed Baasim and returned
his injector, he’ll give you a pack of smokes.
Now, grab one moth, just one, and talk to Twotongue
again. If you’re collecting, you can also buy
a pack, but it’ll cost ten moths, so you’ll
have to try to grab them. To get to the next part, we’re
going to get caught with drugs, but before that, return
to the Recreation Area and to the fighting ring to start
the fight with Sawtooth. Sawtooth uses a shiv, but he’s
still not that hard. Just block his attacks, and counter
with the combo above. After the fight, you’ll
get a pack of smokes. Talk to Centurion.
NOTE: There are two ways to proceed. You can compete
in two more fights, the second one being against Bam,
a guard. If you kill Bam, you’ll be taken into
custody, where the next portion of the game begins.
You’ll receive a cigarette pack for killing Bam.
If you don’t care about collecting smokes, and
don’t want to risk anything with Bam, then buy
the gram of smack from Twotongue. You’ll continue
the story at the next section, but you won’t be
able to collect the smokes you would’ve got for
killing Bam. Either way leads to the same destination,
but for the sake of this guide, we’re going to
get caught with drugs. If you want to finish off the
ring fights and collect the two smokes, read paragraph
18a. If you want to get caught with the drugs and avoid
any further loss of health, and don’t care about
unlocking anything, read paragraph 18b.
18a… After Centurion tells you to find Cusa,
leave the area, and return to the Rec Area. Go to D,
and speak with Cusa, the bald guy.
He accepts your challenge, so return to Centurion and
start the fight. As always, equip the shiv right away,
and slash him with the L-R-L-R-U combo. When he falls,
speak to Centurion, and he’ll start the final
fight against Bam, the prison guard. Bam is tough, and
will take a few shots to kill. Once he falls, you’ll
be dragged off, and you’ll have to fight Abbott.
18a… After the fight, don’t bother talking
to Centurion, because we don’t need him anymore.
Leave the area, and return to the Rec Area. Go to room
D, and speak with Twotongue. Choose the option “Buy
three grams of smack. 10 UDs.” You now have the
drugs. Run all the way back to Rec Area A. At the far
corner, under a huge sign that says “Stay Back”,
you’ll see two guards standing in front of a door.
Walk to the guards, and as you get close, a cutscene
will take over. The guards pat you down, and find the
drugs.
The game loads.
| |
 |
After the load, you’ll be in a room, and Abbott
will come in, looking pissed.
After the cutscene, you’ll have to fight him,
and this time, you’ll kill him for good. Equip
the shiv. Abbott will come charging at you from outside
the door. Stand still, and back up just as he swings
his club. As soon as he misses you, rush in, hit him
with an uppercut (DOWN), and back up. Repeat the process.
Don’t bother blocking; his attack goes right through,
and you don’t want to get hit, because each blow
takes off half a square, and sometimes he swings his
club twice in a row. Eventually, he’ll die. You
can also mix up the fight by getting around him (he’s
slower than you), and slashing him from where he can’t
defend himself. If you get hit, you can crouch and move
around to refill a square. Keep moving, and Abbott won’t
be able to keep up with you. After the battle, you’ll
learn that Abbott had more blood in him then every blood
bank combined. Pick up his security card,
, and leave through the door. Once in the hall, take
the left junction, and you’ll see one of the sit-down
health stations.
Use it, and you’ll now have six squares of health.
If you talk to Georgie through the rail, he’ll
distract the guards for fifty UD, but don’t waste
your money. Leave, go left, and use Abbott’s card
to unlock the door. Go through the door directly ahead
of you and back into the Recreation Area.
Go straight into the Rec Area, hang a left, and run
all the way to D. Talk to Flores, the inmate sitting
on the bench, and ask him for some info on the mines.
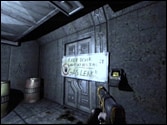
Just past Flores, to the left, is a door with the words
“Obey All Orders” plastered about it.
Go into this door, and walk forward to load the next
checkpoint.
 |
|
Walk forward through the door to enter the Work Pass.
Head to the left, and you will see a Riot Guard, as
well as an inmate coming out of a door.
Talk to the inmate, Shurik, and choose “Agree
to help him out”. Go to the control room, which
is all the way to the right of the area.
Use the keypad to unlock the door, crouch, and walk
inside. It’s dark in here, so turn on eyeshine.
If you’re caught, you’ll be attacked, and
you only have melee weapons. The lights in here will
come on and go out every so often, so do your sneaking
when the lights are off. When they come on, find a dark
place to hide, and wait for them to go off again. From
the door, head to the right, and follow the crates,
until you get to a small staircase. Go up them, and
head to the right, in between the two crates. You’ll
see a panel on the wall.
Open it, and you’ll get some money, as well as
a list of rats, which is part one of the snitch list.
Go back down the staircase, and head across to the other
side, up the stairs, where you’ll find a grate.
Open it, and crawl inside. At the end is some money.
Turn around, crawl out, and head to the right. At the
end, on the right side of the wall, is another grate.
Open it, and go through. Crawl to the end, and you’ll
find a ladder. Climb it up. At the top, continue crawling
until you emerge in a room with two holes in the floor.
Walk to the hole on the right, and it’ll start
moving; it’s an elevator!
When the elevator stops, look down. Both guards will
leave.
When the first guard gets out, drop down onto the back
of the second guard, killing him. Drag him backwards
into the elevator, so the door closes. Don’t pick
up the assault rifle, because your DNA isn’t programmed
down here. Exit the elevator. If you are quick enough,
crouch and sneak up behind the guard, and kill him.
If he’s halfway down by the time you get to him,
hide behind the large crates on the left, and kill him
as he walks by. Continue around to the right (ignoring
the door on the elevated level), and into the mines.
At the end of this small mineway, you’ll see
a guard standing hear the door. If he turns around and
starts walking, hide in a dark corner. Make sure you’re
hidden (screen will be tinted blue), because the lights
may illuminate you and you may not know it. With the
guard dead, walk into the door he was guarding, and
make your way to the Security Checkpoint door to load
the next area.
| |
 |
Open the door, and you’ll find yourself in a
security area. Sneak behind the guard, but don’t
kill him. Instead, head to the crates on the left, and
crouch in the darkened area.
Make your way around the crates, staying in the dark,
until you reach this wall.
Climb it. Look to your right, and you’ll see a
hangrail.
This part requires careful timing. All three guards,
the two men and the Riot Guard, must not be looking
at you, because crossing the hangrail will put you in
the light for a bit. If the guards suspected something
(example, you made some noise and they started investigating),
their patrol pattern will be different then it would
be if you made no noise. Just watch the guards, and
figure out what they’re patrol route is. Once
you’ve done that, jump onto the hangrail, and
take it to the other side. Drop down onto the crates,
and pull yourself up over the railing.
If you find this too difficult, you can do a run-n-gun
kind of thing. Run to where the Riot Guard is, and climb
the wall to his left. From here, jump onto the crate,
and then jump onto the next crate (this crate is what
you land on from the hangrail). Climb over the railing
to the upper level. It’s harder this way, because
you WILL be spotted. No matter which way you choose,
go through the large door,
. Head down the stairs, and as you reach the door at
the bottom, the area will load.
Crouch, and sneak along the catwalk. Across you, on
the opposite side, are guards who will see you and open
fire if you stand.
When you get to a window where you can see a crate below,
, jump through the window and land on the crate, then
quickly jump to the floor and crouch in the shadow.
At the far end, by some crates on the right, is a guard.
Wait for him to walk to you, and he’ll turn, heading
off to your right. When he does this, wait for him to
come back, and walk away, then sneak up and break his
neck. Walk to the end, where he first came from, and
wait for the second guard. When he turns around (or
walks by you), kill him, and drag him into the darkness,
then continue forward and enter the small door.
Climb the stairs to the top, and you’ll be on
an upper catwalk. Follow it, and enter the door on the
left.
Once in the new door, crouch, and walk down the left
junction. You’ll see a guard talking with a miner.
Sneak up behind the guard, and kill them, then talk
to the miner, Mosely. Turn around, go left, and crouch
through the door. Hide in the shadows on your right
until the guard, who comes in through a door, heads
to the balcony on the right. Sneak up and kill him,
then grab his card. If the guards across see you or
the corpse of the guard, don’t worry; they’ll
forget by the time you get back there. Leave the balcony,
turn right, and go through the door the guard came in
from. Crouch, and make your way to the next balcony.
Turn left, and look at the hole in the railing; it’s
a ladder.
Look below and make sure no guards are nearby, then
descend the ladder. When you see the guard call the
driller a “lazy idiot”, sneak up and club
him, shiv him or break his neck, then talk to the driller.
If he attacks you, reload from the checkpoint; this
is a bug, apparently. He’ll tell you he saw Shurik’s
glasses. Look at the keypad, and you’ll three
crates.
Climb onto the top of the second crate, and pick up
the glasses. Climb back up the ladder, and return back
to Mosely, the Blueskin. Use the security card on the
keypad to gain access. As you approach the door, the
game loads.
Open the door to the cargo area.
There is a NanoMED station here if you need it. Whether
you need it or not, jump down one of the chutes, and
you’ll see a miner and a dead guard.
. Talk to the miner, and he’ll offer to sell you
a Tranquilizer Gun for fifty UD, so go ahead and buy
it. You can find it for free later, but we’ll
be using it right away. Enter the only door in here,
and walk to the Mining Core door.
 |
|
When the game loads, enter the door, and run up the
stairs. There is a guard overlooking the lower floor.
Shoot him with the tranquilizer, and when he falls,
run up to him and press the LEFT TRIGGER to crush his
head with your foot. Go down the stairs, go left, and
go down the next set of stairs to the door at the bottom.
There is a Riot Guard in here, and a mechanic. Shoot
the Riot Guard to stun him, then shoot the mechanic
and crush his head. Approach the panel to the right
of the drilling machine,
, and use it to deactivate the rail defenses. Keep shooting
the Riot Guard to keep him stunned. With the guard stunned,
go down the hallway.
Follow it around as it bends to the left, stunning and
killing the two guards you encounter. When you get to
the room with all the crates,
, go behind the second crate on the right, and you will
find Jagger Valance.
Talk to him, and he’ll give you a code to a door.
Turn around, and crouch by the end of the crate. Stun
any guards you see, and quickly run up to them and crush
their head. Crouch up to the ramp,
, which leads to the next area. There may be a guard
here, standing in front of a crusher. If there is, switch
to your fists, sneak up behind him, and break his neck,
and Riddick will toss him into the grinder, sending
blood everywhere. Run to the walkway, and go through
the door that has a blue light around it.
| |
 |
Go down the stairs, and you will see two guards on
your left. Stun them both, then crush their heads. Approach
the door at the end, which leads to the gas filled room.
Use the keypad, and crouch underneath the sign to get
inside. You have to be quick in this room, or the gas
will kill Riddick. From the door, jump onto the crate
in front of you, crouch underneath the wall into the
next room, and look for the hole on the right side of
the wall.
Go inside, and you’ll be in a big expanse. At
the back of the room, near a dead corpse, is Jagger’s
package.
Pick it up, then leave the room the same way. Return
to Jagger, who is still behind the crate. Talk to him,
and he’ll tell you to get a bomb from Jupiter
in Tower 19. Leave this area, and return to the spot
where you disabled the rail defense. Directly across
from where you enter is an elevator; run inside and
press the red button to use it. When the elevator stops,
the game loads.
Leave the elevator, and go into the mine area. Climb
the ladder to the right, near the crates. Go through
the door at the top, through the next door, and you’ll
be back in the area with Mosely. This time, there are
two more people, and all of them will attack you. Stun
them, then crush their heads. When the three of them
are dead, get the second part of the snitch list from
one of the corpses, then go through the door opposite
the one you came in from (not the one Mosely used to
stand at). You’re back on the catwalk. Follow
it to the next door, and go through. Run down the stairs,
and you’ll be back in the lower mine area. Run
to the crates in front of you, and grab onto the green
one.
Pull yourself up through the window, and follow the
catwalk until you reach a door (don’t forget the
guards opposite you). Inside, run up the stairs, and
as you reach the door at the top, the game will load.
Go through the door, and you’ll be back on the
upper catwalk of the Security Checkpoint area. Use your
tranquilizer to stun the Riot Guard (don’t worry
about the human guards), then jump over the railing,
and make your way out the door, and back to the Mine
Entrance.
After the load, go through the door. Follow the rocky
walkway to the main area, and return to the elevator
(where you dropped in on the guard at the beginning
of this area). Use the keypad, and ride the elevator.
As the elevator ascends, the game loads.
Once the area has loaded, exit the elevator. You’ll
see beams of blue energy.
Hang a left, go up the small staircase, and climb the
crate. Holster your tranq guin (switch to fists), and
grab the wall.
Pull yourself up, and crouch walk along the wall to
the left. At the end, look up, and you’ll see
a hangrail. Jump up and grab it, and shimmy over to
the other side. Don’t fall into the room with
the Riot Guard, because there is no way out. Once Riddick
stops shimmying, press X to drop down, then jump to
the floor below. Don’t land on the inmate, or
it’s considered an attack. Talk to him, and give
him his glasses, then enter the Recreation Area.
Walk through the door in front of you, and you’ll
be back in Rec Area D. We’re going to finish up
a few side missions. Go to Rec Area C, and talk to Wilkins,
who should be sitting on the bench (if not, he’ll
be moving around). He’ll give you some money for
confirming Jagger is alive. Go to Rec Area B, and talk
to Jamal-Udeen, who should be standing near the painted
circle. He’ll give you a pack of smokes for killing
all the Blueskins (Mosely and his crew). Head to Rec
Area A, then leave. Go through the door into the Feed
Ward.
 |
|
In the Feed Ward, talk to Cuellas, and he’ll
give you your reward for bringing him the snitch list.
Leave the Feed Ward, and return to the Recreation Area.
Go through all the rec rooms, and head back through
the door to the Work Pass area. When the area loads,
turn right, and go back into the power room. Inside,
there should only be one guard (as opposed to two and
a technician). Head up the stairs to the right, so you’re
facing the NanoMED station, but instead of heading to
the grate you went to earlier, take a left, go down
the stairs, and use the keypad to unlock the door. Go
inside, enter the ventilation hatch, and climb the ladder
that’s immediately in front of you. At the top,
continue crawling, and you’ll soon see some text
painted in vent.
Continue on, and the game will load.
Keep crawling through the vent, and at the end, you
will see a vent hatch on the floor. Go through it. You
will land behind a metal fence.
Go to the right, follow the catwalk, and stun the guard
as soon as you see him. Crush his head, then return
to the door in the middle of the room.
Go inside, down the stairs, and head to the left. When
you emerge, there’ll be two guards; stun them,
then crush them. Turn around, and head to the opposite
doorway. On your right, you’ll see a service panel.
Use it to disable the lights, then turn on your eyeshine.
Turn around, and head back to where you killed the two
guards. Follow the path straight, and it’ll bend
to the left. When it does, you’ll have a choice
of which way to go.
Go to the right, and stun and kill the two guards. Continue
moving, and you’ll soon see a ventilation hatch
on your left.
Go inside it, and crawl through the vent. You’ll
soon see a sign saying Tower. When you see this, the
game loads, and you’re finally in Tower 19.
When Tower 19 loads, continue to the end of the vent,
and at the end, drop down. You’ll fall through
some grating, and land in a computer room. Turn around
immediately, stun the guard, then crush his head. Pick
up his security card, and use the computer.
Once you’ve opened the cell doors (by using the
computer), hang a left, and approach the junction.
The door on the left is locked, so use the keypad to
unlock the door on the right. In this room, walk forward
through the door, and as it opens, you can see several
cells opening. Jupiter is in the second one. Talk to
him.
After he gives you the bomb, a guard rushes in and kills
him. Hide in a cell, and wait for one of the platforms
over the abyss to start lowering.
When it does, jump onto it, and a cutscene will take
over, showing Riddick grabbing onto one of the platforms.
We’re on our way to the Container Router.
|