Once again, this level is a combination of stealth and assault. The best way of avoiding the enemies at the
start is by utilizing the Nano Suit, but you will need to be quick as the energy diminishes relatively quickly.
This is also the mission that has the most snipers in one part of the level, so you should execute techniques
like the Barrel Roll whenever you need to move across open areas.
Once the level begins, pick up the Dragunov Sniper Rifle at the corner to the right and immediately change to
the crouching position. Activate the Nano Suit and move around the entry into the large room ahead with the
two guards speaking to each other. You will need to be quick here, so merge to the right side of the room and
hide behind the crates to the right. Remaining crouched behind the crates, pull out the Rappel and do not do
anything until you can see that both of the talking guards have walked away in separate directions. It does
not matter if your Nano Suit has been deactivated from this point. When the enemies start to walk away, making
sure their backs are turned away from you, shoot the Rappel towards the Rappel point at the top of the room. Quickly stand up from the crates and move towards the wall. While you move up the wall, pull out the Silenced
Pistol and reach the top ledge. If you manage to get to the top without alerting the first two guards or the
sniper above, you will earn the first Bond Moment in the level.
Now that you at the top, turn left and kill the unaware sniper standing down the hallway. Follow the hallway
and enter the room ahead, killing a few enemies with Shotguns and turn right into the next room. In here, you
can drop down the hole to the right corner to the floor below, but a much more safer method to get below is going
down the stairs by moving through the opening at the left corner. Once you go around the stairs, kill the enemy
that runs out of the room to the left. Go inside that room and head towards the far right corner, through
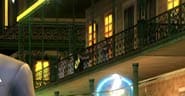
the next opening that leads into the second story of the Lobby Area. Move down the stairs slightly and use
the Bond Sense to target the support wire for the chandelier at the middle of the Lobby. Shoot the supporting
wire to make it fall down to the two enemies below, earning you the second Bond Moment. There maybe another one or
two enemies hiding behind the pillars, so remain on the stairs and shoot them from a distance when you have the
chance to. Once it is safe, move to the stairs going upwards ahead and drop down into the gap. You have to
disable two Electronic Door Locks to unlock the door at the second story of the Lobby Area. When you are inside
the first small room underneath the stairs, press the action button on the switch to disable the first lock.
When you have done that, use the wall hug technique near the wall that leads to the exit to kill any enemies
lurking around the area ahead. If you cannot manage to shoot any of them, move a little closer by moving up to
the crate. Shoot the enemies hiding behind the tables at the middle open area first before killing the ones
hiding behind the pillars. After killing four or five enemies, move across to the small room at the opposite
side of the stairs. Also make sure you stock up on ammunition from the enemies dead bodies to prepare for the next
part. When you make it inside, the second Electronic Lock is there, so go next to it an disable it by pressing
the action button. Once it is disabled, the Double Doors at the second story open, so this is the next
destination, but first, you must fight your way through the next bunch of enemies that have arrived at the
Lobby, including some trigger happy snipers along the balcony at the far end of the room. Quickly head out of the
room and shoot any enemies standing on the stairs at the middle, to the left. Right after that, use the wall hug
technique on the closest pillar to kill the snipers. The ground soldiers at this part tend to spend
some time hiding behind the other pillars, which buys you some time to kill the snipers. Once all the soldiers
around here have been killed, head back up the stairs and turn left at the second bunch of stairs, moving back
towards the second story of the area.
Once you reach the second story again, head left and follow the balcony all the way around to the opposite side
so you can reach the door you have just opened recently. When you are about halfway through the balcony, hide
behind the crate to the right so you can kill the two enemies hiding behind the door at the room ahead. Another
enemy also runs from the left, so kill him before moving towards the door at the other side. When you finally
reach the opened doors, head into the next room and move down the stairs. Kill the sniper standing at the Attic
above and you will need to make your way up here later on by using the Rappel. Kill another three or four enemies
and make your way to the ground level at the bottom of the stairs. Move ahead and turn right into the next room.
When you enter this room, kill the enemies inside and the doors ahead should start closing, so you cannot enter the
lair through the direct route. You will need to find an alternate path so you can get into Yayakov's Lair. Head to
the right side of the stairs, but do not go up them. Deploy the Q Spider and make it go through the small shaft
underneath the stairs. Move it through the various ramps and crawl spaces until you reach a small secret room.
Even if you get lost for a while moving it through the numerous shafts, there is only one path that leads to the
secret room. When you have found the Secret Room, move the Q Spider towards the secret door disguised as a painting
and then detonate it, blasting the entry open and earning you the last Bond Moment.
Go up the stairs and head towards the room at the far left. Once you are inside the next room, go into the
secret room and collect all the pickups possible. When you are done, make your way out back towards the stairs and
use the Rappel to go up towards the Attic. Once at the top, turn left and kill another few enemies waiting at the
next room further ahead. Go into the next room, turn right and head into the entry of the smaller room at the right
corner. Arriving at the last room of the attic, turn left and Rappel down the wall to the ground level below.
When you reach the bottom, kill the last group of enemies by hiding behind some cover. Once they all have been
eliminated, head into the Yayakov's Lair ahead to finish the mission.
|
|