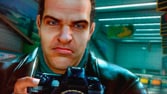
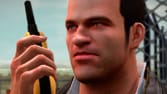
After the opening cutscene, the game will shift to
a first person view as Frank holds up his camera. Take
this chance to get familiar with the camera controls
as you take pictures of the chaos below. B (Zoom in),
A (Zoom out), X (Shutter), right analog (Move camera)
are the basics. Don't press the start button at all,
or you'll skip this section and miss out on some valuable
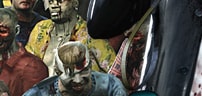
PP. These are all freebie shots so take pictures of
all the grizzly scenes on the streets below until the
battery dies on Frank's camera. The number in the bottom
right hand corner will let you know how many shots you
have left before the battery dies.
|
|
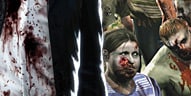
There will be a minor scene with two zombies feeding
on the street below that will give you a Brutality ranking.
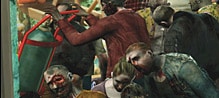
The first major scene consists of a civilian fighting
off a horde of zombies from the top of a car. Take pictures
as the civilian fights off the zombies and you'll get
points as he hits them (Brutality), waves his hands
at the chopper for help (Drama), and ultimately, when
the zombies drag him down to the ground (Brutality).
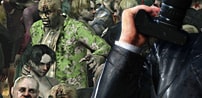
The next big scene you will encounter is a group of
zombies surrounding a bus. All the photos you take of
the zombies will register as No Genre, but there are
plenty of them so the PP is decent. If you aim your
camera downward as the helicopter speeds up you will
be able to get a good shot of a very bloody zombie feasting
on a rooftop right before you get to the gas station
- this scene is a little hidden. Aim at the gas station
as the helicopter flies by it and take a picture just
as the station blows up for some Brutality PP points.
Keep snapping shots of the burning zombies for some
more PP. The final scene will involve a woman on a building
top as several zombies corner her. Take a snapshot as
she fires her gun (Brutality), while she waves her arms
at the chopper (Drama), and as she falls to her death
(Brutality). If you have a few more shots left then
take shots of her body until the camera dies. The camera
will recharge when the chopper lands.
September 19 / From 12:00 PM / Case 1-1 / Case
1-2 / Case 1-3/ Case 1-4
(Must complete all of Case 1 before 7:00 AM on September
20)
| Scoops available
during this case |
Extra Survivors |
| "Cut from the Same Cloth"
- 2:00 PM |
Jeff - Rooftop |
| "Barricade Pair A & B"
- 4:00 PM |
Natalie - Rooftop |
| "A Woman's Lament" -
5:00 PM |
Bill - In the Closet (Entrance) |
| "Out of Control" - 9:00
PM |
Sophie - Leisure Park (after 6:00
PM) |
| "Japanese Tourists A &
B" - 10:00 PM |
|
| "Shadow of the North Plaza"
- 11:00 PM |
|
| |
 |
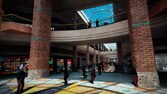
Welcome to the Willamette! This is where you will spend
the entire game unraveling the secrets that lie inside.
Walk by Carlito and open the door then head down the
stairs. You will come across a sofa at the bottom as
a tutorial menu displays explaining the save system.
You can only save on this sofa or in a restroom found
around the mall. Look for the yellow "S" icon
on your map to find the restrooms. The game only has
one slot, so you will need to overwrite your current
save every time that you save your game unless you have
a memory card. Be sure that you actually want to save
when you find a save point since the one slot save system
can get you stuck in the game and make you start over
if want to see the main story if you're not careful.
Walk through the red door to enter the security monitor
room.
[Extra Scene - All They Do is Eat, and Eat, and
Eat]
Examine the security cameras for a cutscene showing
the zombies attacking a victim.
[Extra Scene]
Open the door to the right of the security cameras
and go through the next door on the right. Head down
the corridor and you will be greeted by another cutscene
as you near the end.
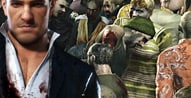
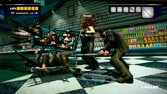
What a lively bunch we have here! Take some pictures
of each of the survivors for some Drama rankings. Try
to get as many zombies as you can in the shot of the
survivors near the door. Don't use too many shots though,
since the greater PP shots will be available in just
a moment. Do as the guy in the cutscene said and go
toward the chairs and boards in the back to help the
survivors blockade the doors. When you reach the pile
of chairs and boards, a cutscene will activate.
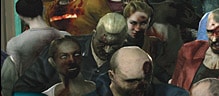
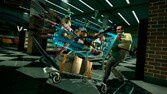
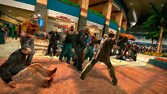
A brutal cutscene will give way to a horde of zombies
slamming through the doors and feasting on the survivors.
Now, we could grab one of the many chairs or boards
to the side and use them to fight off the zombie hordes,
but, oh no, we want to take pictures of the carnage
for some incredible PP scores! Grab a single 2"
x 4" or bat to help you fight through the zombies
and head toward the stairs near the doors while snapping
pictures along the way. Try to find the zombies that
are in a group feasting then work tons of zombies into
that shot  and the resulting photo will give you tons of PP points.
Go out of your way to get some good shots here even
if you have to take damage - you'll get some recovery
items in just a moment. Don't worry about the survivors.
Even though the red messages will inform you of their
death, you cannot save them. You can find a shotgun
if you can seek out Brian's dead body - he is usually
next to the left staircase (while facing the stairs).
Climb either staircase at the front of this area to
have a cutscene start once you reach the middle.
and the resulting photo will give you tons of PP points.
Go out of your way to get some good shots here even
if you have to take damage - you'll get some recovery
items in just a moment. Don't worry about the survivors.
Even though the red messages will inform you of their
death, you cannot save them. You can find a shotgun
if you can seek out Brian's dead body - he is usually
next to the left staircase (while facing the stairs).
Climb either staircase at the front of this area to
have a cutscene start once you reach the middle.
| |
 |
When the cutscene ends, talk to Otis next to the ventilation
shaft to receive the TRANSCEIVER and a MAP OF THE MALL.
He will give it to you anyway even if you try to leave
through the Security Room air duct. You might also want
to enter the Security Room and grab the food items in
the back if you need them. Enter the air duct to continue.
On the roof, you will find two people - one on each
side. You'll probably notice [Jeff] first on the right
side of the roof. Run up to him to find out that he
was separated from his wife. Press the B button while
near him and talk to him to get him to follow you. Press
the Y button to call him over to you or hold RT then
tap Y to scope out a location for him to run to (this
is the Goal Marker). You will need to remember these
commands while rescuing the many survivors around the
mall. Take him over to the other side of the roof to
find his wife [Natalie]. [PHOTO OP] Once they
regroup, take a picture as they hug to get some big
PP points. Photo Op moments like this are spread throughout
the game so look for the PP icons to appear then snap
a shot quickly. Take them back through the ventilation
shaft (use the Jump button to get back up to it) to
get them to safety.
Go back outside and look off the side that Jeff was
on to see plenty of zombies below that you can snap
a pic of for some PP points. Press the button and go
down the elevator or open the door on the other side
of the roof. It's best to open the door since you'll
come across several weapons on the shelf tops. Jump
along the wooden shelves and be sure to grab the Sledge
Hammer. Frank will automatically grab the sides of the
shelves while jumping from shelf to shelf. You'll need
to fall down along the crates near the right shelf in
the back to avoid taking damage. Break apart the Mannequins
by throwing them then grab their torso for a very powerful
weapon against zombies. There are also some Mannequins
near the elevator entrance, so get their torsos as well.
Run down the corridor off to the side to enter the mall.
If you took the elevator, you'll need to zigzag through
the shelves to find the corridor entrance. A cutscene
will take place as you reach the end of the hall. This
will end Case 1-1.

|
|
Jessie will give you a handgun. Be sure to go for headshots
if you use it on the zombies. Open the door at the end
of the hall to enter Paradise Plaza.
Case 1-2 will automatically take the place of whatever
scoop that you had selected, so you will need to set
the guide arrow once again if you want to get some scoops
done first. It's always set to the latest case by default.
The guide arrow is a big help since you likely don't
know the layout of the mall that well at the moment.
You can set a guide arrow by pulling up Frank's wristwatch
then highlighting and pressing "A" on the
current case that you want the arrow to guide you to.
This can also be done on the map menu by pressing "X"
to pull up the case and scoops.
In this walkthrough portion, you will always be directed
toward the cases instead of any scoops, but feel free
to check the scoop section for any scoops that you may
have open to you. I will point out the times of each
available scoop per case set, but their time of availability
in a case will depend upon how you play, so you might
get some at different times compared to what I have.
It is recommended that you try the "Cut from the
Same Cloth" scoop in the upstairs portion of Paradise
Plaza since it will help you to understand the photo
system better. Otis must call you first and tell you
about the situation for a scoop to be available to you
- he won't call you if you stay in Paradise Plaza since
that is where the scoop takes place.
If you have those Mannequin Torsos from the warehouse
then go up to Bachman's Bookporium and grab the Interior
Designs book to make them last longer. Judging by the
map, you should head north to the middle of Paradise
Plaza, then enter Leisure Park through the doors to
the side. If it is before 3:00 PM then you should go
grab both Sniper Rifles in Huntin' Shack in North Plaza
- they will definitely help you out for the next few
areas. Walk all the way across Leisure Park and head
for the Food Court in the northwest. Zombies will be
all over the park but you can easily maneuver through
them. A zombie horde will be right next to the doors
that lead to the Food Court. Luckily, there is a conveniently
placed lawn mower on the right side of the set of doors.
Run over to it and crank it up with the B button then
hold X and steer with the left analog to run over the
zombies in your way.
A cutscene will play upon entering the Food Court then
you will be forced to face one of the many psychopath
bosses of the game.
Psychopath Boss - Carlito
| |
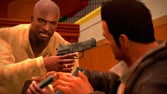 |
And to think, we just met this guy on the roof. In
order to defeat Carlito easily, you must have a gun.
Brad will give you a gun, and if you run out of ammo
then talk to him and he will give you some more. If
you got those Sniper Rifles at Huntin' Shack then switch
to one of them and you can take down Carlito very quickly.
Carlito will fire at you while moving around the structure
up above. He fires with a Submachine gun that will stun
you if it manages to hit you, so make sure to get behind
something when he starts to fire or run to the sides.
In order to hit Carlito, stand behind a column and aim
at him then fire away with your handgun or Sniper Rifle.
You can also run behind the area that he is up on and
fire at him while he has his back turned. Both you and
Brad will be on opposite sides giving Carlito a real
disadvantage. If you want to try for it, climb the cardboard
boxes next to the wooden structure that he is on in
the seating area and attack him physically - I would
not recommend this however, since he will kill you easily
with his Submachine Gun and will kick you away very
quickly when you get close to him - I'm just pointing
this out.
|
|
When you have shot him enough, he will make his way
to the area above the food stores in the very back of
the Food Court. You will actually have better cover
when you go to hit him here since there are more columns
between you and him. Be on the lookout for an occasional
grenade that he will throw at you and move appropriately.
If Brad gets stuck behind a table then make sure to
bump into him or move the obstacle that is blocking
his way to make sure that he continues to help you out.
While Brad is stuck, Carlito will only shoot at Frank.
Use the various food items in the food stores to fill
up your life gauge if you sustain too much damage. You
could actually make some Spitfire and spit at him to
damage him if you so desire. It is best to carry a food
item with you while shooting him just in case he manages
to catch you off guard. A cutscene will play upon his
defeat.
| |
 |
Follow Brad to Al Fresca Plaza. Grab a cactus from
the sitting area to help you fight through the zombies
down the stairs. The zombies will quickly swarm Brad
in the current area as he waits for Frank near the door,
so don't leave him alone for too long. In Al Fresca
Plaza, Brad will fight through the zombies and will
not need any help from you so you can work on saving
the survivors in "Barricade Pair A & B"
and "A Mother's Lament" scoops if you have
gotten the call from Otis for them - remember that you
will not get the calls if you stay in this area though.
Be sure to save your game in the restroom of the Flexin'
gym. Chainsaws and other weapons (Hedge Trimmers) are
available in the Hardware store and there are some useful
Dumbells in the gym that pack a good punch. The plywood
panel from the barricade shielding the "Barricade
Pair" survivors is incredibly useful as well if
you want to take down a horde of zombies real fast.
Walk into the fountain near the end of this area to
find an Submachine Gun in the water along with a Dumbell.
Catch up to Brad and enter the Entrance Plaza.
[Extra Scene - Don't Come Any Closer!]
If you enter North Plaza and Huntin' Shack after 3:00
PM you will engage in a boss fight. If you stand in
Huntin' Shack and wait till 3:00 PM, he will not show.
You must enter the North Plaza area after 3:00 PM then
he will show up after you enter Huntin' Shack.
Psychopath Boss - Cletus
[PHOTO OP] When he takes a swig of wine. He
will almost always do this after he shoots you.
Cletus will fire at you from behind the counter with
his shotgun. The only cover that you will have for this
fight is from behind the three store displays spread
around the room. Do not pick them up and throw them
or you will have no cover from his attacks. You must
position Frank very carefully behind each store display
so that Cletus' bullets hit the display. His gun cannot
destroy the displays, but it will cause them to shake
a bit. It's possible to move the displays closer to
the counter by picking them up and laying them down
with D- pad down, but you're likely to get hit doing
that. You can actually set a good wall this way though
if timed correctly.
You need some type of gun for this fight and plenty
of ammunition. Bring at least three handguns with you
along with a Submachine gun. It's good to bring some
healing items as well. You can hide behind a display
and switch to aiming mode then you might be able to
hit him while he fires without him being able to hit
you, but be sure to reposition yourself when he moves
after being attacked. You can also count as he fires
then step out and hit him after the sixth shot when
he goes to reload. He will always reload after six shots
and will be completely open. Make sure to hide after
you hit him while he recovers though, since he will
immediately take a shot at you afterwards. He has plenty
of Sniper Rifles, Shotguns, and Wine behind the counter
but it's troublesome to get over to them. He will always
grab you and throw you back over the counter as he comes
into contact with you. If you want to get behind the
counter, wait until he reloads then make a run for it.
A most ironic cutscene will commence once you have beaten
him.
TIP: If you have the Small Chainsaw while fighting
him, run up to the counter and hit him while on the
other side to quickly get rid of him. You can also do
this with the Mannequin Torso, but you will get hit
some. The Spitfire doesn't work that well at all for
this boss if you're wondering.
[Extra Scene]
|
|
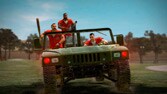
[Extra Scene - Prison Break!]
If it is past 6:00 PM, you will get a cutscene where
three convicts in a jeep will attack another survivor
once you get to Leisure Park on your way back to the
Security Room. These convicts will stay in Leisure Park
for the rest of the game unless you kill them. Sadly,
even if you do kill them they will come back every night
at 12:00 AM. They can be avoided by staying to the sides
where they will not notice you, but this is sometimes
easier said then done, since they may still spot you.
[Sophie] will be running from the convicts, and she
is a helpful survivor when you go to fulfill the "Photograph
Challenge" scoop that will happen later, so make
sure to save her if you can. She will be the key Erotica
shot for Kent's viewing pleasure.
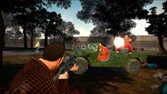
To defeat the convicts, you really need to grab a Sniper
Rifle from Huntin' Shack before going outside. Get on
top of the roof that is over the park benches on the
east side using Zombie Ride or by simply jumping to
it (Frank will sometimes grab on to the side) then scope
out their location. You can also do this from the ground
but it may be a bit harder to find them. They will most
likely be in the trees somewhere getting stuck as usual
or they may not have started moving yet, which is a
major plus if that happens. Aim for the gunner and take
him out first then kill the two in the front seat. Even
if you do kill the driver first, then the other convict
in the front seat will take over driving. The back convict
will always stay at the gun. You will have access to
their jeep and will be able to take the Heavy Machine
Gun off the back of the jeep. The Heavy Machine Gun
is easily one of the most damaging weapons in the game.
| |
 |
Another way to fight off the convicts is to bring a
submachine gun with you. Stay up in the trees and they
will constantly crash their car into a tree. Stand behind
a tree then aim for the gunner and kill him. When they
crash once again, run up to the back of the jeep and
quickly grab the Heavy Machine Gun. Run away and fire
at the two convicts in the front seat to kill them very
quickly.
If you can manage to get all of the survivors in the
scoops past Leisure Park back into Leisure Park before
6:00 PM then you will not have to worry about this menace
while escorting them. Even if it goes past 6:00 PM while
you're in Leisure Park then you will not have to worry
- they will only show up when you ENTER Leisure Park
after 6:00 PM, not while you're already there. Sophie
will not die unless you leave her in Leisure Park with
the convicts after the cutscene has played or they kill
her while you're in Leisure Park.
Like I've already mentioned, if you defeat the convicts
they will come back every night at 12:00 AM, so no matter
what you do, they will still be there to haunt you later
in the game. This is why I highly recommend that you
perform the "Out of Control" scoop once it
is offered, that way you don't need to go through Leisure
Park most of the time.
TIP: The convicts' jeep can be used for the ultimate
zombie-killing machine in the Maintenance Tunnels underneath
Leisure Park. Their jeep will last about as long as
three trucks. Also, the Heavy Machine Gun on the back
of the jeep will replenish every time you enter and
exit from Leisure Park to the Maintenance Tunnel and
vice versa. The Heavy Machine Gun itself can be used
to take down any boss incredibly fast.
[Extra Scene]
[Extra Scene - The Horrible Night]
You'll most likely reach the time of 7:00 PM soon. Once
this time rolls around, the zombie hordes will become
more aggressive and greater in number. A cutscene will
play once that time is reached.
[Extra Scene]
[Extra Scene - A Weakness is Found]
Also, when you go back to the Warehouse on your way
back to the Security Room, a cutscene will take place
where Frank will find a weakness in the zombies by stomping
on a Queen insect. You will be able to collect Queens
from zombies by catching them inside of a bottle from
then on. Equip the Queen and press the attack button
to have Frank shatter the bottle on the ground and kill
any zombies in his immediate area. This sequence will
activate any time after 7:00 PM when the warehouse is
entered. After the cutscene, a zombie near the entrance
to Paradise Plaza and near the elevator will appear
with Queens inside of them.
[Extra Scene]
When you enter Entrance Plaza with Brad, walk over
to the left side of the gate where Brad is waiting to
activate a cutscene. Follow Brad into the middle of
Entrance Plaza once he raises the gate and run toward
Everybody Luvs Books for another cutscene. If this case
was failed before Brad had the chance to raise the gate,
Frank can still press the switch to the side to raise
it.
| |
 |
For this case, all you have to do is go back to the
Security Room in Paradise Plaza. The case will be finished
once you open the door to the Security Room and watch
the cutscenes. You have until 7:00 AM on September 20
to go back there, but you must be back there a little
before that time. If you go back early, before 6:00
AM, the game will go ahead and tell you that Case 1-4
is solved and will tell you that the next case will
start at 6:00 AM. If you do not get back to the Security
Room before 7:00 AM then you have automatically failed
the next case and all the preceding cases will be failed.
To avoid this, always pay attention to the time and
the starting time for the next case set.
[Extra Scene - The One That Was Left Behind]
Take this time to save [Bill] in the In the Closet store
on the second floor of Entrance Plaza. The store has
a few zombies in front of it. Rush up the steps inside
of the store and go around the side corridor to find
him behind some boxes. Throw the boxes out of the way
and talk with him. He will not join you at first since
he isn't aware of the situation. Once he reaches the
entrance of the store and sees the zombies he will quickly
decide to join up with Frank after you talk to him again.
Escort him back to the Security Room since you're headed
back there for your next case anyway.
[Extra Scene]
[Extra Scene - Trust]
Travel back to the Security Room after 10:00 PM to receive
a extra cutscene where Frank and Brad will have a discussion
while unpacking some supplies.
[Extra Scene]
September 20 / From 6:00 AM / Case 2-1 / Case 2-2
/ Case 2-3
(Must complete all of Case 2 before 12:00 PM September
20)
| Scoops available
during this case |
Extra Survivors |
| "Lovers A & B" -
7:00 AM |
Pamela - near Child's Play (after
"Lovers" is complete or in progress) |
| "The Hatchet Man" -
8:00 AM |
Heather - inside Child's Play
(after "Lovers" is complete or in progress) |
| "The Coward" - 9:00
AM |
|
| "Restaurant Man" - 11:00
AM |
|
In this set of cases, time can easily get away from
you because of the two required boss battles so be sure
to keep a tight check on your watch and do not let it
go past 12:00 PM. You have a total of six in-game hours
for all three parts. For Case 2-1, all you have to do
is enter the Security Room between 6:00 AM and 7:00
AM then a cutscene will start.
[Extra Item - Maintenance Tunnel Key]
You can go down into the Maintenance Tunnels via the
Parking Area on the west side of Leisure Park and retrieve
the Maintenance Tunnel Key at any time. Drive into the
tunnel and head for the middle dead end to find a door
that leads to a warehouse. In the very back right of
the room, the MAINTENANCE TUNNEL KEY will be lying on
the ground. This will help you to make shortcuts through
the different plazas of the mall by going underground.
There is also a Submachine Gun off behind some barrels
in the warehouse of the Maintenance Tunnel. The key
is not required, but it will make the final cases much
easier to perform.
[Extra Item]
Grab both of the coffee jugs from the Security room
and head to Paradise Plaza. If you do not have at least
two handguns or a handgun and a Submachine Gun (or Sniper
Rifle from Huntin' Shack), then head to Colby's Movieland
right now and beat down some security guard zombies
and take their handguns. You may be able to find some
handguns in the trashcans around the area as well. You
can also go make some Spitfire Juices. Enter Entrance
Plaza via the newly opened gate on the south side of
Paradise Plaza. If you fail a case before you get to
Case 2-2 then the gate that leads to Entrance Plaza
through Paradise Plaza will remain closed. A cutscene
will play as you walk into Entrance Plaza that will
lead into a boss fight.
Psychopath Boss - Carlito
Well, well, once again it's our friend Carlito, only
this time he is armed with a big sniper rifle. Not only
will it knock you down with incredible firepower each
time it hits Frank, but it will also take off two blocks
of health each time he catches you with it. Brad will
position himself inside of the sports store most likely
and will step out to fire a few shots at Carlito every
few seconds. Carlito will fire off several rounds without
reloading so don't even think about chasing him with
a melee weapon unless there is no other choice. Even
if you do manage to get near him, he will run and toss
a grenade behind him in order to keep you off. He will
also hit you over the head with the end of his rifle
and bum rush you if you get too close, so even if you
do manage to hit him physically, he will get away from
your attacks shortly.
The best way to take him down is to have at least two
handguns or an SMG then stand behind a column and aim
at him. The best column to stand behind is the one right
next to the Shootingstar Sporting Goods store that Brad
will duck into - this way you will never even have to
move. When the camera shifts behind Frank while aiming
the gun, you will be able to hit Carlito, but he will
not be able to hit you. If he hits you then move back
behind the column a little more. If you fire at him
and accidentally hit the column then you will need to
step out further from the side of the column. A Sniper
Rifle works well for this fight, but you will have to
move out from around the column a bit more to shoot
him. You may want to try Spitfire as well. Darting out
from the back of a column as Brad steps out to fire
will help you to take his life down just as quick since
Carlito will turn to hit you while Brad shoots him.
Brad cannot kill Carlito however - Frank must score
the final hit to start the cutscene that will end this
battle. If Carlito kills Brad, then the case is failed.
Don't spend too much time on this fight since you have
another big battle coming up shortly.
TIP: Spitfire works just as well as a handgun in this
fight. Mix Cooking Oil + Condiment in Paradise Plaza
right before fighting him then spit at him from behind
a column. Also, if you have the Small Chainsaw, then
by all means, chase after him and kill him quickly.
[Extra Scene - Carlito Escapes (Short Version)]
This is not really too much of an extra scene, more
of a shorter version of the actual cutscene that plays
after you beat Carlito, but if you kill either Barnaby
or Brad or if Carlito kills Brad then Carlito will immediately
hop off the second floor.
[Extra Scene]
Depending on how much time you spent on the Carlito
boss battle, you will need to rush on this mission and
get to Seon's Food & Stuff quick! The supermarket
is in the North Plaza, so you will need to go through
Wonderland Plaza to get there. If you did the "Out
of Control" scoop then use the mirror in the women's
restroom of Paradise Plaza, if not, then go through
Leisure Park. Grab the
Submachine Gun from the blue awning next to the staircase
in Paradise Plaza and be sure to grab the small chainsaw
in Wonderland Plaza if you did the "Out of Control"
scoop. Make a trip by Ripper's Blades in North Plaza
and grab a few Katanas or collect some Mannequin Torsos
around North Plaza if you don't have a Small Chainsaw.
You will need them! Rush to Seon's Food & Stuff
afterward. Notice that the usual zombie-filled supermarket
is now completely silent. When you try to open the double
doors in the back of the supermarket a cutscene will
introduce you to the next psychopath.
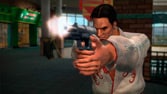
Psychopath Boss - Steven
[PHOTO OP] When Steven tries to suddenly dash
forward with the cart. He puts his feet on the back
of the cart and rides it toward you. If you hit him
with a gun, he will usually do this move afterwards.
|
|
Thanks to the supermarket that you fight Steven in,
you will have an unlimited supply of food to choose
from when you take damage. Try to go for the meat, milk,
and yogurt and orange juice near the back for a greater
health replenish.
Steven will start out by chasing you down one of the
aisles. Run away from him and stand along either side
of the aisle until he comes out. Be sure to watch out
for the basket since it has blades all around it. If
the basket is about to hit you then move away and let
him move out of the aisle a little more. Shoot him with
the Submachine Gun or get about two strikes in with
a Katana, Mannequin Torso, or Small Chainsaw from behind
him when he tries to turn. Steven can be taken down
extremely fast if you have the Small Chainsaw. If you
hit him with a melee weapon, be sure to back off after
about two strikes since he will turn the cart around
and hit you with the blades along the side.
| |
 |
His main attacks are his cart push, his cart slap,
and another move where he will suddenly dash toward
you with lightning speed and try to ram you with the
cart. His cart dash will leave him wide open for an
attack afterward, preferably a gun attack since he will
be a distance from you most likely. The main attack
that you will have to watch out for is his shotgun blast.
He will sometimes stop pushing the cart and aim his
shotgun at you. Be sure to get behind a rack when he
starts shooting and do not try to sneak up on him at
that time! Wait for him at the end of the aisles or
move along the side the registers at the front of the
store and hit him while he tries to turn the cart around.
TIP: If you don't bring a good enough weapon, try to
use the can drinks on the far aisle. They work surprisingly
well for taking his life down if you hit him with a
bunch of them in a row.
You will receive the PHARMACY KEY once he is defeated
and will also have access to his unique Weapon Cart.
Move through the double doors in the back and follow
the corridor all the way to the Pharmacy. Use the Pharmacy
Key to unlock the door then grab the MEDICINE for Brad.
Now you need to rush all the way back to the Security
Room in Paradise Plaza with the medicine. This part
can be easily failed depending on how long you took
while trying to defeat Steven, so I would advise you
not to save until you have completed this part of the
case all the way. You can try to complete the "Lovers"
scoop in Wonderland Plaza on your way back if you have
time, but watch the clock. The "Lovers" scoop
will end at the same time that the current case will
end, so it's either now or never.
|
|
[Extra Scene - Two Sisters]
[Pamela] will be getting attacked in Paradise Plaza
on your way back. She'll be near the Toy Store of Paradise
Plaza surrounded by zombies while in the water. Pamela's
sister [Heather] has taken cover inside of the Toy Store
(Child's Play), so break through the glass and save
her as well. They will show up at 9:00 AM only if the
"Lovers A & B" scoop is in progress or
completed. You have to at least kill both Tonya and
Ross if you are not escorting them for the two sisters
to be there. They will show up automatically in Paradise
Plaza if the "Lovers" scoop is failed at 12:00
PM.
[Extra Scene]
September 20 / From 11:00 AM / Case 3-1
(Must complete all of Case 3 before 12:00 PM on September
20; the next case will not start until 3:00 PM)
| Scoops available
during this case |
Extra Survivors |
| * "Photo Challenge"
- 12:00 PM |
Jennifer - Paradise Plaza after
1:00 PM |
| "Above the Law" - 1:00
PM |
Nick - north rabbit after 3:00PM(Wonderland) |
| |
Sally - north rabbit after 3:00PM(Wonderland) |
* only if the "Cut from the Same Cloth"
scoop was completed. You must meet Kent between 12:00
PM and 1:00 PM in Paradise Plaza.
|