WALKTHROUGH, CHECKPOINTS 25-32
Your ride comes to an end. When the platform stops
moving, take a look at the ground in front of you.  You’ll see a guard standing below. Stun him, and
drop down, then turn around quickly; there’ll
be another guard either behind you or to your left.
Stun him, then crush both their heads. Walk to the other
side of the platform, and you’ll see a hole in
the ground.
Descend to the bottom.
You’ll see a guard standing below. Stun him, and
drop down, then turn around quickly; there’ll
be another guard either behind you or to your left.
Stun him, then crush both their heads. Walk to the other
side of the platform, and you’ll see a hole in
the ground.
Descend to the bottom.
| |
 |
Flip on your eyeshine, and you’ll see a guard.
Stun him and kill him. If he isn’t here, he will
be making his way in soon. When you’re ready,
leave through the right side of the screen.
Walk into the next room, and you see a hallway to your
left, and a ladder to your right. If you want some smokes,
climb the first ladder, in the middle of the wall. If
you don’t, then enter the alcove. Next to the
ladder you’ll see the tranquilizer gun, but since
you bought it, don’t worry about it. Climb this
ladder to the top. When you get to the top, stop; you’ll
see a guard patrolling back and forth. When he gets
to your left, and looks over the railing, pull yourself
up, sneak up behind him, switch to your fists, and press
the right trigger; you’ll push him over the edge.
With the guard dead, climb the ladder he was standing
next to.
For smoke collectors, descend the ladder to the bottom,
and follow the crawlspace to the end. Otherwise, climb
to the top, and enter the grating on the left. When
you kick off the grating at the end, look down, and
land on the crate.
Stun the guard in front of the door, crush him, and
turn around, following the hall to the left. At the
end, you’ll come to a dark area, so turn on your
eyeshine, and climb the ladder.
At the top, you’ll see a grate immediately on
your left; kick it out, then crawl through to the other
end. Turn off your eyeshine; it’s bright here.
Emerge from the vent, and start walking down the hall.
At the end, unless they ran up to you, you’ll
see a guard and a technician, both of which must be
killed. If either sets off the alarm, return to the
beginning of the hall (where you got out of the vent),
and hit the alarm button to disable the defenses. When
the technician dies, pick up his red security card.
There’s also a NanoMED station here if you need
it. Take a right, and enter the next hallway to approach
the computer.
Using the computer activates the rail track, but it
breaks down, and you have to find another. Seems like
such a waste of time, huh?
 |
|
Turn around, and head back to where you came out of
the vent. Instead of going through the vent again, hang
a right, and use the keypad next to the doorway.
This causes the elevator to lower. When it gets low
enough, drop onto the roof of the elevator. When it
stops, fall to the floor, and climb the ladder back
up to where you just were. Go through the vent to the
other side again, and use the keypad again. This recalls
the elevator, and as it rises, jump on the roof of it.
This may have seemed like some needless backtracking,
but when the elevator stops, you’ll spot a ventilation
shaft at the top.
Go through it. Follow it to the end, and you will begin
to load back into the mining core.
When you drop down, you’ll be outside the gas
room. Hang a right from where you landed, and enter
the gas room again. Return to the area where you found
Jagger’s package, and as you get to the middle,
a cutscene will take over. Riddick will light the bomb,
, and then you’ll have control. Start leaving
the room, and hurry; as you approach the door, a cutscene
will take over, and Riddick will be caught by a Riot
Guard.
After he calls for backup, you see a cutscene of two
guards taking you away in an elevator. The bomb finally
goes off, and the guards are knocked out. They wake
up, and activate an emergency mode. One guard keeps
his gun trained on you, while the other goes off to
see what happened.
When you have control of Riddick, fight the guard,
hand-to-hand. All of your weapons are gone, including
the tranquilizer gun. You can’t leave the elevator,
or you’ll be killed, so fight that guard. Try
to grab his gun so you can kill him instantly, otherwise
you may loose a few blocks of health. When he dies,
leave and head to the right.
Approach the broken tracks at the end, and you’ll
see a cutscene. Looks like the explosion freed some
weird creatures, and this guard is about to find that
out first hand.
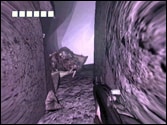
Once you’ve got control, walk forward, and you’ll
see a big black hole, with a flare opposite it.
Fall into the hole to load the next section.
| |
 |
You wind up at the bottom of the hole. Run forward,
through the tiny hole. You’ll be able to pick
up a shotgun and two grenades, so do this before emerging
in the large area. Turn to the right, and a large creature
will attack you. Back up, and hide in the alcove.
He can’t fit through, so toss a grenade at it.
One of them will kill it, so head back out, and continue
to the right. There is a small hallway lined with green
goo that you’ll want to go through.
Pick up the shotgun, and you’ll emerge in a room
with smaller versions of the creature you just killed.
Don’t waste your grenades, because they can be
killed in one or two shotgun blasts. Throughout this
area you’ll find many of these things, so just
kill them as you see them. Run up the ramp to the left
of the room, and at the end, pull yourself up onto the
ledge. Run up the ramp here, and follow the hall. You
will see two crates on the left; pick up the shotgun,
then climb the crates, and climb onto the ledge, and
fall onto the ground. There is a door to the left you
can’t open yet, so run down the hall to the right.
Go down the ramp at the end, and follow the hall to
the left. Grab the ammo on the floor, and go through
the hole in the wall at the far right. Run up the mini-ramp
to your left, and run to the crate. Grab the vent tool,
then turn and use the ventilation hatch.
Crawl through it to the end, and you’ll drop into
a room with a door and some crates.
Use the panel next to the door to turn on the lights,
then go through the small crawlspace. There is an empty
health station here, as well as a drilling machine you
can’t use yet.
Go into the doorway behind the drill, and follow it
as it goes to the right. You’ll wind up in a large
room with a broken bridge.
On the ground, to the left of this side of the broken
bridge, is the toolroom key, which you’ll need
to pick up.
Jump onto the ledge behind you, then look up and grab
the wire.
Shimmy across the broken bridge to the other side, and
jump down. Grab the shotgun lying on the side of the
bridge, then enter the doorway.
Go through the open door on the right, down the ramp,
and into the alcove on the left. You’ll be back
where you started from. Go across to the ramp on the
other side, climb it, and pull yourself up onto the
ledge. Climb the ramp, follow the path to the end, and
climb onto the crates. Pull yourself onto the ledge,
and over it. You can now open the large security gate
that was locked earlier. There is a shotgun in here,
as well as some grenades, and a working NanoMED station,
should you need it. Go to the left, and crawl through
the same space up ahead.
There is a panel in here that’ll turn on the lights.
Activate it, and go through the door. Follow the hall
until you come to the end, and go through the door.
 |
|
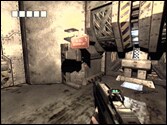
You’re in a room with some crates to your right.
Enter the door on your left. In this room, you will
find a power cell, a prototype rifle (which lacks DNA
recognition), some grenades, and some shotgun ammo.
Return back to the hall, and take it to the end, into
the room where you came from. Use the large machine
to recharge the power cell.
Leave through the crawlspace, back out through the gate,
and go down the ramp you went down earlier. Go back
to the vent hatch you used earlier, climb into it, and
crawl through to the end. If you’re not collecting
cigarettes, return to the room with the drill after
you exit the shaft, by going through the small crawlspace.
Run the whole time. If you are collecting cigarettes,
jump out of the shaft and turn around. Another large
creature will burst through the wall.
Kill it with your grenades, and you’ll find a
pack of smokes in the hole. Whatever you do, get to
the drill and walk to the back of it, and insert the
power cell.
Once the drill is powered up, activate it again, and
it’ll go crashing into the metal gate ahead.
Crawl through the next metal gate, and you’ll
be in a room with two vents. Kill the creature here,
then crawl into the broken vent on the left, and start
following it. Soon, the game will load, and you’ll
be in the central storage area.
Crawl through, and look down at the guard fighting
a xeno.
Keep going forward, into the next vent, and kick out
the grating at the end. You’ll be looking over
a large abyss.
Slowly crouch onto the ledge, then stand up. Look at
the hangrail above, grab it, and move over to the other
side. When you drop down, you can climb the ladder and
find some smokes; otherwise, go through the small tunnel.
At the end, climb down the ladder, and open the hatch.
You will see a guard fighting the creatures. Kill the
guard, then kill any creatures who come after you, and
pick up the cartridge from the guard. Go through the
door the guard had his gun aimed at.
| |
 |
In this room, filled with crates, you’ll see
a couple of guards fighting the creatures. Kill the
guards, kill the creatures, then collect their ammo.
You’ll see a forklift in the middle of the room.
Climb onto one of the crate to the left of it, then
jump to the crate on the forklift. Jump onto the next
set of crates, and take a right, toward the vent at
the end.
Crawl through it, and at the end, fall onto the metal
rails. Fall through the hole, and kill the creature
that attacks, then open the door to the right. A creature
will kill a guard and drag him away.
Walk into the room, grab the shotgun, and go into the
tunnel where the creature went. Kill it, and descend
the ladder. Kill the creature that attacks, then descend
the next ladder to the bottom.
You only have one way to go.
Follow the hallway, and you’ll come to a room
filled with crates; you’ll also see a Riot Guard
fighting a large creature.
Circle around the Riot Guard as he’s fighting
creatures, and shoot him in between the two red lights.
After six or seven shots, he’ll collapse, and
you can pick up his minigun. Use it to kill any remaining
creatures, then enter the door to the right of where
you started from.
There is a health station here if you need it; otherwise,
continue to the next door. In the middle of the room,
there is a Riot Guard looking over to the right. Use
your minigun to kill it, and kill the guard who comes
up from the ramp. Don’t go down; instead, head
to the door at the end, and approach the next door marked
“Loading Docks” to load the area.
Run into the docks, and immediately move to the left,
all the way to the end, killing all the creatures and
a single guard. Keep moving, or the turrets will kill
you in a flash. At the end, enter the door on the left,
kill the guard, then press the button to activate the
elevator.
When the elevator stops, kill the guard, and open the
single door. Kill the creature in here, and approach
the door at the end. As you get near it, a guard will
open it and fire at you. Mow him down with the minigun,
and go through. There is a health station to your left,
and an elevator to your right.
Take the elevator. At the bottom, go through the only
door here, and kill the three guards. Head to the right,
and walk to the fence. It’ll slide away, revealing
a large elevator. Use it.
 |
|
At the top, in the room, there will be a Riot Guard
and two normal guards. Mow them all down with the minigun,
then enter the single door on the left. There will be
two guards standing by the stairs, so kill them. Go
up the stairs to the left, and kill the two creatures
who attack. In the room to the right, kill all of the
guards, a total of three. Grab the grenades they drop,
then use the health machine to get a seventh block added.
Leave the room and continue right. You’ll see
a small metal staircase. Walk up, then back away, and
avoid the grenade. When it goes off, continue up and
kill the guard, then go into the door.
You’re now in a room with a machine.
There are two guards on the floor, and two guards on
the upper catwalks. Kill them all, then go through the
fence on the left to another large elevator. Ride it
to the top.
Leave the elevator, and mow down the riot guard with
the minigun. Pick up his minigun so you get a fresh
supply of ammo, then follow the hall around to the left.
Go through the small doorway, then into the doorway
on the right. Climb the stairs, and kill the guard at
the top. Enter the room, and go into the station ahead
of you.
Hang a right, and press the button at the end.
This opens a door. Walk in the door, and the game will
load.
Open the door, and you’ll see a heavy guard.
All your weapons, including the minigun, won’t
harm it, so switch to the shotgun. If you look up, you’ll
see canisters moving along lines. What you have to do
is shoot a canister that the mech is close to, and it’ll
drop, causing damage. Use the pillars for cover while
waiting for a fuel canister. You’ll have to do
it about five or six times. Once it is destroyed, stay
away, or the explosion will damage you. Go back to your
minigun, pick it up, and enter the door the mech was
guarding. Walk toward the large door labeled Hangar.
Walk forward, and take a left. You are outside. Kill
the Riot Guard here, the one who comes from the right,
and then go down the path, toward the ship.
Kill the three guards, and a ramp will lower.
Walk up it into the ship. As you get inside, a cutscene
will open, and you meet an old friend.
You awake from cryo sleep for your daily exercise.
Just walk around or stand still until you pass out,
and you’ll wake up again. This time, you’ll
have company.
Watch him. He will pass out before you, and a mechanical
arm will put him back into his cryobed.
Wait until you pass out again. When you awake, run to
the open cryobed (not yours), and press X to enter the
bed.
Riddick sits in it, and the machine will pick up the
next prisoner. It’ll place the prisoner in the
machine, and you’ll be taken to the pyramid area.
|