WALKTHROUGH, CHECKPOINTS 09-16
When the new area loads, follow the hall until you
come to a man.  He is Pope Joe. Follow him, and he’ll lead you
to an elevator. When the elevator comes to a stop, get
out, and keep following Pope Joe. Once he stops moving,
talk to him to get a mission.
When he’s finished, pick up the flares from the
corner. The box may look like it doesn’t hold
much, but keep picking them up until you reach twelve,
the maximum. There is also a health station here if
you need it. When you’re done, leave his place,
and return to the elevator. Ride it back to the bottom.
He is Pope Joe. Follow him, and he’ll lead you
to an elevator. When the elevator comes to a stop, get
out, and keep following Pope Joe. Once he stops moving,
talk to him to get a mission.
When he’s finished, pick up the flares from the
corner. The box may look like it doesn’t hold
much, but keep picking them up until you reach twelve,
the maximum. There is also a health station here if
you need it. When you’re done, leave his place,
and return to the elevator. Ride it back to the bottom.
| |
 |
Step off the elevator, and head down the left pathway,
which has spilt blue ooze.
Enter the gateway on the left, and follow it. Keep following
the hall until I tell you to take a turn. Soon, you
will come to a room with three dwellers. Kill them all,
and enter the broken wall to your right to get a NanoMED
cartridge, as well as a cigarette pack. Go back to the
square room, turn right, and enter the room just beyond.
Here, sitting next to a barrel, is a radio; this is
Pope Joe’s blessed voicebox.
Pick it up, and quickly turn around. Several dwellers
have showed up. Make your way back to the elevator,
killing them as you go. Ride the elevator to the top,
and return to Pope Joe. Use the NanoMED station if you
took enough damage, then talk to Pope Joe.
Now that you have your Eyeshine, you can see in the
dark, whether you’ve got a light or not. Eyeshine
can be toggled on and off by pressing in the right thumbstick.
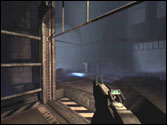
Follow the vent you start out in until you emerge in
a room. Take the arch on the right, and follow the path,
killing the dwellers as you go. At the end, take a left,
through the small nook, and head back the way you came,
only on the other side. When you get to a break in the
wall on the right, go through the break, and climb the
ladder at the right.
 |
|
You emerge in the showers.
Turn off your Eyeshine for now, as it’s light.
From your starting point, do a 180° turn, and approach
the stained wall. Look to your left, and you’ll
see a door with a switch next to it.
Throw the switch to turn off the light, then switch
on your eyeshine and kill the guard who comes out of
that room. When he dies, turn to the right, and kill
the guard who is running at you. If he isn’t,
he’ll be in the locker room. Once he’s dead,
shoot the lockers on both sides to blow off their doors,
and collect the goodies within. The far right locker
on the right side (assuming you came from the bathrooms)
contains some new clothing, which makes you look like
one of the civil guards.
The disguise may or may not be effective. If any guards
rushed into the room (besides the two you killed), you
may not be able to hide. When you’ve collected
everything, head up the small set of stairs, and start
heading out of the locker room. If your disguise doesn’t
work, you’ll have to kill four guards, either
in or out of the locker room.
Once in the hall, hang a right and use the NanoMED
machine on the back wall (if you need it). Head into
the room to your left, and kill the guard in here. All
the doors in here are locked (they lead to guards apartments),
but head to the back left of the room, and jump over
the railing to land on the lower level.
Move to the center of the room, and pick up the vent
tool. Turn around, and use the vent tool on the shaft
in the middle of the wall. Turn on your eyeshine, and
follow the vent. At the end, you’ll come to a
ladder, so climb it to the top. Keep following the vent,
and you’ll soon come to grating that can be kicked
out. You’re back on the upper floor. Leave the
apartment area, turn right, and follow the hallway to
the next open doorway. Before going through, make sure
no weapons are equipped, and you’ll be able to
get by without getting attacked. Also, make sure you
don’t stand too close to a guard for too long,
or they might recognize you as Riddick.
Facing the stairs,
, take the small archway on the right. You’ll
see two guys making fun of a guy trapped in the elevator.
Ignore them both, and continue falling the path to the
right. You’ll soon come to a junction where you
can go one of three ways.
Take the only route which leads somewhere, and that’s
straight ahead.
Follow the path, and you’ll see a guard at the
end. Don’t worry; even though he’s staring
at you, he won’t attack. Continue following it
to the right, and you’ll come to a room with a
patrolling guard, a guard sitting on a bench, and a
retina locked door. You can’t open the door, and
the only other door in here is locked, so do the next
best thing and jump over the railing on the left.
Once over the railing, turn on your eyeshine and head
to the left, towards the vent shaft. Crawl forward a
little bit, then climb the ladder at the end. Open the
grating on the floor to fall into a room, then walk
into the next room. You’re in a supply room. Pick
up the pack of smokes, and change into the light guard
uniform.
You could’ve bought this later, but why buy it
when you can get it for free? Pick up the Assault Rifles,
and exit the room by using the keypad. The guard still
won’t attack you, but doesn’t he wonder
how you got in there in the first place? Head to the
left, back to the door with the retina lock. Approach
the retina scanner, and use it. Quickly run to the dark
corner by the pillar, next to the litter bin on your
right (not left), and crouch. A guard will come running
in from the right doorway. Once he gets to the retina
scanner, get up, and quickly run the way he came from.
A once locked door is now open, so go through it. As
you walk up the stairs to the next door, the game loads.
| |
 |
Go through the door. You are now in the Guard Quarters,
facing a wall. Either side will lead to the same area,
but take the right doorway anyway. Talk to the civilian
guard, Jenkins, and he will give you a bottle of booze.
Look for the store that’s still open on the right
side of the area.
You can buy stuff from him. He’ll sell you a pack
of smokes (if you’re trying to collect everything),
shotgun shells, assault rifle ammo, a combat knife,
and an armored uniform, the same one you’re wearing.
Buy what you want, and be sure to ask him if he knows
where to find Abbott. He’ll give you a package
to deliver to him. Turn left, and go through one of
the next room. Approach the elevator, step inside, and
press the button.
At the top, get off the elevator, and you’ll
be in a room with two guards.
Take the door on the right, and speak to the civilian
guard, Chancellor.
Agree to give him the booze, and he’ll give you
money and a cigarette pack. Leave, go back to the main
room, and take the door directly opposite you.
Follow the hall as it curves to the left, down some
stairs, then to the left. You’ll see a door. Go
through it, and you’ll be on the balcony overlooking
the stores.
Run past the guard, through the door, and you’ll
be in the apartment area. Follow it to the end. If you’ve
been killing people, go to the right. There is a NanoMED
station in the wall, as well as a panel that will disable
the lighting. If you’ve followed the guide, head
to the left. Follow the hall as it bends to the left
and goes up some stairs. You’ll see two guards
talking, so keep following the hall, up the large set
of stairs, and follow it to the left. You’ll wind
up in a wide room with two guards talking by a bench.
Abbott’s apartment is the last door on the left.
Ring his doorbell, and choose “Try to trick Abbott
to open the door”. He’ll open the door.
Walk in slowly, so the game loads, but not so fast that
the door will open as soon as the area loads.
Before you enter Abbott’s apartment, pull out
your Assault Rifle. Walk to the door, and be prepared;
Abbott will start firing at you immediately.
Lay into him with the assault rifle, and when he drops,
a cutscene will take over. Looks like someone’s
showed up.
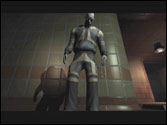
After a cool cutscene, you wind up at Tower 17, which
is the double max area of Butcher Bay. We can see just
how brutal Tower 17 is.
Once you’ve got control of Riddick, leave your
“cell”. If you look across, you can see
a guard knock an inmate over the edge, only to kick
him in the hands and cause him to fall into the abyss
below. Cruel bastards. Hang a right and go through the
door. Follow the hall to the end, and step into the
elevator.
The guards will activate it, and when it stops, you’ll
be at Tower 17 Base.
| |
 |
When the game loads, step out of the elevator and talk
to Rael.
After talking with Rael, go through the door on the
left. Run down the stairs to the bottom, and you’ll
be in a large area with the number “17”
printed on the ground.
Talk to the man on the left, Dogbone, for info. Then
talk to Centurion, who is close to Dobone; he’s
wearing a black hat. Choose the option “Agree
to fight”, and he’ll tell you who you should
challenge. Turn right, and head to the large door, opposite
the guard. Talk to Harman, the Blueskin guarding the
door, to set up your first fight.
Go back to Centurion. Talk to him to set up the fight,
and you’ll square off against Harman.
After the fight, speak to Centurion and pay him five
UD’s to get another fight. If at anytime you need
to heal after a fight, talk to the guard, and he’ll
let you use a NanoMED station if you pay him ten UD’s.
The station is fully charged (so you’ll get four
squares of health), but the guard will charge you every
time you need it, so if you leave the room and the door
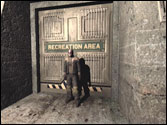
shuts, it’ll cost you to get back inside. Leave
the area through the big “Recreation Area”
door, the one Harman was guarding.
You are now in the Recreation Area. Go through the
large yellow door that says “No fucking in recreation
area”. You are in Rec Area A. Throughout the four
rec areas, you will see moths flying about. You can
grab them when they’re close enough to you, and
they’ll be added to your inventory. When you get
thirty moths, you can buy two cigarette packs from an
inmate (first one for ten, second for twenty).
There are two guards to your right. Don’t talk
to either inmate yet; instead, head left to the door,
to enter the B area.
In B, talk to Jamal-Udeen to initiate a side quest.
If he is praying, you can’t talk to him, so wait
until he is finished, or go back to Tower 17 Base, then
back into the Recreation Area (the load should reset
his path). Talk to Baasim, the bald man with all the
tattoos. He’s your next fight. If you’re
looking to complete the cigarette collection, talk with
Pink and he’ll sell you a pack. When you’re
done here, head over to C.
Talk to Gulag, and agree to help him for another sidequest.
Talk to Wilkins, and tell him you’ll look for
Jagger Valance for another sidequest. There is a third
inmate in here named Craps, who will let you bet some
UD’s on a dice game. You can choose several bets.
The last inmate in this section, The Nurse, will give
you another sidequest, so talk to him and “agree
to help him”. Head on over to D, the final rec
area.
Speak with Twotongue, the man who is walking around
like he’s crazy. Agree to help him, and he’ll
ask you to bring him some drugs that were stolen. Leave
D, and return all the way back to A. Talk to Cricket,
the one with the red hood, and buy a shiv for thirty
UD’s. This will help you in the fights. Leave
the rec area, and enter the door marked Feed Ward.
|