WALKTHROUGH, CHECKPOINTS 01-08
This walkthrough is written on the Normal difficulty
setting. Whenever you see a cigarette pack, pick it
up. I will not tell you to do so, but you can check
out the “Cigarette Pack” section for additional
help.
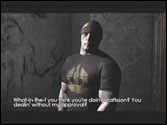
After a cool opening, you begin the game facing Johns
and two other inmates.  Walk up to Johns, and press X to talk to him. Choose
any dialogue option. After you talk to him, he turns,
and approaches one of the inmates. With his back turned,
crouch, and sneak up to him. When you see you arms raise,
, press the right trigger to break his neck loudly.
If you want to practice being quiet, press the left
trigger and keep hitting X to break his neck silently.
When he drops, turn around and race to the now open
door, and drop through.
Don’t take his gun; it’s DNA encoded.
Walk up to Johns, and press X to talk to him. Choose
any dialogue option. After you talk to him, he turns,
and approaches one of the inmates. With his back turned,
crouch, and sneak up to him. When you see you arms raise,
, press the right trigger to break his neck loudly.
If you want to practice being quiet, press the left
trigger and keep hitting X to break his neck silently.
When he drops, turn around and race to the now open
door, and drop through.
Don’t take his gun; it’s DNA encoded.
Walk forward, jump over the obstacle, and press X to
grab onto the ladder, then climb down.
Jump down to the floor, and walk to the guy who is fixing
something. As you get close, he’ll turn around,
and you’ll have to fight him, hand to hand. When
he dies, pick up his security key, and use it on the
nearby door.
|
|
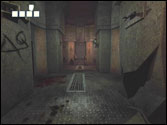
You are in a very dark hallway. Walk to the edge of
the wall,
, but make sure you are hidden (screen will be blue).
You will see a guard come from the right. Crouch-walk
and sneak up on him as he is walking to the left, and
snap his neck. Pick up the Vent Tool, then drag his
body to the shadows. Drop him, and walk down the hall
from where he came. Around the corner, you’ll
see a stack of crates.
Climb them to the top, then climb onto the handrail.
Start shimmying, and you’ll see a guard come in.
When you are over the guard, press X to jump down onto
him, killing him. After doing this, climb back up the
crates, and jump onto the handrail again. Shimmy all
the way over, and open the vent door. You’ll crawl
inside automatically.
Crawl through the vent, and kick open the gate at the
other end. You will see a med station, but you shouldn’t
need it yet. Pick up the nearby med cartridge, and follow
the hall to the left. You’ll come to a door with
a green light above it; go through. Walk forward, and
turn to the left. You’ll see a guard standing
by a table.
Run up to him. When he turns around, wait for him to
attack you, and press the right trigger just as he’s
about to hit you. You will grab his gun, aim it under
his chin, and pull the trigger; you now have a shotgun.
Climb up the vents,
, and then climb onto the rail. Shimmy to the right
to the open spot, and press UP to pull yourself up.
Go through the door on the left. In the hall, walk to
the end, to the gate. As you approach it, it rises.
Walk inside, and press the button to activate the elevator.
At the top, walk through the only door, and you’ll
be outside. Get into a crouch, and sneak up behind the
guard you see walking to the right. Switch to your fists,
and snap his neck, then grab his shotgun for some ammo.
Jump down this ladder,
, go to the right, and shoot the blue lock to open the
gate. Crawl inside. Use your light to find your way.
Ignore the offshoots. Kill all the guards on your way,
four in total. Use the explosive barrels to help. At
the end of the sewer, you’ll see a weird light.
Run towards it until the mission ends.
Turns out it was all a dream. Johns wakes you up, and
you disembark the ship. After the cutscene, you will
be escorted into the prison. It takes place in real
time, so feel free to look around as you are being escorted.
You will wind up in your cell.
After the prison loads, Riddick will say something
about being deloused. The cell door will then open,
so go through it. To your right, an inmate will ask
you to come.
Walk to him, and press X. After talking to the man,
hang a left, and follow the hall until you come to a
gate. You will see a man standing in between the gate
and cell A31. Talk to him. Choose the option “Agree
to kill Molina” when given two choices. You now
have a side mission. Leave the way you came, and continue
past your cell. You will see an open door with two men
inside.
Walk inside, and talk to Waman, the man lying on the
bed. Say “hear what he has in mind,” then
leave the cell. Continue left. Hang a right through
the alcove, and you will see two inmates talking under
a loudspeaker. Continue past them to the left, up the
stairs, and into the yard.
Talk to the man standing on the left, near the rope
holding the large grate shut. This is Mattsson. When
you get your objective, talk to the bald man, Haley.
Return back to the cellblock, and go back to the main
hallway. When you leave the alcove, turn right, and
enter the now-open cell on you right, cell A40. Run
to the back of the cell, and quickly turn around; two
inmates show up to beat you up. Using your fists, kill
the both of them, then return to the yard and speak
to Mattsson again.
| |
 |
Now, return all the way back to your cell, which is
room A34. Walk to the back of the room, and Mattsson
will show up. So will Rust, who we will get to know
better later.
After the cool cutscene, you’ll see Barber standing
outside your cell, so talk to him. Looks like we’ll
need a weapon. Head right, and go to cell A38. It is
across from the cell where the two men are, the one
doing pushups. Inside is a man, whose name is Molina.
Kill him. Don’t worry; there are no cameras in
here. When he falls, pick up the knuckleduster, then
go to the cell directly across from you. Speak to Waman,
and he’ll give you a cigarette pack. Leave, go
right, and return all the way to the gate. Talk to the
bandaged man you talked to earlier, Shabby. He’ll
give you a secret code for killing Molina. Return all
the way to the yard.
From where you entered the yard, go straight across
to the next doorway, which leads to the second area
of A block, which is considered Aquila territory.
Walk down the stairs and to the right. As you approach
the “Cellblock A 11-30” sign, the game will
load.
 |
|
Follow the hall. When you get to the end, turn right,
and you will see an inmate beating on another inmate.
He will then come running to you, so kill him. Next,
you’ll have to kill an inmate standing between
cells A27 and A28. When he dies, enter cell A28 and
heal if you need it. Otherwise, continue down the hall.
As you turn the corner, an inmate will kick a fire extinguisher
at you. Back up to avoid it. The guy who kicked it will
take off, but another inmate will be waiting for you.
Kill him, and take his shiv. Continue down the hall.
When you get to the next area, the same inmate lights
a fuel streak, so back up before the explosion occurs.
Rush down, and kill the two inmates guarding the small
stairs.
When they’re dead, run up the stairs and hang
a right. You’ll see Rust standing by a gate. Kill
him, and a cutscene will take over.
When you regain control, a guard will be coming at
you. He won’t attack, but stay away from him,
or he’ll hit you for getting close. Make your
way to the prison yard. En route, you’ll see an
inmate being gunned down by a guard,
, so avoid that guard. Stop off at the med station if
you need health.
Once back in the yard, talk to Haley again. After speaking,
return back to the gate, near the guy who gave you the
code.
Talk to the guard behind the gate, and he’ll open
it for you. Once it’s open, walk in, and go through
the door on your left. Walk forward to the next door
to load the infirmary.
Once the game’s loaded, open the door. A guard
will come and tell you not to move. Equip your shiv,
and attack the guard with the gun. Try to time your
attack so you catch him off guard and slit his throat.
When he dies, kill the next guard, who was standing
by the far door. Once they’re dead, pick up the
security code from one of them, and heal (if necessary).
Open the door on the left, marked “1”. On
a gurney, you’ll find a scalpel (which will replace
the shiv), and a pack of smokes. Leave, and open the
door on the right, marked “2”. A guard will
come out, so kill him, then continue into the room.
Inside, take a right, and you’ll see a large machine.
Activate it, and it’ll add one block to your health,
so instead of four, you’ll now have five. After
getting the increase, climb the ladder.
At the top, run forward, all the way down, and enter
the door on the right. You are now above the infirmary.
Run to the crate on the right, and crouch behind it.
A guard will be coming from the door in front of you.
Equip the scalpel, and wait for him to pass, then sneak
up behind him and stab him in the back. Go through the
door he entered from.
| |
 |
In this new room, hang a right, and open the sewer
hatch.
Crawl inside, and you’ll emerge in a room big
enough to run. There is a guard to your left, behind
the pillars. Move in between the pillars as the guard
does so he doesn’t see you. If he does spot you,
just hightail it to the other side. Crouch again and
crawl through the shaft, and you’ll eventually
come to a ladder. Climb it.
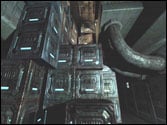
At the top, continue forward and go through the next
hatch. In this room full of crates, you’ll see
a guard start walking away from you, so snap his neck
or stab him. Continue past the crates, towards the litter
bin, and enter the door in the darkened passage, signaled
by a green light.
There is a single guard standing here, so kill him silently,
take his code, and enter the door at the end. Walk into
the next room, and you will see a guard. This is the
guard who was overlooking the shaft you crawled into.
When he’s done, enter the door with a green light
above it, next to the door with the red light. You’ll
see a sign pointing to the “mainframe”.
Walk toward the door, and the area will load.
Enter the door. You will be on a catwalk overlooking
a technician moving around.
Jump down (don’t worry if you get hurt), and kill
the technician. Approach the machine in the center of
the room and activate it.
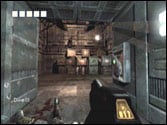
You can now use a guard’s weapon, but the machine
has alerted security. Quickly run to the assault rifle
and grab it, then crouch here.
Press black to zoom in, and kill the two guards as they
enter. If only one guard comes in, kill him, then move
to the door to kill the second. Go through the door
the guards came from, and kill two more of them in the
hallway; use the explosive canister to help you. Turn
the corner, and you’ll see an open doorway ahead
with a red light above it.
Run to it, then as soon as you see the guard, turn around
and run away, so you avoid the grenade he throws. Once
it’s exploded, head into that hall and look right.
The explosion made a hole in the wall. Press X on the
pieces of debris to get rid of them (they will hurt
if they fall on you), then go through the hole.
You’ll be in front of some crates that are illuminated
by the fire. To the left of the crates is a dark area
where you can squeeze through.
Be careful going through, though, as there is a guard
there (he may turn his light on, letting you see him).
Continue into the room, and go left, into the small
alcove. You’ll see a panel.
Activate it. Turn around, and face the large stacks
of crates. On the upper right, you will see a fan, which
is no longer spinning, because you shut off the power.
Use the crates on the left to get to the top. At the
top, jump over to the crates on the right, then crouch
and crawl between the fan blades.
 |
|
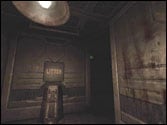
You will be on some grating, overlooking a guard in
the hallway below.
Shoot out one of the closest grates, and fall to the
ground. Kill the guard in front of you, then turn around
and kill the second guard behind you. Walk towards where
the second guard was, and you will come to a room. Go
through the open door, and you will see a med station.
Don’t use it yet, because a guard may be coming
from the left. If he is, kill him, then use the station
(if you have to). After killing the guard, get along
the wall. In the room beyond, there are two more guards
on the upper balcony.
Peek out every so often and shoot them. When they die,
go into the room. If you want, climb the crates to the
catwalk to get their ammo and a cigarette pack. Otherwise,
head to the green light you see to your left. As you
approach the door, a guard will come rolling out from
the crate, so kill him, then go through the service
hatch.
Inside, take a right, and you will see a green gas.
Use the valve on the left to turn off the gas, then
continue forward. As you get near the end, you’ll
hear a guard shout “Grenade!!”, so immediately
back up to get out of the blast radius. When the grenade
goes off, continue forward again, and kill the two guards.
The hatch at the end is locked, so go through the hole
the grenade made.
You’re in the locker area. Walk inside, past
the crates, towards the open doorway. A guard will run
in from the right, so be ready for him. After he’s
dead, continue into the doorway, and hang a right. There
will be another guard here, so kill him. You are now
in a room with two options.
Use the med station if you need it, then take the left
door. You’ll be in a large room. Kill all the
guards in here, and a guard in a mech suit will come
from the elevator. Don’t bother killing him; run
for the elevator and ride it.
At the top, you’ll have two doors to choose from;
take the one on the right, with a green light. In this
room, you’ll have a locked door straight ahead,
but look to the left to see a smaller door.
Approach this door to load the next area.
When the game has loaded, go through the door. Run
forward (ignore the darkened stairs), and make your
way to the valve to open a gate.
Turn around, back past the nanomed station, and go down
the darkened stairs. At the bottom, the gate that was
shut is now open. There may be one or two guards near
the gate; kill them, but don’t rush through. We
have to destroy the security guns, or they’ll
tear you apart. The guns are the these things.
Make your way slowly down the stairs, until you can
see it, but it’s not firing at you. Zoom in, and
destroy it. Walk down the stairs, and peak out to the
right; there is another gun on the left wall. Destroy
it. There is a third gun at the far end of the hall,
on the right side, so destroy it from the same spot.
Now you may leave. As you run down the hall, a guard
will come at you. Kill him, and continue down. An inmate
will come from the left and will be gunned down by two
guards. Don’t go too far out, because there is
another security gun on the right wall, next to the
cell door, with an “A” in a circle spraypainted
underneath it. Destroy it, then continue to the left
and kill the two guards. Before getting too far, crouch
behind the crate on the left, and destroy the security
gun on the far right wall.
| |
 |
Just past the security gun is a small hallway.
Go down the hall a little, and kill the guard. Don’t
run into the room yet, because you need to destroy the
security gun on the right. When it’s destroyed,
approach the gate. It’s locked. Return all the
way to the beginning of the area, killing the one guard
who shows up. When you get to where the darkened stairs
are, hang a right. When you hear “Grenade!!”,
back up. After it goes off, go around to the right,
and walk to the gate. A guard inside will raise it,
and another guard will come in through a door. Kill
them both, then collect the radio on one of their corpses.
Picking it up causes Riddick to radio to the guards,
and says the cellblock is secure. Return all the way
around to the small locked gate, and you will have to
kill one more guard. As you approach the gate, you’ll
see an inmate laying on the ground who wants you to
put him out of his misery. Do so or don’t; doesn’t
matter. Walk through the now open gate and up the stairs
into the yard, where a cutscene will take over. Riddick
will be shot at by a guard, and he’ll rush into
the guard, sending both of you down into the pit.
You are in the pit, and you have a limited amount of
time before the light on your shotgun goes out. If it
goes out, it doesn’t make the game harder, because
you fail, so you better hurry. This area is crawling
with mutants, who will come at you from the front and
back, so always be on the lookout. The developers must’ve
gotten lazy at this point, or decided the game was too
easy, because the mutants are never ending. Turn around,
and go through the gateway behind you.
Once on the catwalk, follow it until you get to a ramp
leading down; ignore the path to the right. On the bottom
left, take a right, then a left, and follow this path
all the way to the end. At the dead-end, you will find
a valve. Grab it, then turn around. Return all the way
to the ramp, go back up, and go through the path on
your left (that you ignored earlier). Once on the new
grating, just follow it straight, following the bends,
but never going through an offshoot. When you get to
a red flare,
, you’re almost finished. At the flare, put the
valve into the niche, then turn the valve, opening the
gate. Follow the newly opened path. Keep following it
straight. When it splits, keep going straight, toward
the flare. Eventually, the game will load, and you’ll
be in a new area of the Pit.
|